> ## Documentation Index
> Fetch the complete documentation index at: https://docs.mileapp.dev/llms.txt
> Use this file to discover all available pages before exploring further.

# Component: Subpage

The Subpage component is a container component that allows you to create repeatable data entry forms within a task. It enables structured collection of repeating information by grouping related fields that can be duplicated multiple times.

## What is Subpage?

Subpage acts as a form array where users can add multiple entries of the same structure. Each entry contains multiple sub-components (input fields, selects, photos, etc.) that you configure in the Flow Builder.

**Use Cases:**

* **Multi-recipient deliveries**: Capture name, phone, signature for each recipient
* **Item inspection**: Record condition, photos, notes for each item
* **Proof of delivery**: Collect signature + photo + feedback from multiple parties
* **Service checkpoints**: Document multiple inspection points with photos and readings

## Allowed Sub-Components

Subpage can contain only these seven component types:

1. **View** - Display-only fields (labels, instructions, calculated values)
2. **Input** - All input types (String, Numeric, Date, Datetime, Time, Address, Geolocation, PhoneNumber, URL, Currency)
3. **Select** - Dropdown, checkbox, or button selection (single or multi-select)
4. **Photo** - Image capture with watermark and gallery options
5. **Signature** - Digital signature capture
6. **List** - Repeatable item list (text / checkbox / quantity types)
7. **Bill** - Line-item billing with master items (name + unit price) and master costs (surcharge / discount)

<Warning>
  Nested subpages are not allowed. You cannot add a Subpage component inside another Subpage.
</Warning>

## How to Configure Subpage

<div align="center">
  <img src="https://mintcdn.com/mileapp-c1584fbc/jvVKvpPwiK1qABos/images/flow-builder-subpage-configuration.png?fit=max&auto=format&n=jvVKvpPwiK1qABos&q=85&s=2cf325f62932d8a556b59a3145276fc8" alt="Subpage Configuration" width="600" data-path="images/flow-builder-subpage-configuration.png" />

  <p><i>Subpage component configuration in Flow Builder showing Customer Subpage with three sub-components</i></p>
</div>

### Step 1: Add Subpage Component

In the Flow Builder, drag the **Subpage** component from the component list to your page.

### Step 2: Configure Subpage Properties

Configure the basic properties of the Subpage:

1. **Title**: Name of the subpage (e.g., "Delivery Recipients")
2. **Required**: Toggle whether at least one entry must be added
3. **Visible**: Toggle visibility on the mobile app

### Step 3: Add Sub-Components

Click **"Add Component"** inside the Subpage to add fields. Each sub-component has:

1. **Title**: Field label displayed to users
2. **Component Type**: Choose from view, input, select, photo, signature, list, or bill
3. **Type** (for specific components): Additional type selection (e.g., String, Numeric for Input)
4. **Required**: Whether the field must be filled
5. **Visible**: Whether the field is displayed
6. **Default Value**: Pre-filled value (optional)

### Step 4: Configure Component-Specific Settings

<div align="center">
  <img src="https://mintcdn.com/mileapp-c1584fbc/jvVKvpPwiK1qABos/images/flow-builder-subpage-expanded.png?fit=max&auto=format&n=jvVKvpPwiK1qABos&q=85&s=2065b96b776e18cb737ec506a2538566" alt="Subpage Expanded Configuration" width="600" data-path="images/flow-builder-subpage-expanded.png" />

  <p><i>
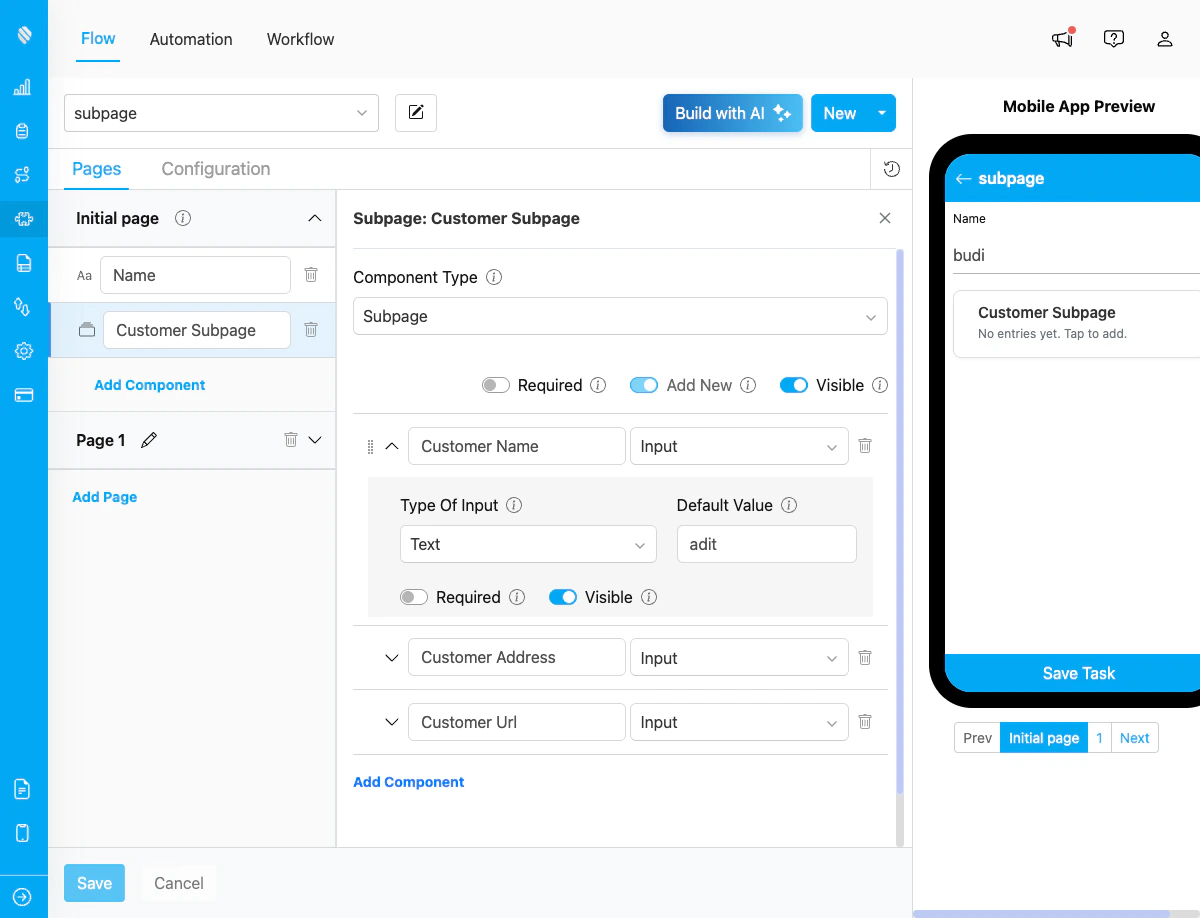
Expanded view of a sub-component showing detailed configuration options including Type, Default Value, Required, and Visible settings</i></p>
</div>

**For Input Components:**

* **String**: Set default text value
* **Numeric**: Add min/max values and units (e.g., KG, M3)
* **Date**: Set default date value
* **Datetime**: Set default datetime value
* **Time**: Set default time value
* **Address**: Multi-line text area with default value
* **Geolocation**: Enable map picker for coordinates, geolock with radius settings
* **PhoneNumber**: Set default phone number value
* **URL**: Set default URL value with validation
* **Currency**: Set default currency value with formatting

**For Select Components:**

* **Options**: List of selectable options
* **Min/Max**: Selection constraints for multi-select
* **Type**: Dropdown, Checkbox, or Button display

**For Photo Components:**

* **Min/Max**: Number of required/allowed photos (0-10+)
* **Watermark**: Enable watermark on photos
* **Select Gallery**: Allow selection from device gallery

**For Signature Components:**

* **Required**: Whether signature must be captured

**For Bill Components:**

* **Master Items**: Configure item names and unit prices that users can select at task time
* **Master Costs**: Configure surcharges and discounts (name, type, amount)
* **Required**: Whether at least one item must be selected before the entry can be saved

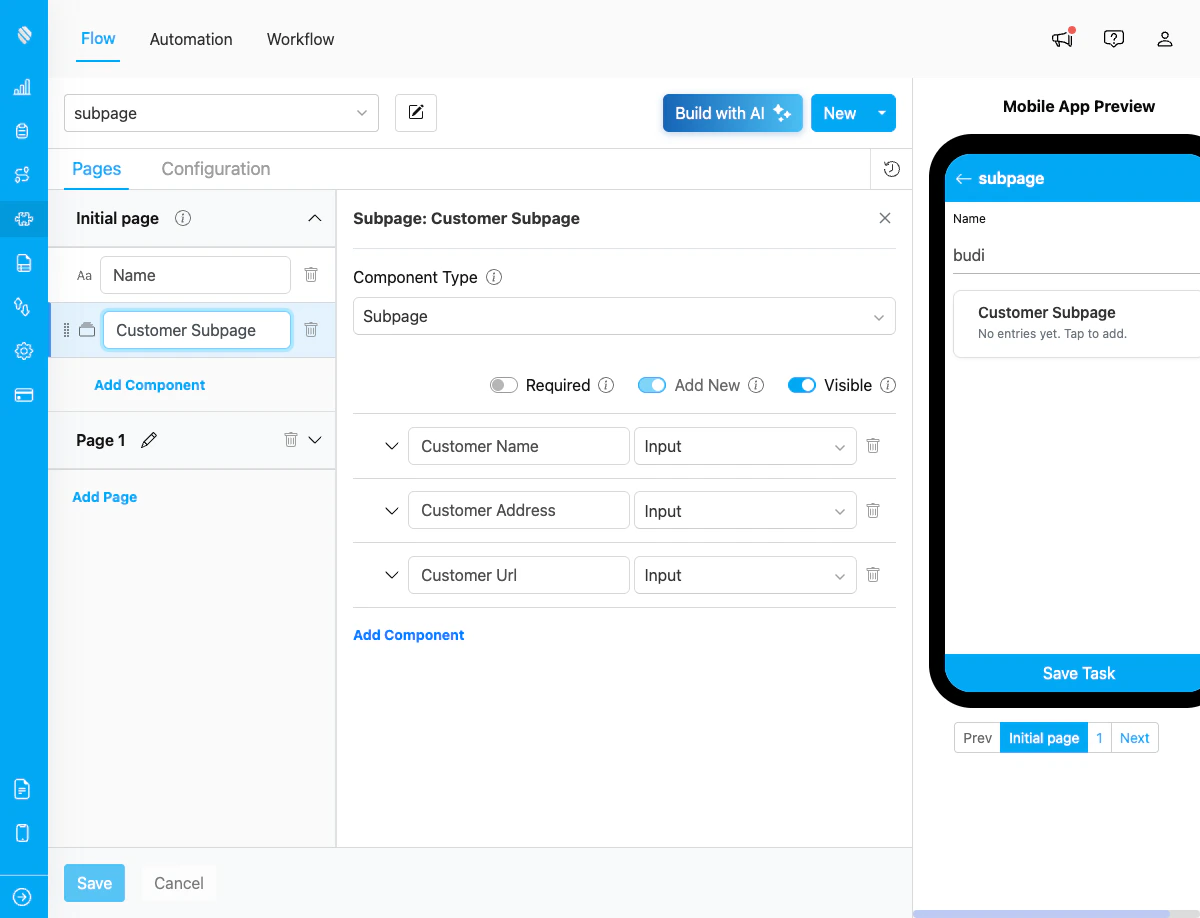
### Step 5: Reorder Sub-Components

Drag the grip handle on the left of each sub-component to reorder fields within the Subpage.

## Validation Rules

### Component Level

* **Title**: Required for each sub-component
* **ID**: Auto-generated from title, must be unique
* **Required Field**: Must be marked as required or optional

### Subpage Level

* **Unique IDs**: Sub-component IDs must be unique within the subpage
* **Reserved Keys**: Cannot use reserved field names (name, flow, hubId, startTime)
* **Max ID Length**: Generated IDs are limited to 47 characters

### Restrictions

* **No nested subpages**: Cannot add Subpage inside Subpage
* **Component types**: Only 7 allowed types (view, input, select, photo, signature, list, bill)
* **No advanced components**: Cannot add subflow, timer, capture, voice, or barcode
* **Bill limitation**: Bill inside Subpage does not support "Use Data Source" (external data source). Master items and costs must be configured directly in the Flow Builder.

## How Subpage Works in Tasks

When field workers use the mobile app or web interface to create/complete tasks:

1. **List View**: Shows all entries with completion status (e.g., "3/5 fields completed")
2. **Add Entry**: Tap "+ Add" button to create new entry
3. **Edit Entry**: Tap on an entry to open the form
4. **Complete Fields**: Fill in all required fields per entry
5. **Delete Entry**: Remove entries that are no longer needed

<Tip>
  Each entry in a Subpage is independent. Users can add as many entries as needed during task execution.
</Tip>

## Related

* [Input Component](/pages/flow/flow-builder/component-input-type/component-input)
* [Select Component](/pages/flow/flow-builder/component-select)
* [Photo Component](/pages/flow/flow-builder/component-photo)
* [Signature Component](/pages/flow/flow-builder/component-signature)
* [View Component](/pages/flow/flow-builder/component-view)
* [List Component](/pages/flow/flow-builder/component-list/component-list)
* [Bill Component](/pages/flow/flow-builder/component-bill)
