> ## Documentation Index
> Fetch the complete documentation index at: https://docs.mileapp.dev/llms.txt
> Use this file to discover all available pages before exploring further.
# How to Use Flow
A Flow goes through four simple stages — from being built on the web, applied to a task, and finally used by a field worker on the mobile app. The steps below walk through the typical journey.
## Step 1: Open the Flow page
Sign in to MileApp on the web and open the **Flow** menu from the sidebar. This is where every Flow is created, edited, and managed. If your account has no Flow yet, the page will appear empty as shown below.
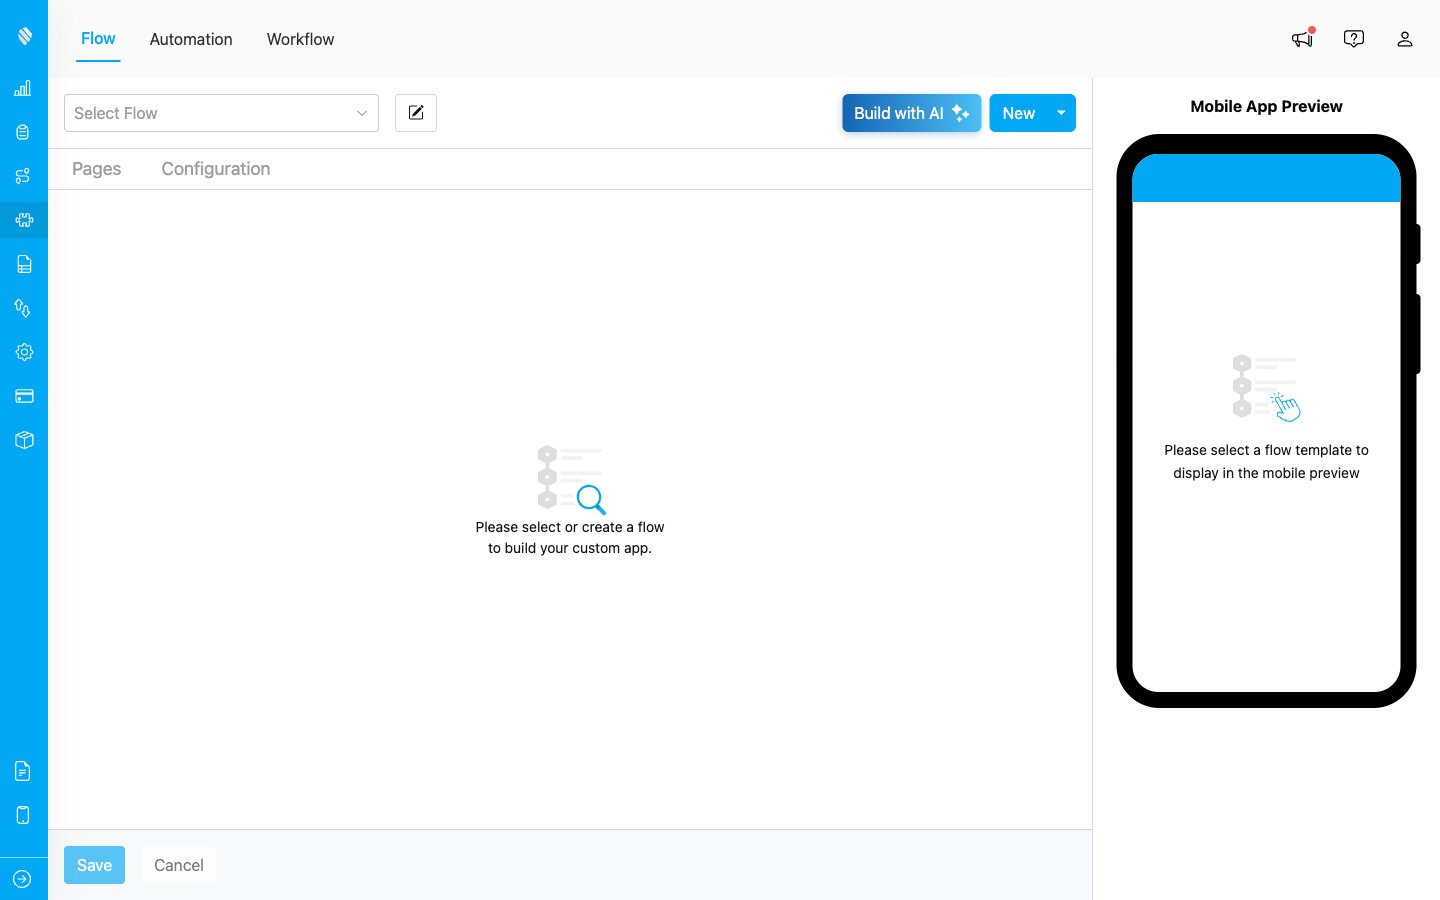
The Flow page — starting point for managing every Flow
## Step 2: Create or select a Flow
You can either build a new Flow or use one of the ready-to-use templates provided by MileApp.
* Click **New** to start a Flow from scratch or from a template (recommended for first-time users).
* Click **Select Flow** to open an existing Flow and continue editing it.
Once a Flow is opened, the Flow Builder appears. The **Pages** panel on the left lists the screens of the Flow, the middle area is where each component is configured, and the **Mobile App Preview** on the right shows how the Flow will look on the field worker's phone in real time.
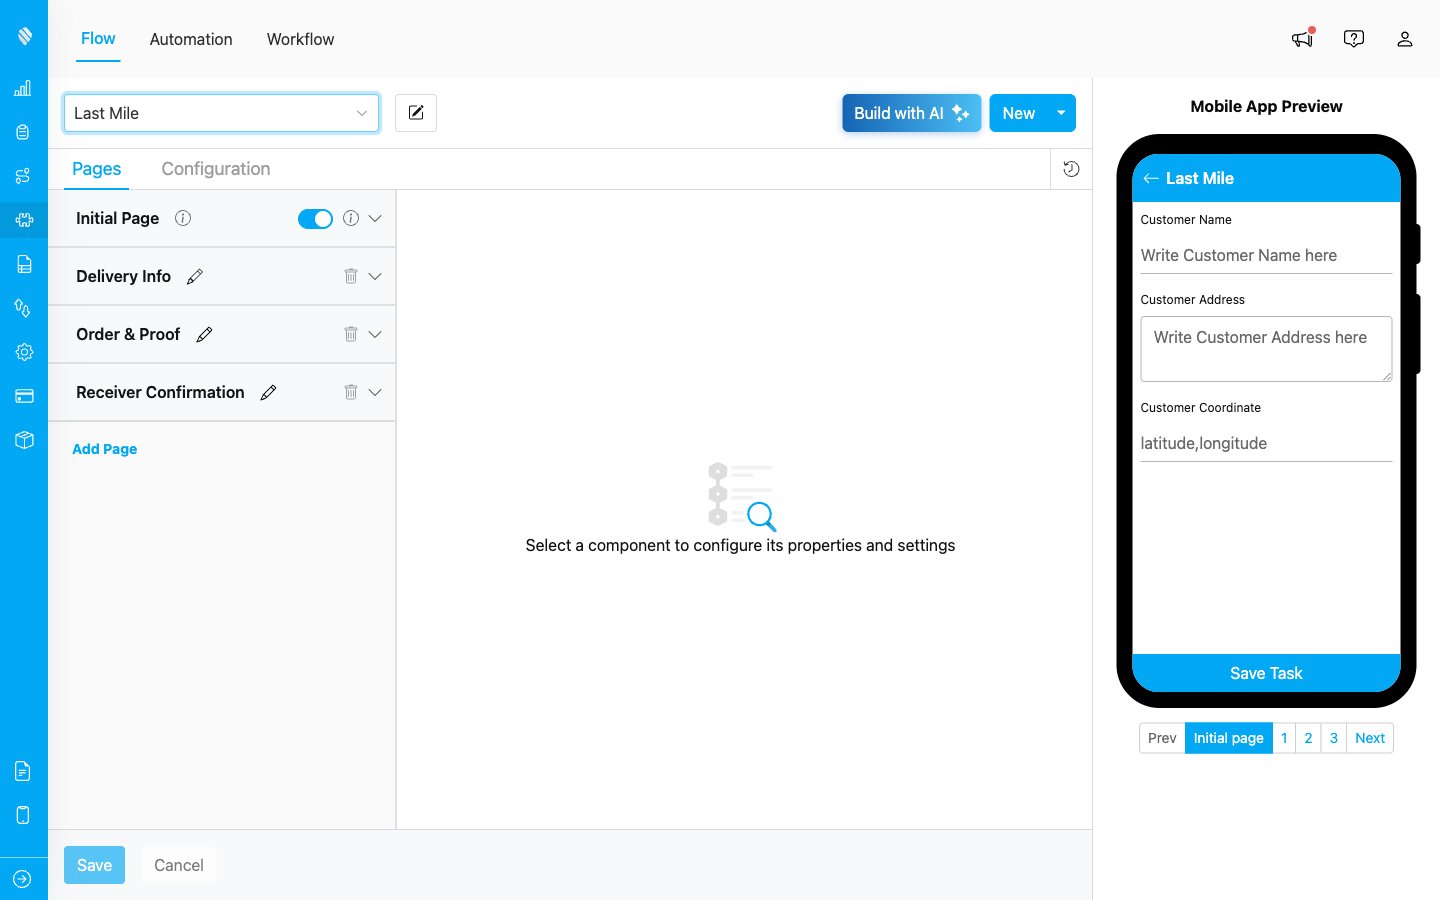
The Flow Builder — left: pages, middle: configuration, right: mobile preview
Add pages and components as needed:
* **Initial Page** — the first screen, shown when the task is created. There can only be one Initial Page.
* **Mobile App Page** — additional screens used while the task is being done in the field. You can add multiple pages with the **Add Page** button.
When the Flow is ready, click **Save** to keep your changes, or **Save as Template** to make it reusable.
**Tip — Build the Flow faster with AI.** If you are new to MileApp or want to skip the manual setup, click **Build with AI** in the Flow Builder header instead of **New**. Describe your workflow in plain language (e.g., *"Courier picks up parcels at customer address, takes a photo and signature on delivery, then records the COD payment"*), and MileApp will generate a ready-to-use Flow with the right pages and components for you. You can still edit any part afterwards. See [Build Flow with AI](/pages/flow/build-flow-with-ai) for details.
## Step 3: Use the Flow to create a Task
Once a Flow is saved, it becomes available for any Task. Open the **Task** menu and click **New** to create a new task. The system will ask which Flow to use — pick the one you just built.
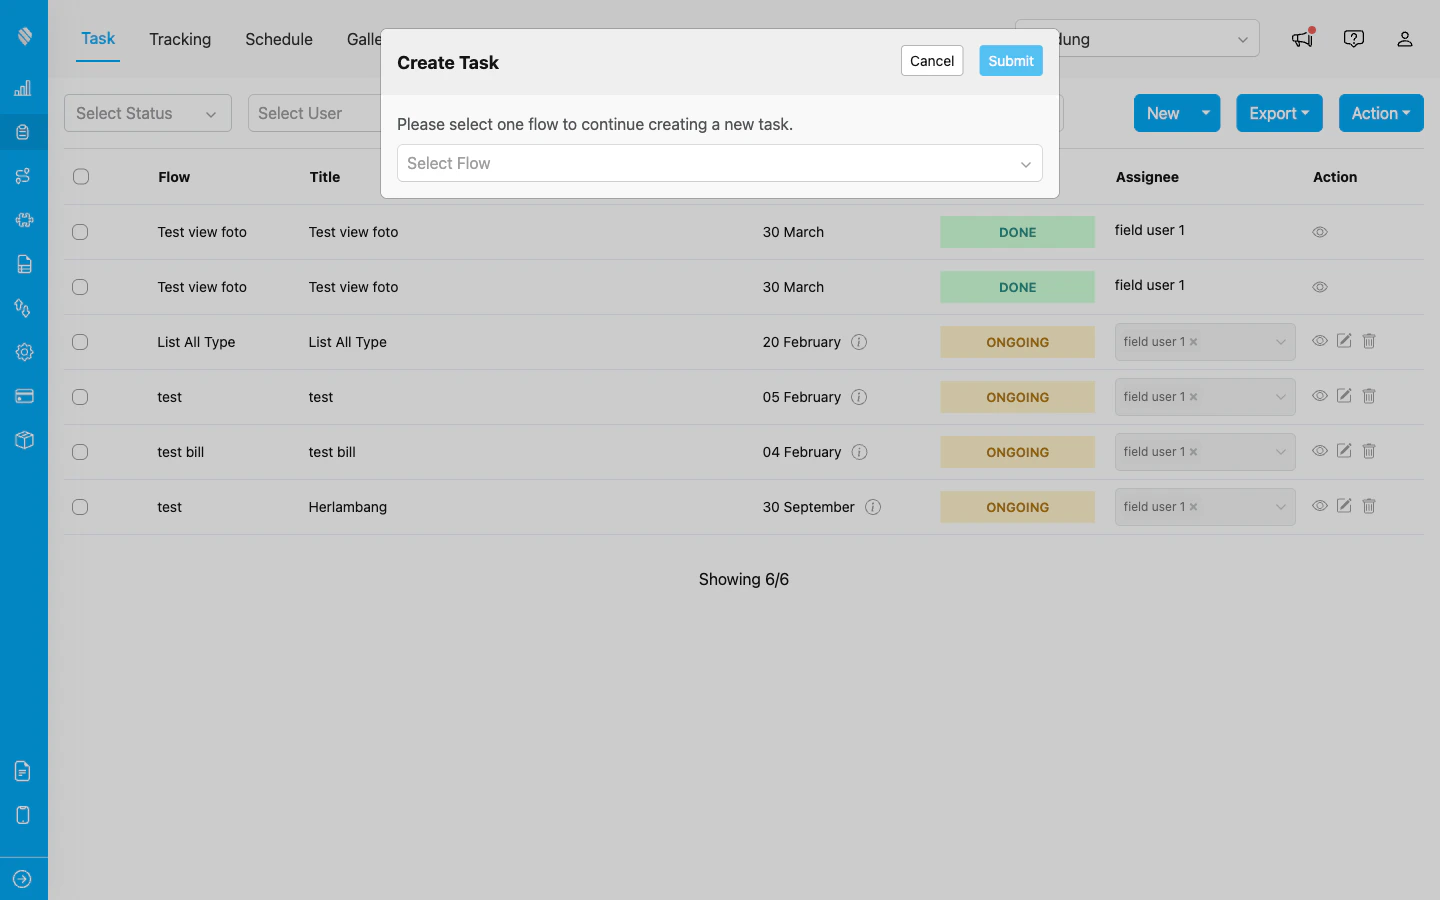
Creating a task: the Flow defines the form fields that appear next
The fields and pages of the chosen Flow now drive how the task is filled in — both on the web form and on the mobile app.
## Step 4: Field workers use the Flow on the mobile app
After a task is created and assigned, the field worker opens it on the MileApp mobile app. The pages, fields, and order shown to the worker come directly from the Flow you designed. As the worker fills in each field — text, photos, signatures, locations — the data is saved back to the task and visible on the web in real time.
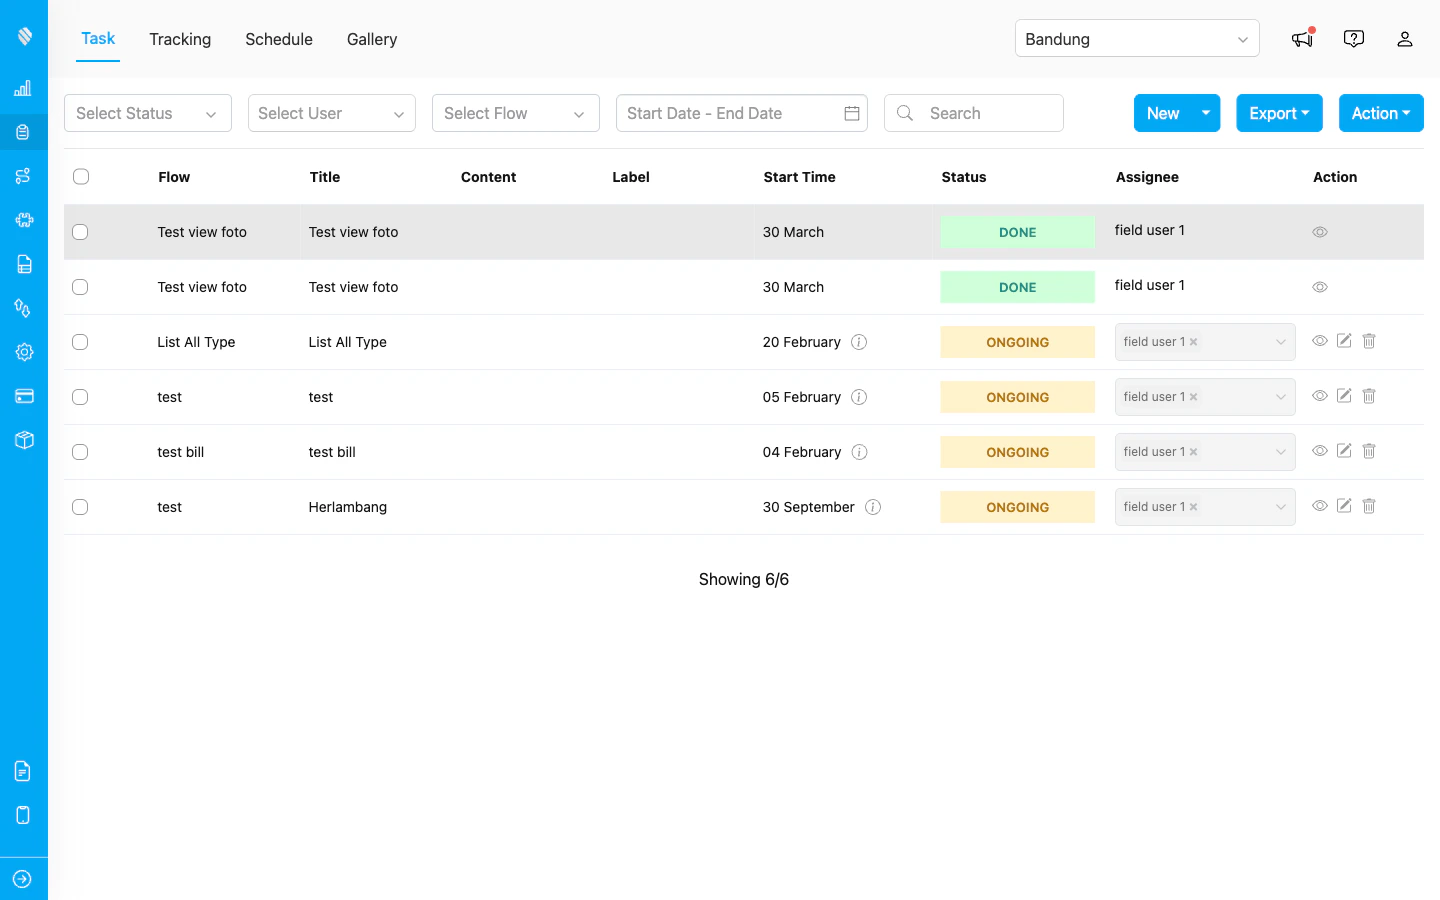
Tasks created from different Flows appear in the Task list with their Flow name
That is the full lifecycle: **build the Flow → create a Task with it → field worker completes it on the mobile app → review and export the results from the web**.
## Common Flow Examples
Different industries use Flow in different ways. The examples below are the ready-to-use templates available when you create a new Flow — they cover the most common field operations and can be customized to match your business process.
### 1. Pickup Flow
Used to pick up goods or items from a location. A courier opens the task, navigates to the requester, takes proof of pickup, and closes the task.
**Typical pages:**
* **Initial Page** — Requester Name, Requester Address, Pickup Coordinate
* **Page 1** — Read-only summary of requester info for the courier
* **Page 2** — Pickup Picture (photo) and Signature
**Best for:** Logistics, courier services, warehouse pickup, e-commerce return pickups.
### 2. Delivery Flow
Used to deliver goods to a customer, including handling COD payment and proof of delivery. Supports both **Success** and **Failed** delivery outcomes with conditional fields.
**Typical pages:**
* **Initial Page** — Customer Name, Customer Address, Coordinate, Order Price (Bill component with items and costs)
* **Page 1** — Confirm Payment (COD / NON COD), Delivery Status (Success / Failed). If Failed, a Reason field appears.
* **Page 2** — Final Order Price confirmation (Bill)
* **Page 3** — Receiver Name, Proof of Delivery (photo), Signature
**Best for:** E-commerce delivery, food delivery, retail distribution, parcel courier.
### 3. Field Sales Flow
Used by sales agents who visit customers and sell products on the spot, with billing and payment captured during the visit.
**Typical pages:**
* **Initial Page** — Customer Name, Address, Coordinate, Bill Item (master products and prices)
* **Page 1** — Sales Status (Success to Buy / Failed to Buy) drives the next pages
* **Page 2** — Bill Item confirmation with quantity and price adjustments
* **Page 3** — Payment Method (Cash, Credit Card, QRIS, etc.), Proof of Sales (photo), Signature, optional Note
**Best for:** FMCG sales, direct-to-store sales, B2B field sales, distributor agents.
### 4. Field Canvassing Flow
Used by agents who visit prospects to take orders and survey demand. Similar to Field Sales but built around an item **List** instead of a Bill, so it suits order-taking without immediate payment.
**Typical pages:**
* **Initial Page** — Customer Name, Address, Coordinate, List Item (quantity per item)
* **Page 1** — Status Canvassing (Success to Order / Failed to Order)
* **Page 2** — List Item confirmation
* **Page 3** — Payment Method, Proof of Canvassing (photo), Signature, optional Note
**Best for:** Distributor canvassing, market surveying, B2B order taking, route-to-market sales.
### 5. Home Cleaning Flow
Used by home or office cleaning service workers to record what was done and where.
**Typical pages:**
* **Initial Page** — Customer Name, Customer Address, Customer Coordinate
* **Page 1** — Read-only customer info plus an Additional Service selector (Air Freshener, Disinfectant, Deep Cleaning, etc.)
* **Page 2** — Room Photo (after) and Signature
**Best for:** Home cleaning services, office cleaning, maintenance crews, facility management.
### 6. House Inspection Flow
Used to inspect a property before a cleaning or service job — captures area, floor count, and condition photos so the team can plan the work.
**Typical pages:**
* **Initial Page** — Customer Name, Address, Coordinate
* **Page 1** — Read-only customer info
* **Page 2** — Building Area (m²), Number of Floors, Area Cleaning option, Current Building Conditions (photos)
* **Page 3** — Total Workers, Tools Used (multi-select), Signature, optional Note
**Best for:** Inspection services, pre-cleaning survey, property assessment, maintenance pre-check.
### Other use cases
Beyond the ready-to-use templates, Flow is flexible enough to be tailored to many other field operations:
* **Installation & repair** — capture before/after photos, technician notes, replaced parts (Bill component), customer signature
* **Site survey** — capture coordinates, building photos, measurements, environmental conditions
* **Asset audit / stocktake** — capture asset code (via Text or barcode Capture), quantity (Number), and condition (Select)
* **Quality control / QC visit** — capture inspection checklist (List), photos, and a pass/fail decision (Select)
* **After-sales visit** — capture customer feedback (Text/Select), product condition (Photo), and rating (Number)
If none of the templates fit, start with the closest one and customize the pages — or build from scratch using the [Flow Builder](/pages/flow/flow-builder/introduction).
## Related
* [Building Flow](/pages/flow/building-flow) — Detailed guide on building a Flow from scratch or template
* [Flow Builder Overview](/pages/flow/flow-builder/introduction) — Reference for every part of the Flow Builder
* [Managing Flow](/pages/flow/managing-flow) — Edit, duplicate, archive, and delete existing Flows