> ## Documentation Index
> Fetch the complete documentation index at: https://docs.mileapp.dev/llms.txt
> Use this file to discover all available pages before exploring further.
# Connect Accurate.id
> Sync data between MileApp and Accurate Online in both directions using the built-in no-code integration.
This guide explains how to connect your MileApp organization to **Accurate Online** (Accurate.id), Indonesia's cloud accounting platform by CPSSoft. Once connected, you can sync in **two directions**:
* **Accurate → MileApp** — a Delivery Order created in Accurate becomes a MileApp task automatically.
* **MileApp → Accurate** — a task reaching a chosen event pushes a Delivery Order into Accurate.
Each direction is configured separately, and you can use one or both.
This integration is currently in early release. The supported Accurate module is **Delivery Order**, in both directions.
Required permission:
* View integration
* Create integration
## Prerequisites
Before connecting, confirm you have:
1. **An Accurate Online account** — the cloud version is required. Accurate Desktop and Accurate Lite are not compatible with this integration.
2. **At least one business data (data usaha)** set up in your Accurate Online account.
3. **Admin access in MileApp** — you need Create Integration permission to complete the connection.
## Step 1: Connect Your Accurate Account
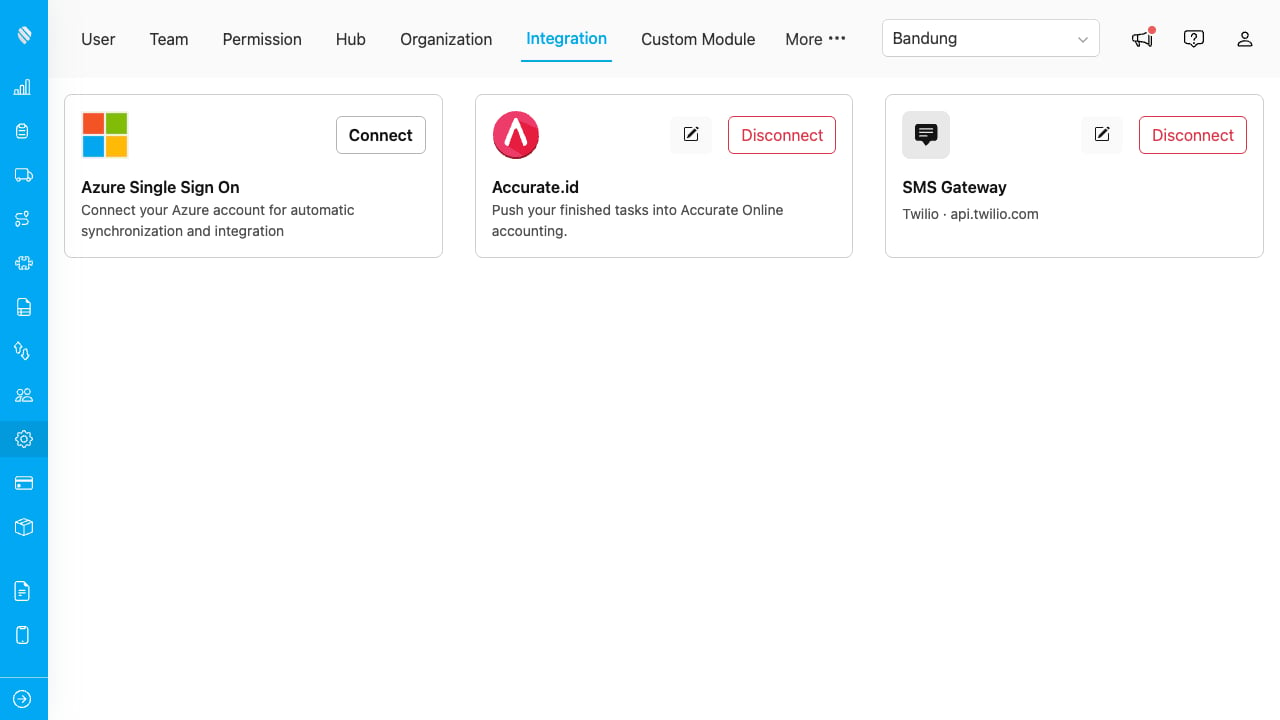
1. In MileApp, go to **Setting → Integration**.
2. Find the **Accurate.id** card and click **Connect**.
3. You are redirected to Accurate's authorization page. Log in with your Accurate credentials and click **Grant Access**.
4. Accurate redirects you back to MileApp. A success message confirms the connection, and the Accurate.id card shows **Connected**.
## Step 2: Choose Your Business Data
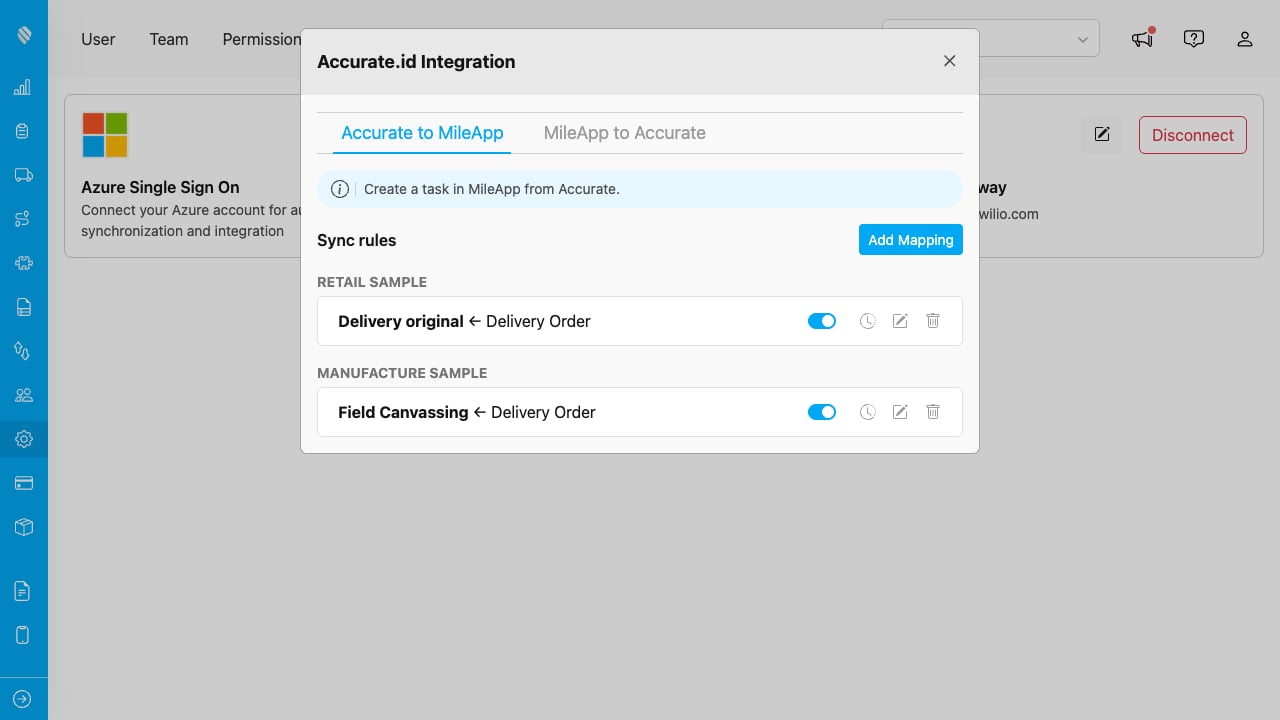
Open the Accurate.id card and click **Manage**. If your Accurate account holds several business data (companies), select the ones you want MileApp to work with.
Every sync rule targets **exactly one business data**. This is deliberate: values such as Customer, Item and Branch are identifiers that only exist inside one company, so a rule that spanned several companies would be ambiguous.
## Step 3: Add a Sync Rule
The Manage view has one tab per direction. Rules are grouped by business data, so all the rules for one company read together.
### Accurate → MileApp
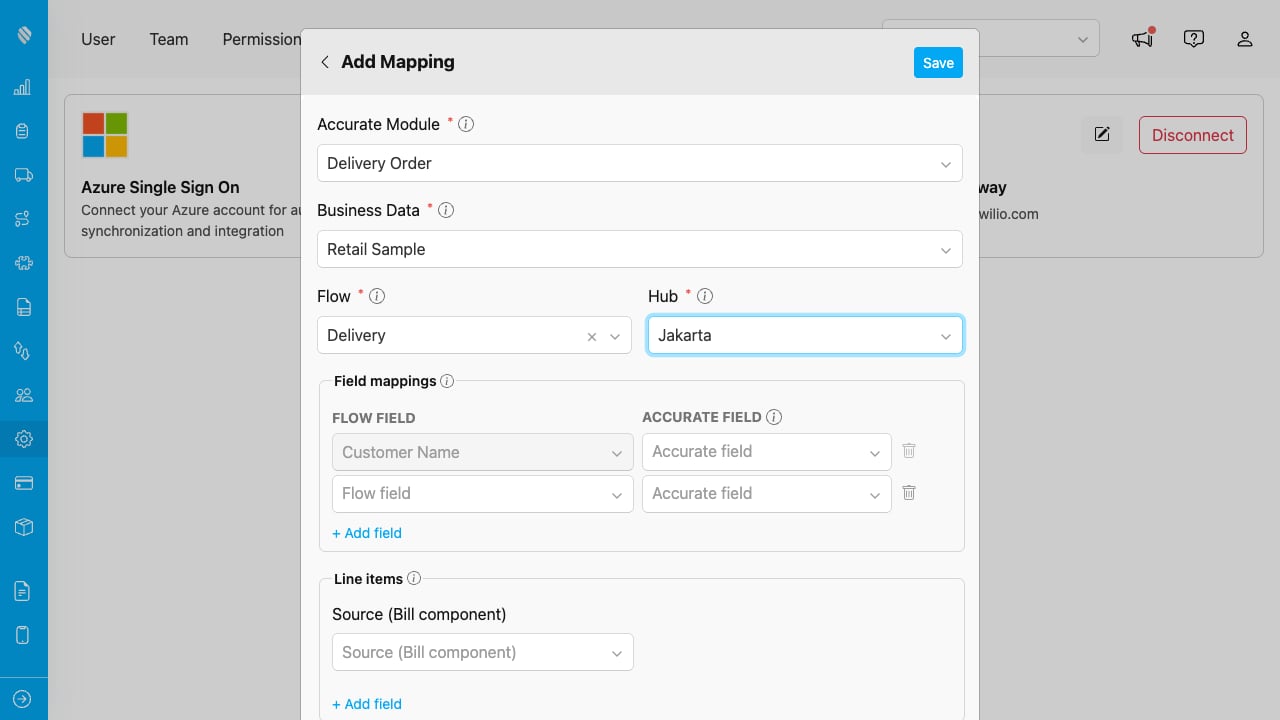
Click **Add Mapping** on the **Accurate → MileApp** tab.
1. **Select the Accurate module** — Delivery Order.
2. **Select the business data** it comes from.
3. **Select the Flow** the new tasks should be created in.
4. **Select the Hub** the tasks belong to.
5. **Map the fields** — for each MileApp flow field (on the left), choose which Accurate field it reads from (on the right). Your flow's **required** fields appear automatically and cannot be removed; you only choose where each one gets its value. Only Accurate fields whose type fits the flow field are offered.
6. **Map line items (optional)** — point a MileApp Bill or List component at the Delivery Order's item rows, then map each column (item code, quantity, unit price, and so on).
7. Click **Save**.
The same Accurate module and business data can feed **several flows**. One Delivery Order then creates one task in **each** mapped flow. A flow can only be used once per module, though — a flow already receiving that business data's Delivery Orders cannot be added twice.
### MileApp → Accurate
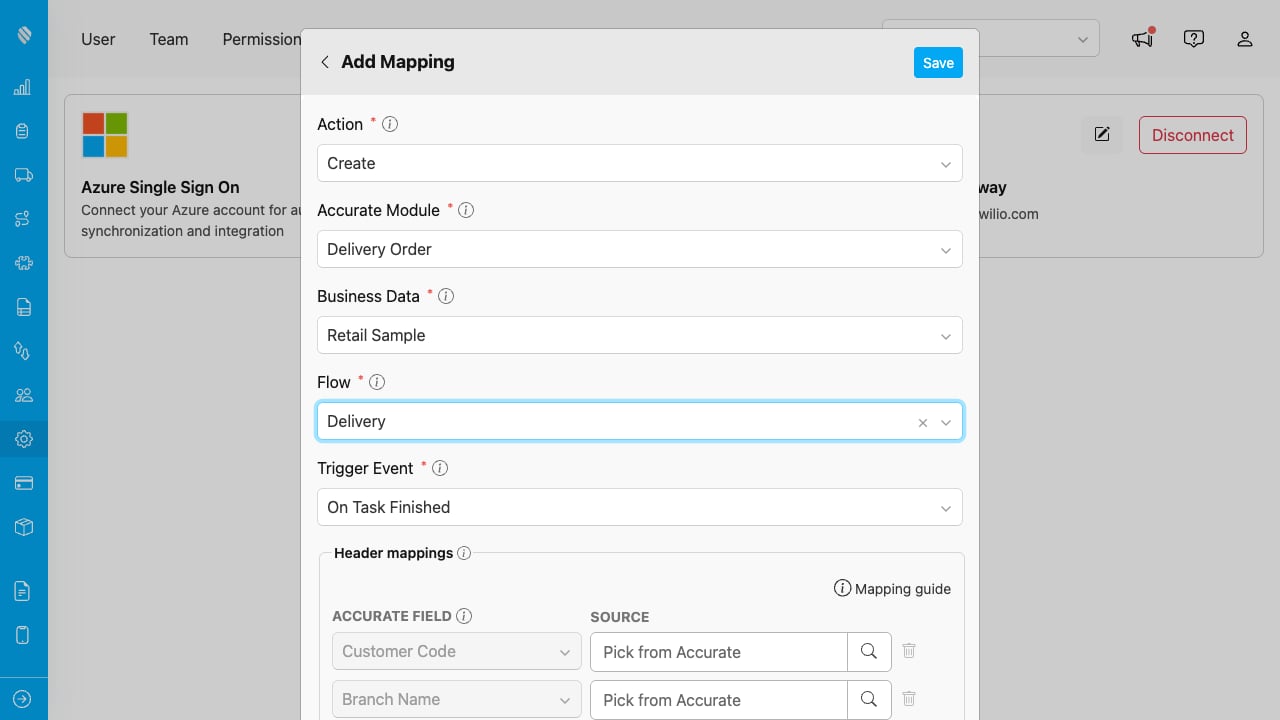
Click **Add Mapping** on the **MileApp → Accurate** tab.
1. **Select a Flow** — the Flow whose tasks should be pushed.
2. **Select the Accurate module** — Delivery Order.
3. **Select the business data** to create the record in.
4. **Select a trigger event** — when the push fires:
* **On Task Created**: when a task in this Flow is first created.
* **On Task Assigned**: when a driver or field worker is assigned.
* **On Task Finished**: when the task is marked Done.
5. **Map each Accurate field** — pick a source from the **Source** list, which groups your Flow fields and Task system fields. The value type (date, number, currency, text) is detected automatically.
6. **Fill dependency fields from Accurate** — fields such as Customer, Branch, Item or Unit must be picked from your live Accurate records using the search button. Accurate rejects values that are not real records, so these cannot be typed by hand.
7. **Map line items (optional)** — point a MileApp Bill or List component at the Delivery Order's item rows.
8. Click **Save**.
Required Accurate fields are marked and pre-filled; the Save button stays disabled until each one has a source. A field already used by another row is greyed out — one Accurate field can only be filled once.
## Step 4: Syncing Happens Automatically
**MileApp → Accurate.** Saving a rule creates a webhook automation in the background, named "\[Accurate] {Flow} → {Module}". You can see it in the Automation list, but you do not need to manage it. From then on, every task in that Flow that reaches the trigger event is pushed to Accurate.
**Accurate → MileApp.** Once a rule exists, Accurate notifies MileApp whenever a Delivery Order in that business data changes:
* **Created** → a task is created in each mapped flow.
* **Edited** → the linked task is updated. No duplicate is created, however many times the document changes.
* **Deleted** → the linked task is deleted.
A task that is already **Done** is never changed or deleted by a later edit in Accurate — completed field work is protected.
## Managing the Integration
### Edit or delete a rule
Open **Manage**, find the rule, and click the edit or delete icon. Deleting a rule removes the configuration only — records already created in Accurate, and tasks already created in MileApp, are not affected.
### Automation health (MileApp → Accurate)
Each rule in this direction owns one webhook automation. The toggle on the rule row turns it on and off. If the automation is edited or deleted from the Automation page, the row shows **"⚠ automation broken"** — click **Fix** to restore it.
### Reconnect
Use the **Reconnect** button (next to the power icon) when Accurate asks for permissions MileApp does not yet hold — for example after a new module becomes available. Reconnecting re-authorizes your account **without losing any sync rules**.
### Disconnect
Click the power icon and confirm. **Disconnecting deletes every sync rule** in both directions, along with their automations, and clears the stored credentials. Use **Reconnect** instead if you only need to refresh permissions.
To fully revoke MileApp's access on the Accurate side, open your Accurate account, go to **Aplikasi Terhubung**, and remove MileApp there as well. Accurate's public API has no server-side revoke endpoint.
## Notes
* **A flow belongs to one direction.** A flow used by an Accurate → MileApp rule cannot also push to Accurate, and the reverse. This prevents a task and a document from endlessly re-creating each other. Flows already claimed by the other direction appear greyed out in the picker.
* **Broken mappings**: if a Flow is edited after a rule is saved and a mapped field no longer exists, that rule's syncs will fail. Edit the rule to reassign the missing field.
* **Backfill**: syncing is go-forward only in both directions. Tasks and Delivery Orders that predate a rule are not synced.
* **Supported Accurate version**: Accurate Online (cloud) only. The integration uses Accurate's official OAuth 2.0 Open API.