> ## Documentation Index
> Fetch the complete documentation index at: https://docs.mileapp.dev/llms.txt
> Use this file to discover all available pages before exploring further.

# How to Setup MFA with Cloud-based Authenticator

# Introduction

This guide walks you through setting up Multi-Factor Authentication (MFA) using a Cloud-based Authenticator app. Cloud-based Authenticator uses apps such as Google Authenticator, Microsoft Authenticator, or Authy to generate time-based one-time passcodes (TOTP), adding an extra layer of security to your MileApp account.

# Step 1: Add MFA Permission to a Role

Before users can enable Cloud-based Authenticator MFA, an administrator must first enable the permission for the appropriate role.

<Note>
  Required permission:

  * View Role
  * Edit Role
</Note>

1. Log in to your account using your existing credentials.
2. Navigate to the **Setting** menu, then click the **Permission** tab.
3. Select the role you want to enable MFA for (e.g., Admin).
4. Scroll down to the **Multi-factor authentication** section under **Advanced**.
5. Toggle on **Multi-factor authentication by Cloud-based Authenticator**.
6. Save your changes.

<div align="center">
  <img src="https://mintcdn.com/mileapp-c1584fbc/Fe-Vy7m3nk2_ZiMY/images/setting/mfa-cloud-permission.png?fit=max&auto=format&n=Fe-Vy7m3nk2_ZiMY&q=85&s=e31dc589b928f166e27bc33c5027c463" alt="image" width="600" data-path="images/setting/mfa-cloud-permission.png" />
</div>

<p align="center"><em>Enable Cloud-based Authenticator MFA permission for a role</em></p>

# Step 2: Navigate to Multi-Factor Authentication Page

Once the administrator has enabled the MFA permission for your role, you can set up Cloud-based Authenticator from your profile.

1. Click on your **profile icon** in the top-right corner of the page.
2. Select **Multi-Factor Authentication** from the dropdown menu.

<div align="center">
  <img src="https://mintcdn.com/mileapp-c1584fbc/Fe-Vy7m3nk2_ZiMY/images/setting/mfa-profile-menu.png?fit=max&auto=format&n=Fe-Vy7m3nk2_ZiMY&q=85&s=417aca2a03169034269309c6e35ea108" alt="image" width="300" data-path="images/setting/mfa-profile-menu.png" />
</div>

<p align="center"><em>
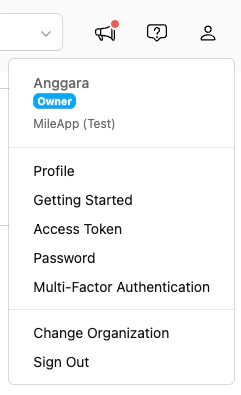
Access Multi-Factor Authentication from the profile menu</em></p>

# Step 3: Set Up the Authenticator App

On the Multi-Factor Authentication page, you will see the setup form with the status showing **Disabled**. Follow these steps to enable it:

1. Download and install an authenticator app on your mobile device (e.g., Google Authenticator, Microsoft Authenticator, or Authy).
2. Scan the **QR code** displayed on the page with your authenticator app. Alternatively, you can copy the code shown under "Or enter this code manually" and enter it into your authenticator app.
3. Enter the **6-digit verification code** generated by your authenticator app into the "Enter verification code" field.
4. Enter your account **password** in the "Confirm Password" field.
5. Click the **Enable** button.

<div align="center">
  <img src="https://mintcdn.com/mileapp-c1584fbc/Fe-Vy7m3nk2_ZiMY/images/setting/mfa-setup-qr.png?fit=max&auto=format&n=Fe-Vy7m3nk2_ZiMY&q=85&s=637c0394625c06ebc7c4db7885612fef" alt="image" width="600" data-path="images/setting/mfa-setup-qr.png" />
</div>

<p align="center"><em>
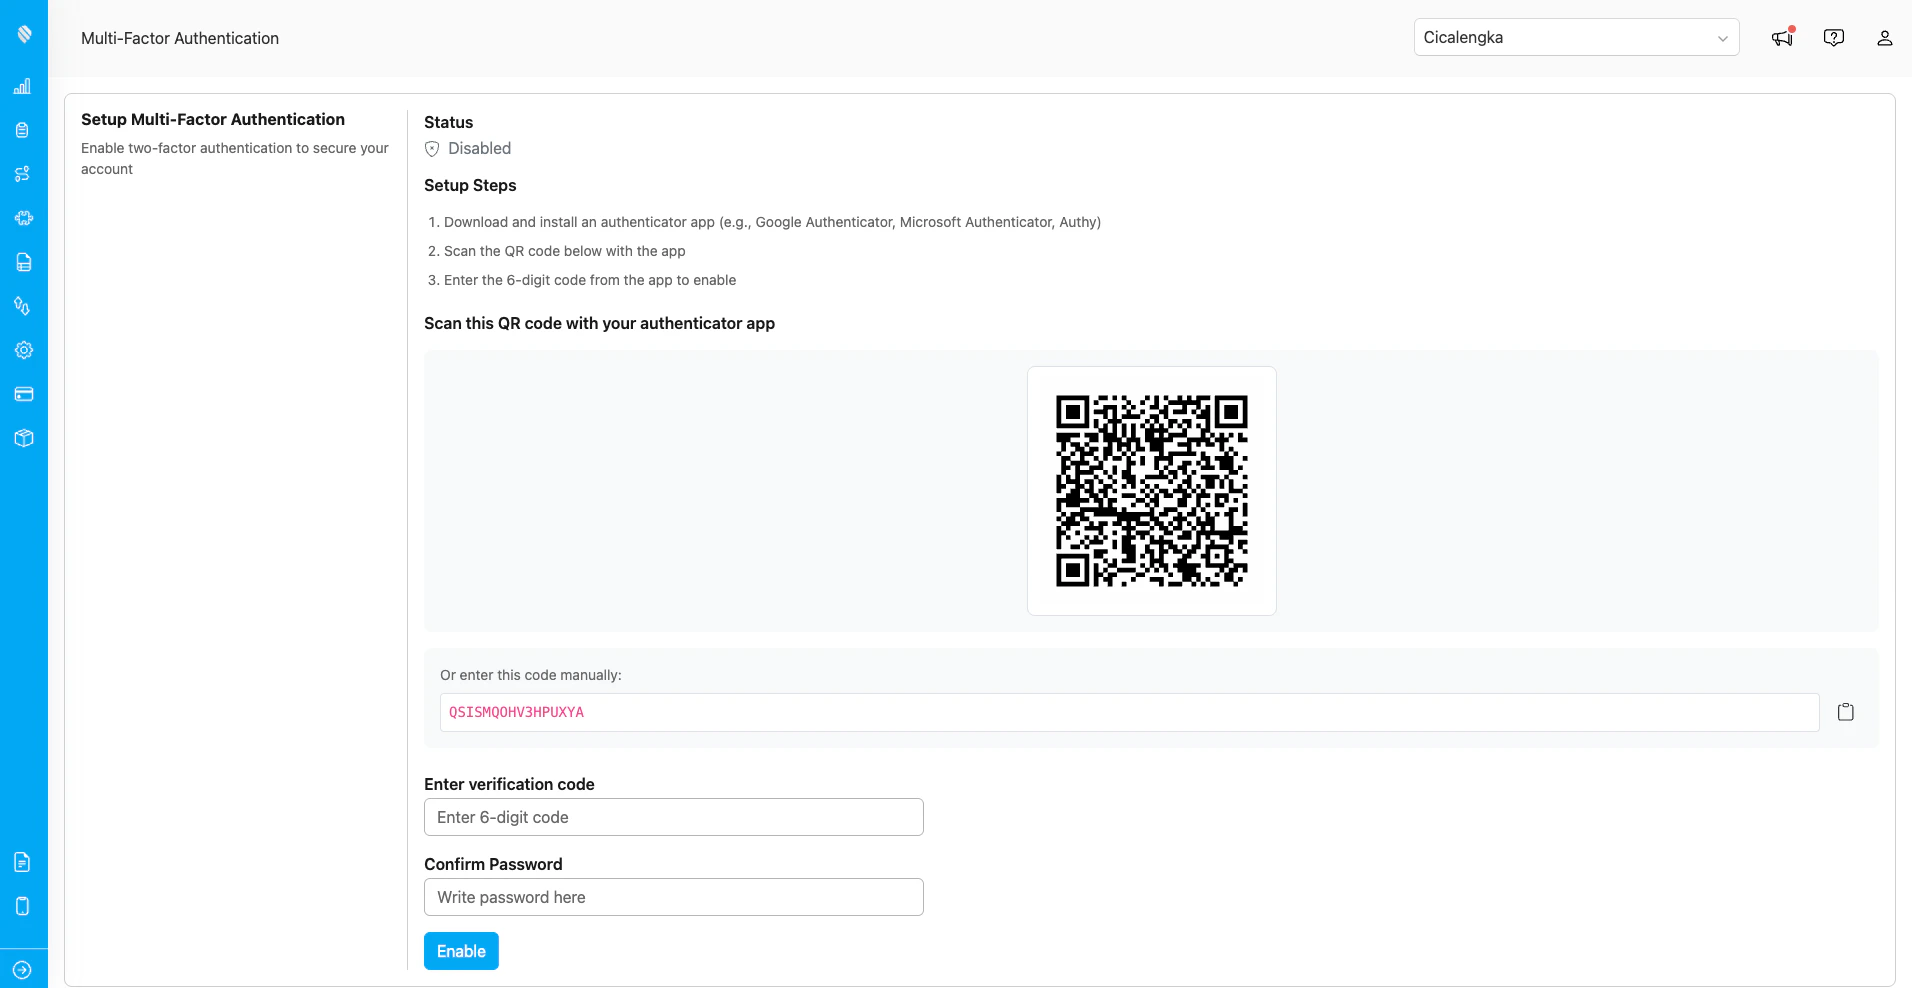
Scan the QR code and enter the verification code to enable MFA</em></p>

# Step 4: MFA Enabled Successfully

After successfully entering the verification code and confirming your password, the status will change to **Enabled** along with the date and time it was activated.

<div align="center">
  <img src="https://mintcdn.com/mileapp-c1584fbc/Fe-Vy7m3nk2_ZiMY/images/setting/mfa-enabled.png?fit=max&auto=format&n=Fe-Vy7m3nk2_ZiMY&q=85&s=8c281e6e41258d6e4891a9e67eaec995" alt="image" width="600" data-path="images/setting/mfa-enabled.png" />
</div>

<p align="center"><em>Multi-Factor Authentication is now enabled for your account</em></p>

To disable MFA, enter your password in the "Confirm Password" field and click the **Disable** button.

# Using MFA

After MFA is enabled, you will be prompted to enter an authenticator code during the sign-in process. Here's how to use MFA with Cloud-based Authenticator:

1. Enter your username and password as usual on the sign-in page.
2. Click the **Sign In** button.
3. Open your authenticator app and find the **6-digit code** for your MileApp account.
4. Enter the code in the **Authenticator Code** field.
5. Click the **Submit** button.
6. If the code is correct, you will gain access to your account. If the code is incorrect or has expired, wait for a new code to be generated by your authenticator app and try again.

<div align="center">
  <img src="https://mintcdn.com/mileapp-c1584fbc/Fe-Vy7m3nk2_ZiMY/images/setting/mfa-cloud-login.png?fit=max&auto=format&n=Fe-Vy7m3nk2_ZiMY&q=85&s=cf28bf55dcedbe5085e80cc5f64ec61f" alt="image" width="600" data-path="images/setting/mfa-cloud-login.png" />
</div>

<p align="center"><em>
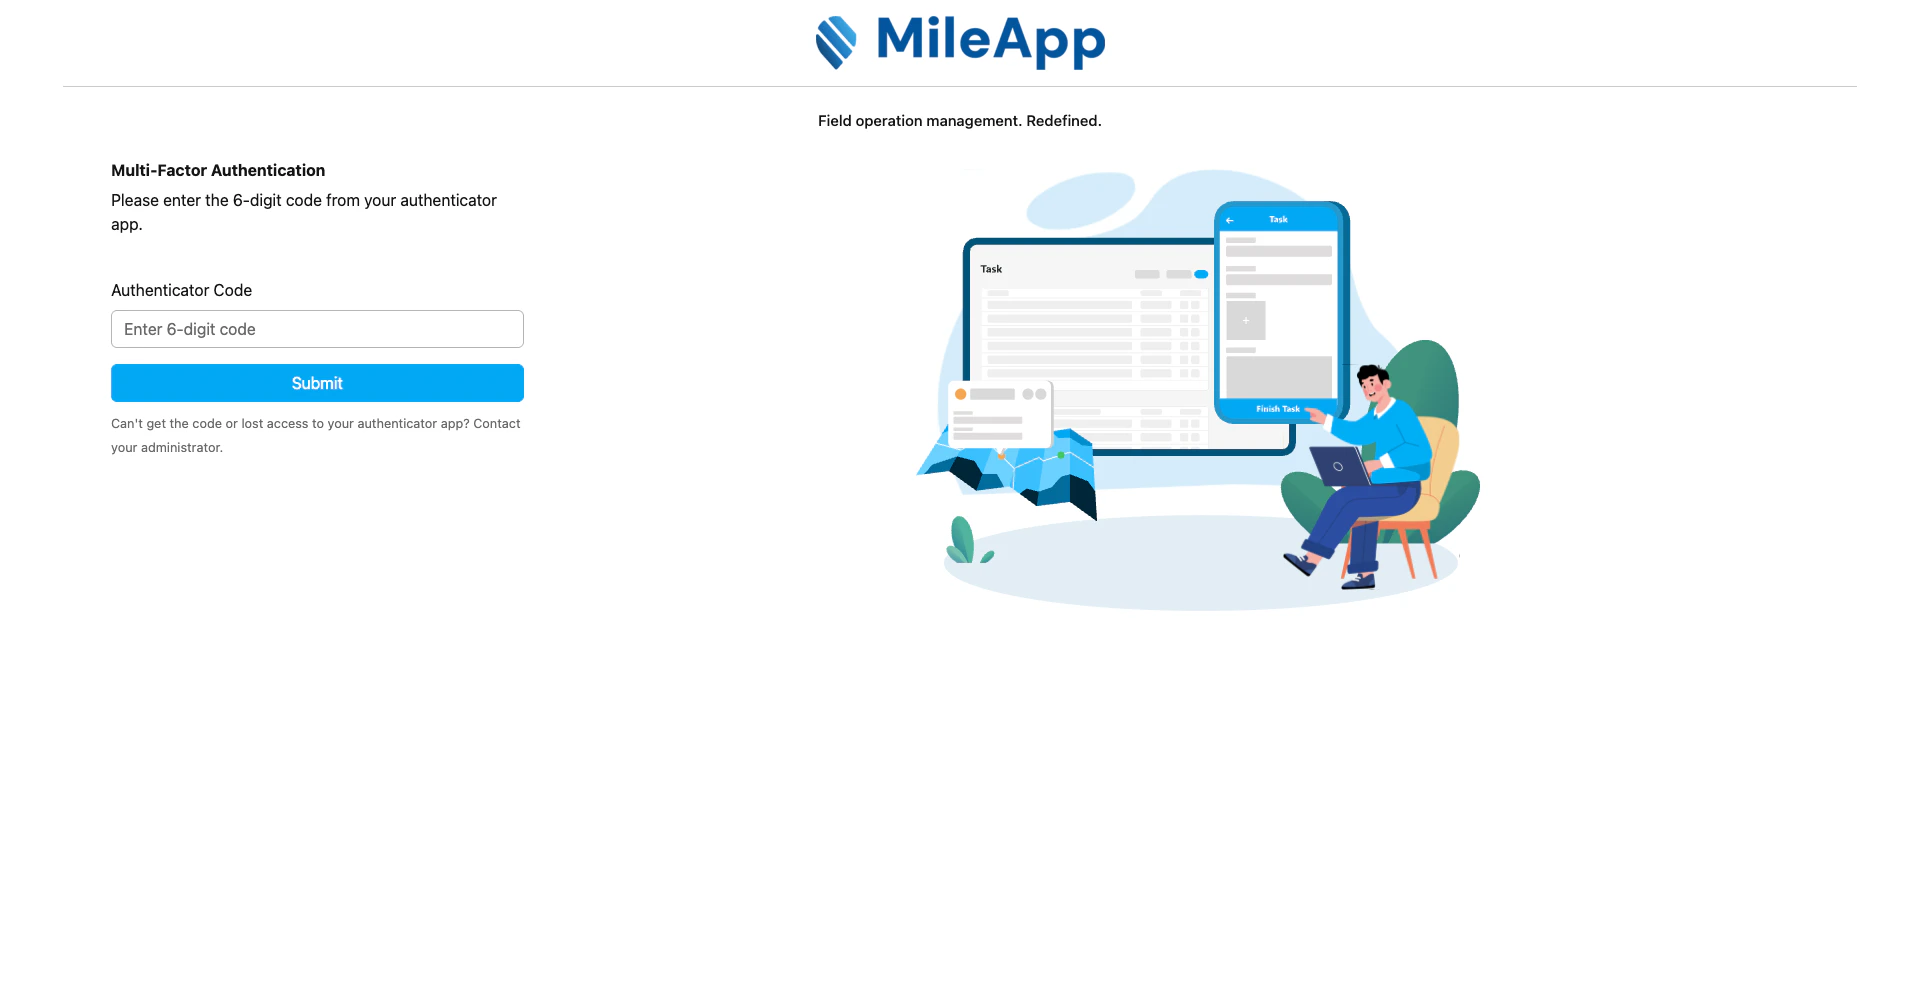
Enter the 6-digit authenticator code during sign-in</em></p>

<Note>
  Can't get the code or lost access to your authenticator app? Contact your administrator.
</Note>

## Using MFA on Mobile

MFA is also required when signing in through the MileApp Field mobile app. After entering your credentials, the app will display the Multi-Factor Authentication screen:

1. Open the **MileApp Field** mobile app and sign in with your username and password.
2. The app will navigate to the **Multi-Factor Authentication** screen.
3. Open your authenticator app and find the **6-digit code** for your MileApp account.
4. Enter the code in the **Authenticator Code** field.
5. Tap the **Submit** button.
6. If the code is correct, you will gain access to the app. If the code is incorrect or has expired, wait for a new code to be generated by your authenticator app and try again.

<div align="center">
  <img src="https://mintcdn.com/mileapp-c1584fbc/Fe-Vy7m3nk2_ZiMY/images/setting/mfa-cloud-login-mobile.jpg?fit=max&auto=format&n=Fe-Vy7m3nk2_ZiMY&q=85&s=8314fc617454ee736e4723525e9a5195" alt="image" width="300" data-path="images/setting/mfa-cloud-login-mobile.jpg" />
</div>

<p align="center"><em>
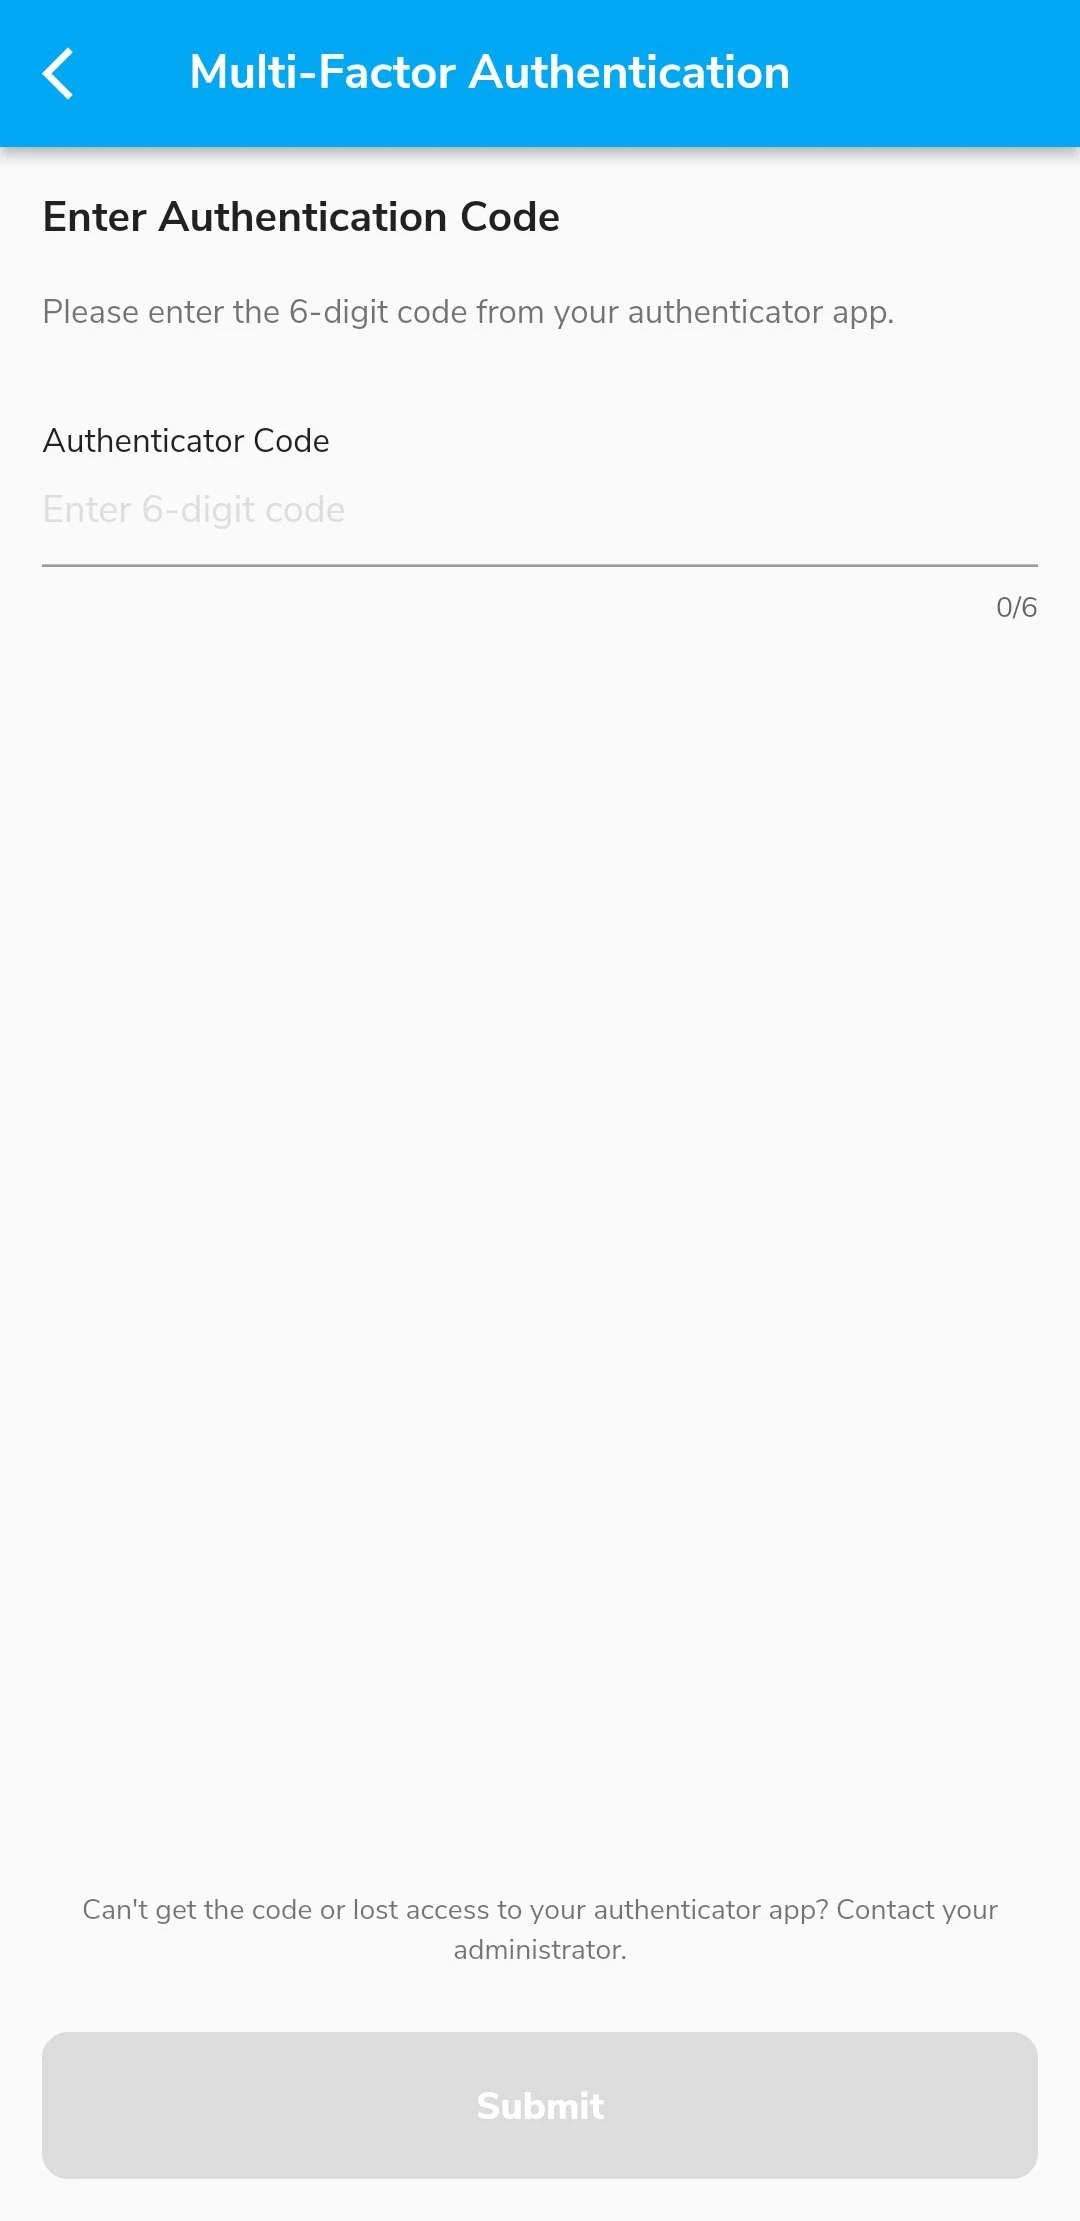
Enter the 6-digit authenticator code on the MileApp mobile app</em></p>
