> ## Documentation Index
> Fetch the complete documentation index at: https://docs.mileapp.dev/llms.txt
> Use this file to discover all available pages before exploring further.
# Route Permission
This user manual will guide you through the various permissions and actions available within the application.
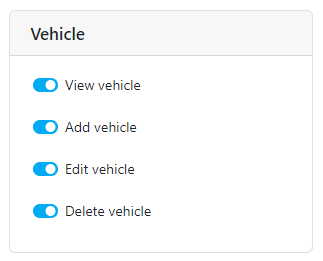
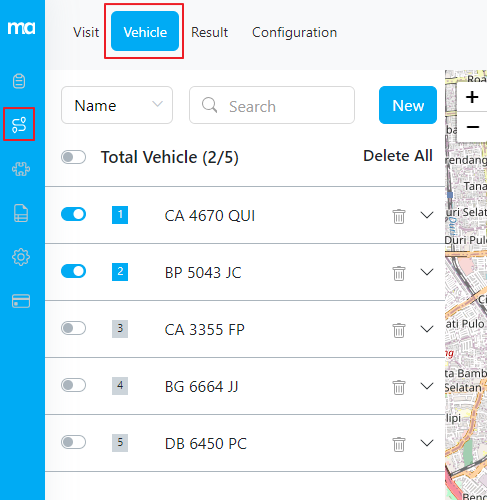
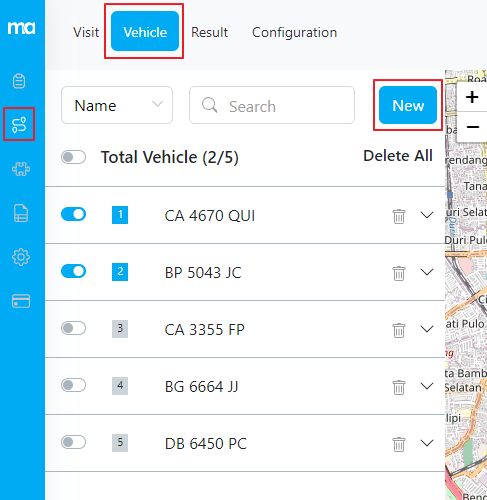
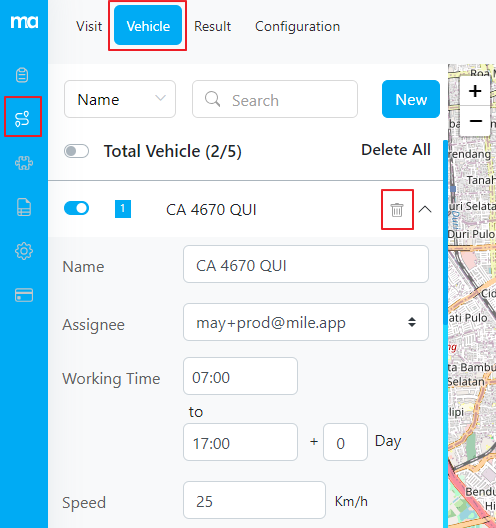
## Vehicle
The Vehicle menu allows you to manage vehicle data that is used in the routing optimization process.
1. **View Vehicle**: This permission allows you to view the list of vehicles currently registered in the system.
2. **Add Vehicle**: With this permission, you can add a new vehicle to the system. You will need to fill in the necessary data, such as the vehicle name, working time, tags, and any other relevant information.
3. **Edit Vehicle**: This permission enables you to edit the details of a vehicle, such as its name, working time, or any other associated information.
4. **Delete Vehicle**: With this permission, you can delete a vehicle from the system. You will find a trash icon next to each vehicle, as well as a "Delete All" button to remove all vehicles.
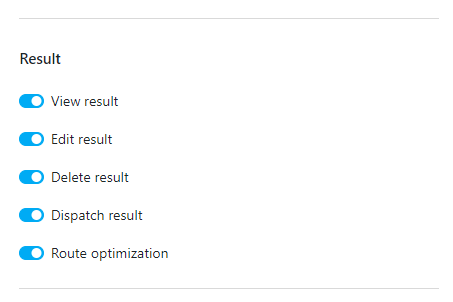
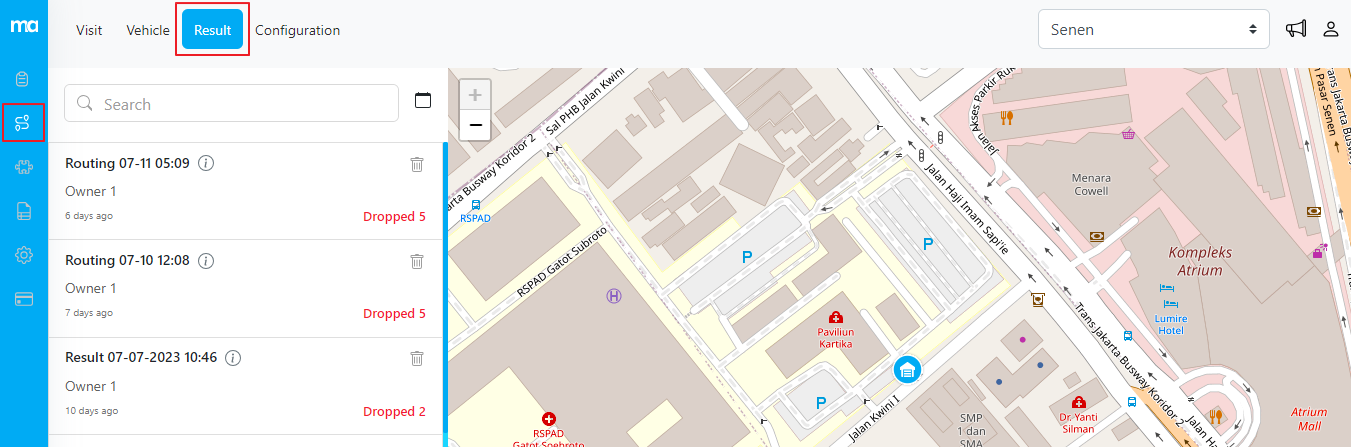
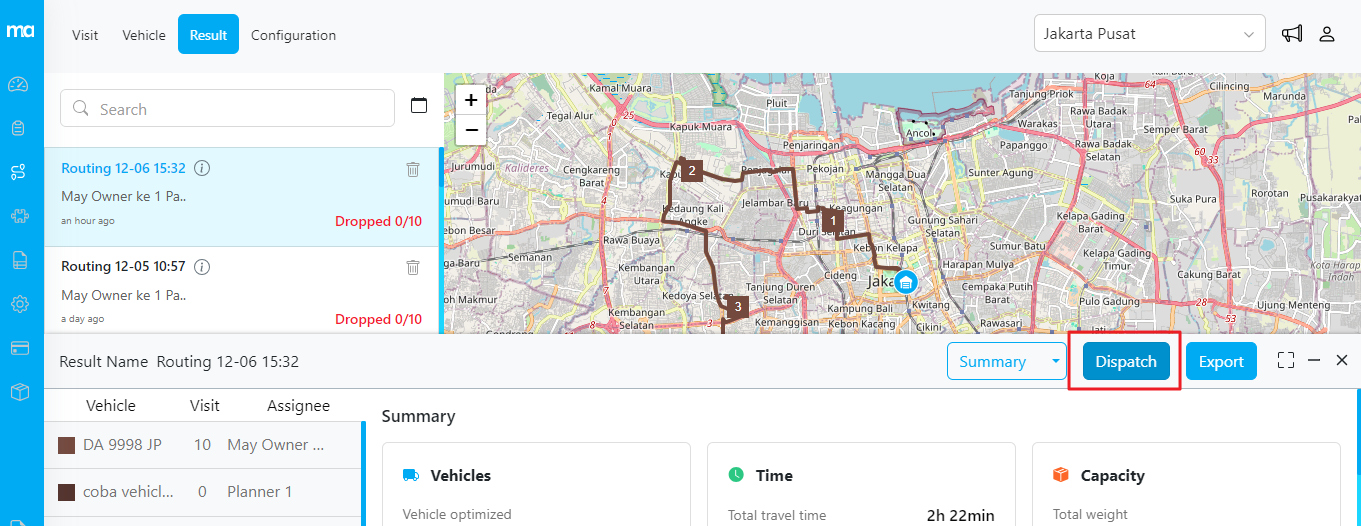
## Result
The Result menu provides access to view and manage the results of the route optimization process.
1. **View Result**: This permission allows you to view the results of the route optimization, displaying the optimized routes for the assigned vehicles.
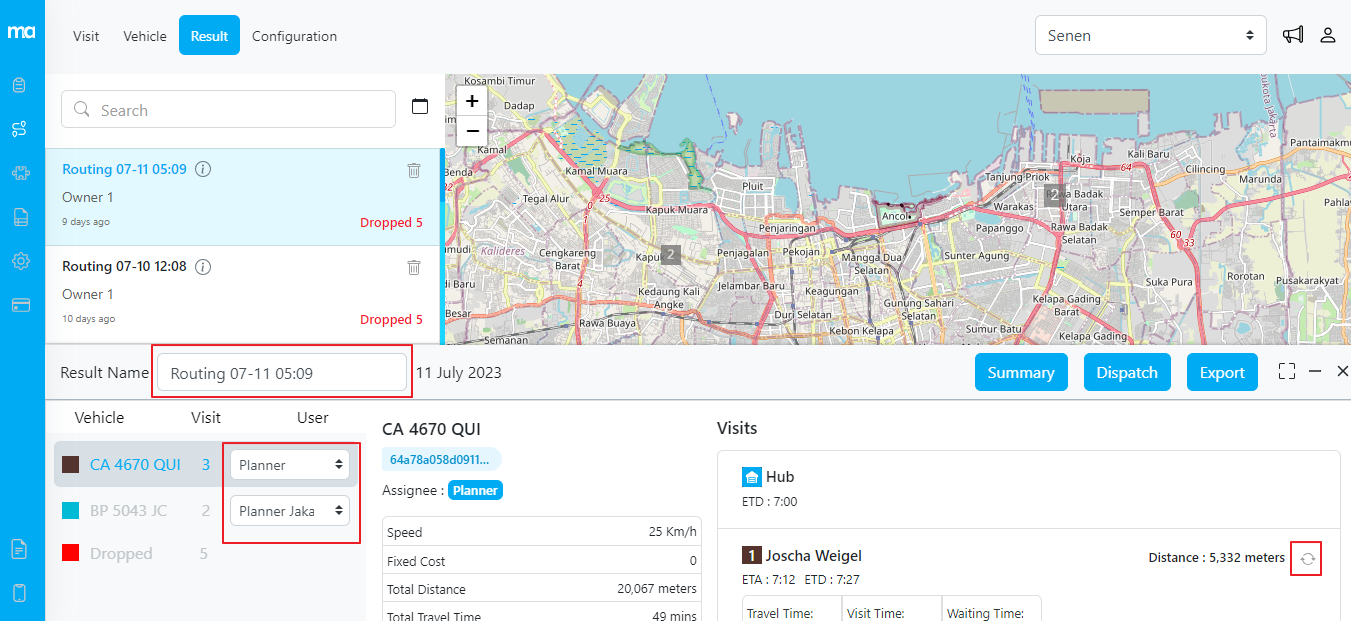
2. **Edit Result**: With this permission, you can edit the details of the optimization results. This includes actions such as renaming the result, changing the assigned vehicles for specific visits, or moving visits to different vehicles.
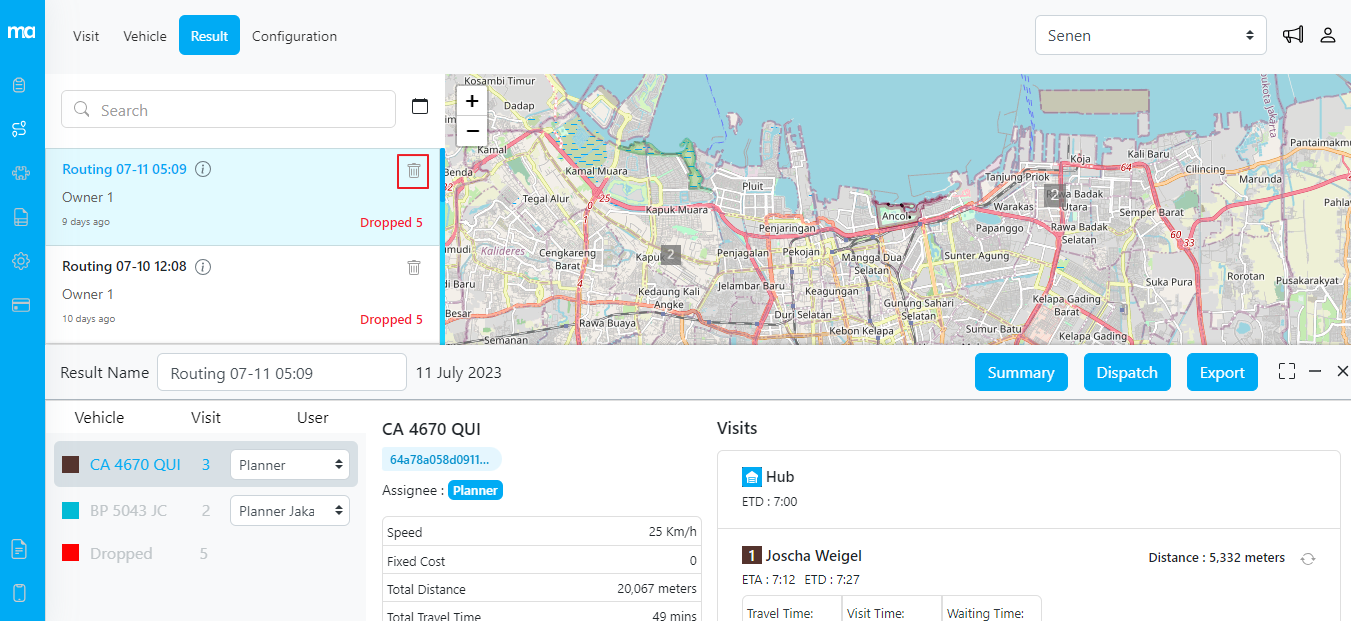
3. **Delete Result**: This permission enables you to delete a route optimization result from the system.
4. **Dispatch Result**: The "Dispatch Result" permission lets you to designate specific roles with the authority to dispatch routing results. This essential feature facilitates the allocation of visits to designated assignees through a seamless dispatch process. Once dispatched, the assigned tasks can be conveniently monitored and managed in the Task menu.
5. **Route Optimization**: With this permission, you can initiate the route optimization process by clicking on the "Optimize" button. This action will optimize the routes based on the given parameters and configurations.
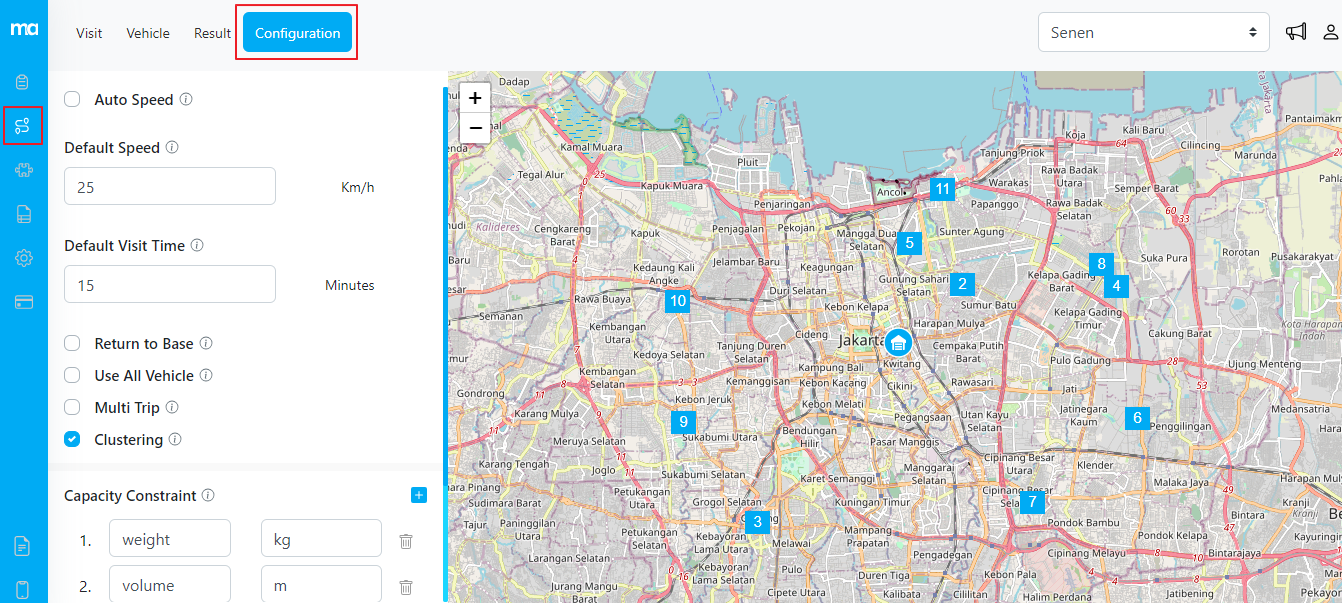
## Configuration
The Configuration menu provides access to the settings and configurations for routing optimization.
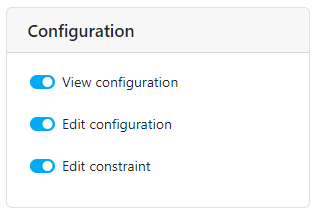
1. **View Configuration**: This permission allows you to view the current routing configuration, including default visit time, default speed, multitrip options, return to base options, clustering options, and other relevant configurations.
2. **Edit Configuration**: With this permission, you can modify the routing configuration based on your specific requirements. You can change default visit time, default speed, multitrip options, return to base options, clustering options, and other relevant configurations.
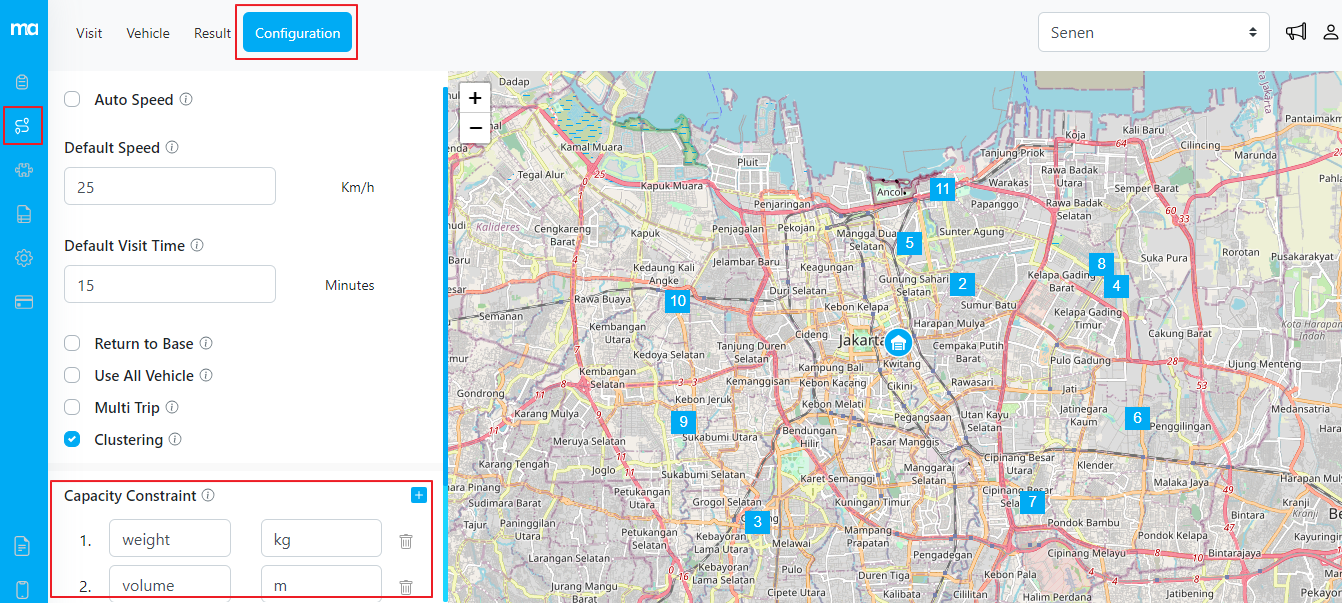
3. **Edit Constraint**: This permission enables you to manage capacity constraints within the routing optimization. You can add new constraints, edit existing ones, or delete constraints as needed.