> ## Documentation Index
> Fetch the complete documentation index at: https://docs.mileapp.dev/llms.txt
> Use this file to discover all available pages before exploring further.
# Subpage in Task
When creating or editing a task that uses a Flow with Subpage components, you can add multiple repeating entries of structured data. This guide explains how to work with Subpage fields in tasks.
## Understanding Subpage in Tasks
Subpage appears as a collapsible card in the task form that allows you to:
* Add multiple entries with the same structure
* Fill in different data for each entry
* View completion status per entry
* Edit or delete entries as needed
**Common uses:**
* Recording multiple delivery recipients
* Documenting inspections of multiple items
* Collecting signatures from multiple parties
* Capturing data at multiple service checkpoints
## Adding Subpage Entries
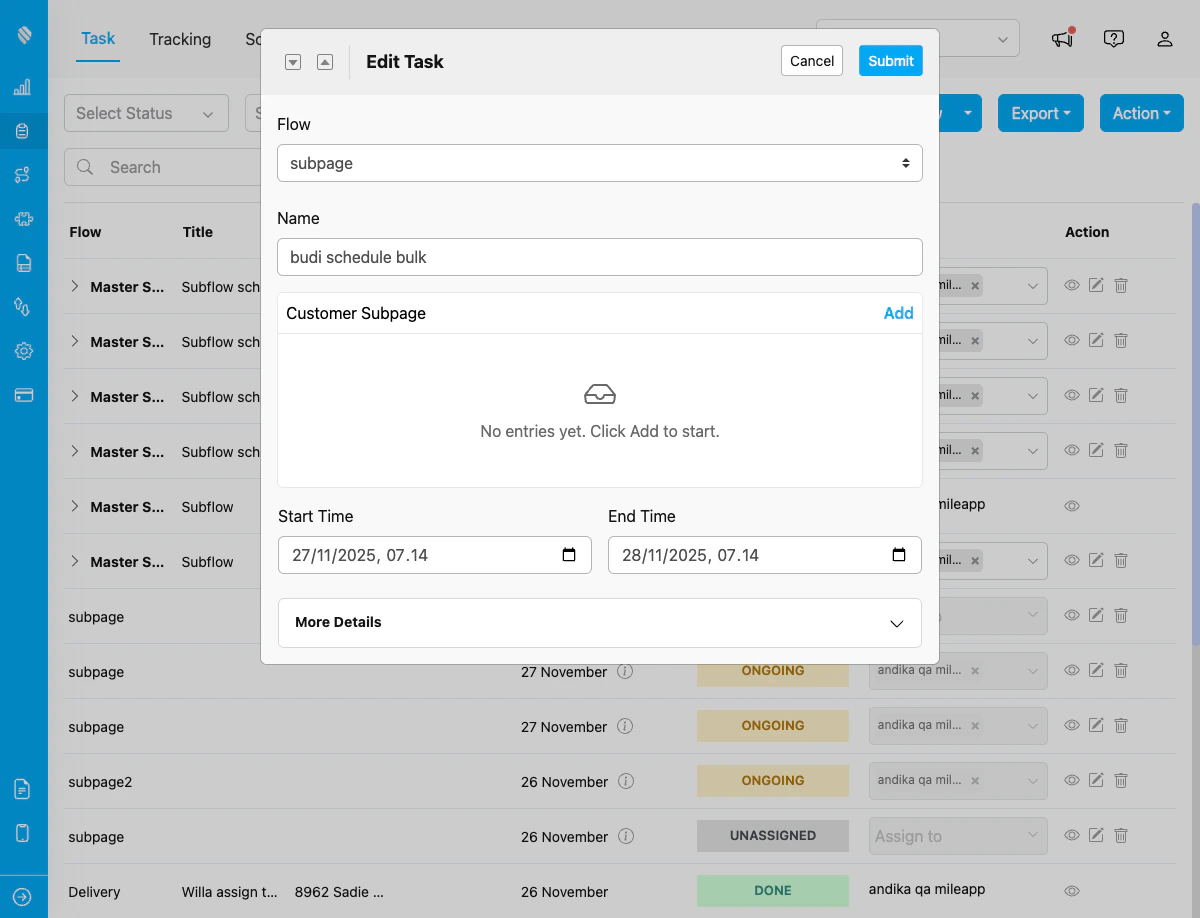
Empty Subpage component showing "No entries yet. Click Add to start" message
### Step 1: Locate the Subpage Component
When creating a task, scroll to find the Subpage component (e.g., "Customer Subpage", "Delivery Recipients", etc.). It displays as a card with:
* Component title at the top
* Current entry count and completion status
* "+ Add" button to create new entries
### Step 2: Add a New Entry
Click the **"+ Add"** button or tap on the empty subpage card to create your first entry.
### Step 3: Fill in the Fields
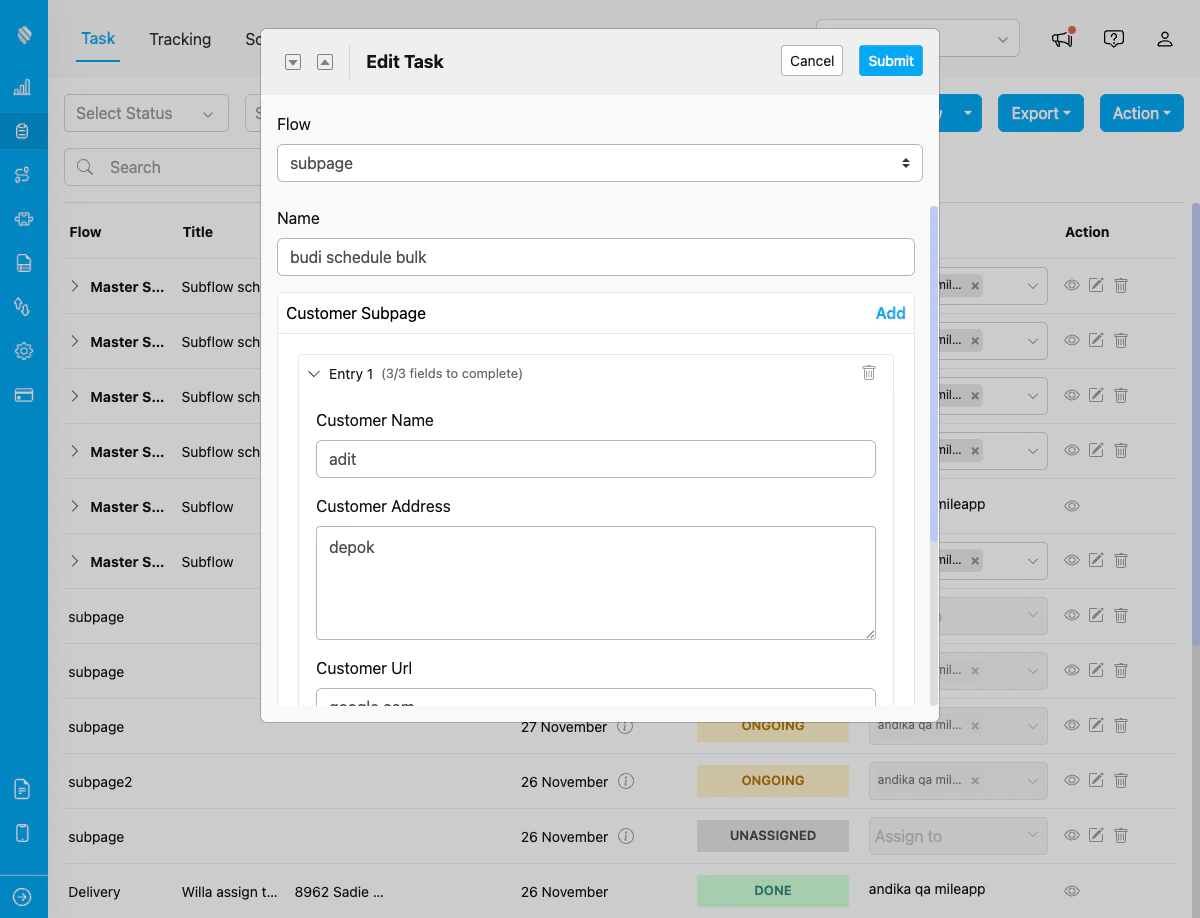
Subpage entry expanded showing three fields: Customer Name, Customer Address, and Customer Url with completion status
Complete all fields in the entry form. Required fields are marked with an asterisk (\*). The form shows:
* Field labels with input types
* Validation messages for errors
* Completion progress (e.g., "3/5 fields completed")
### Step 4: Save the Entry
After filling required fields, the entry is automatically saved. You can:
* Return to the entry list to add more entries
* Continue filling optional fields
* Edit the entry later if needed
## Managing Entries
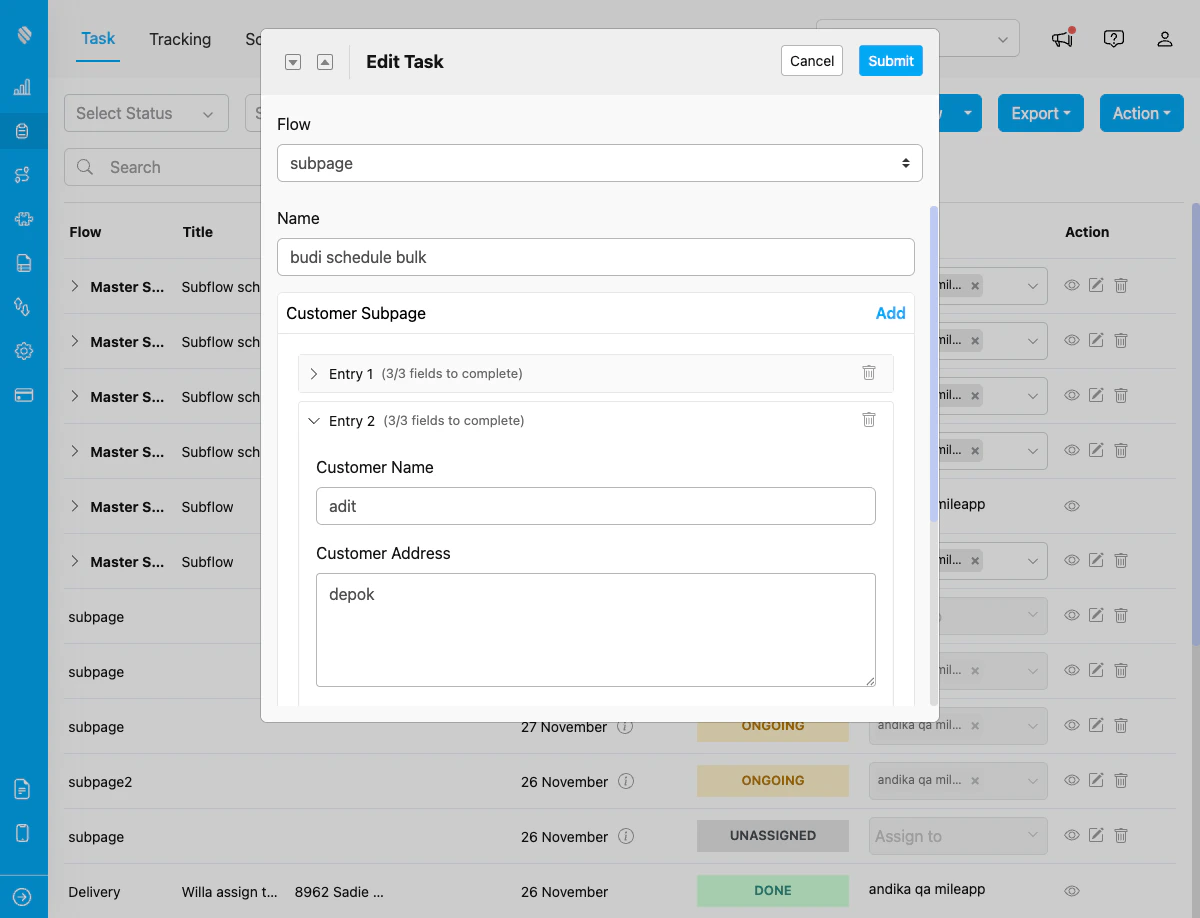
Multiple entries in Subpage: Entry 1 collapsed, Entry 2 expanded, both showing completion status and delete option
### Viewing Entries
The Subpage card shows all entries in a list view with:
* Entry number or identifier
* Completion status per entry
* Quick summary of key fields
* Actions (edit, delete)
### Editing an Entry
1. Click on the entry card to open it
2. Modify any fields as needed
3. Changes are saved automatically
4. Return to the list view when done
### Deleting an Entry
1. Find the entry you want to remove
2. Click the delete icon (trash button)
3. Confirm the deletion
4. The entry is removed permanently
Deleting an entry cannot be undone. All data in that entry will be lost.
## Viewing Subpage Data in Task Detail
After creating a task with subpage entries, you can view the subpage data in the task detail dialog.
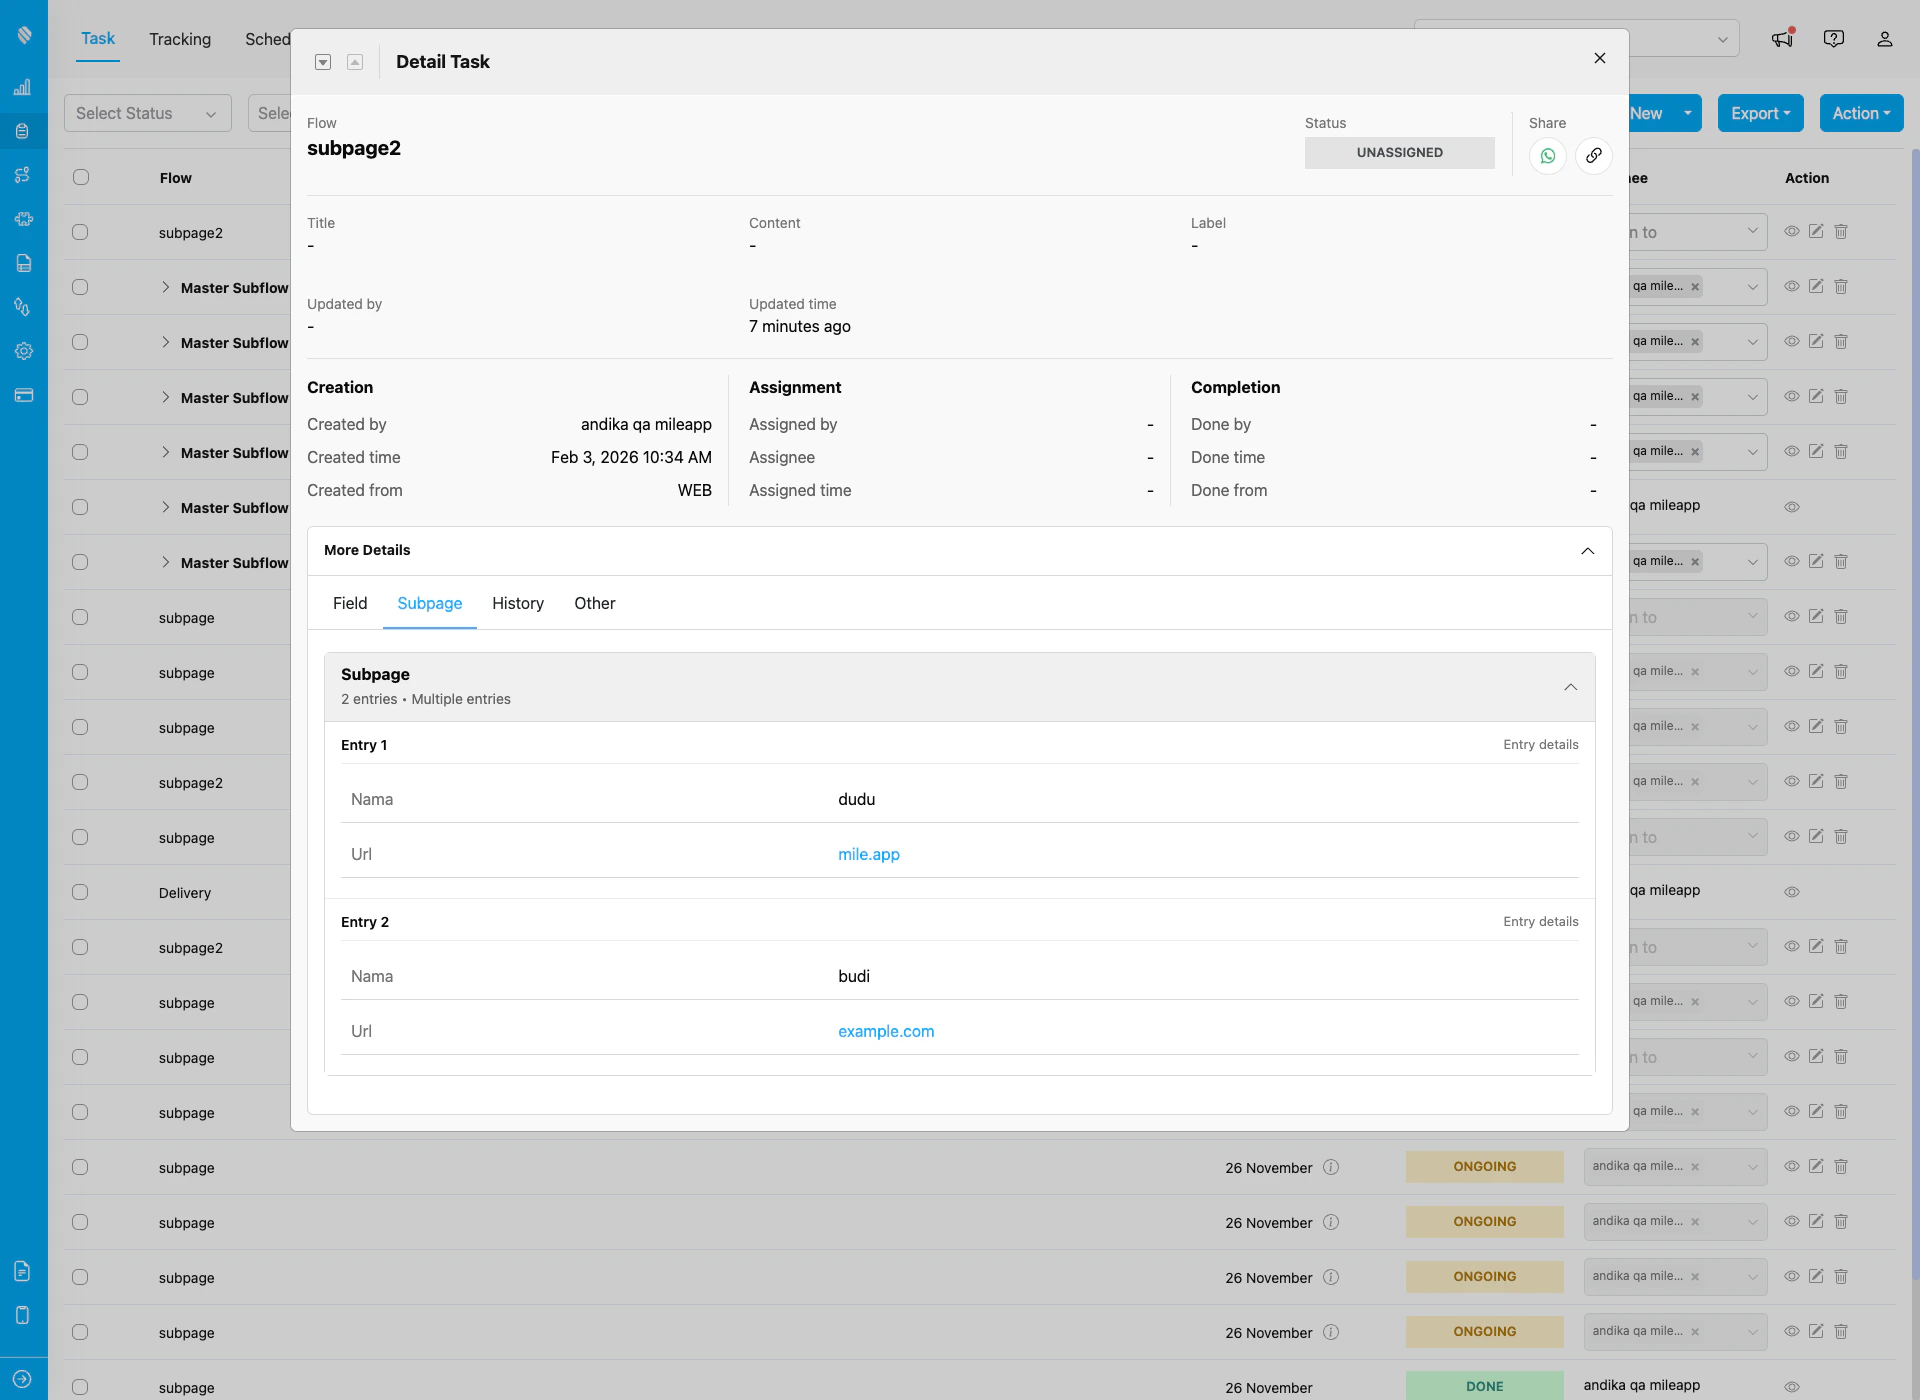
Task detail dialog showing Subpage tab with multiple entries (Entry 1 and Entry 2) displaying field data
### How to View Subpage Data
1. **Open task detail**: Click the eye icon on any task in the task list
2. **Expand More Details**: Click the "More Details" button to expand the details section
3. **Click Subpage tab**: The Subpage tab appears alongside Field, History, and Other tabs
4. **View entries**: The Subpage tab shows:
* Entry count and summary (e.g., "2 entries • Multiple entries")
* Expandable list of all subpage entries
* Each entry displays all field data with labels and values
The Subpage tab only appears in the More Details section when the task's Flow contains a Subpage component with at least one entry.
## Validation and Requirements
### Entry-Level Validation
* **Required Subpage**: Must add at least one entry before saving task
* **Optional Subpage**: Can save task with zero entries
### Field-Level Validation
* **Required fields**: Must be filled for each entry
* **Input validation**: Type-specific rules (email format, number range, etc.)
* **Photo limits**: Min/max photo count per entry
* **Selection constraints**: Min/max options for multi-select
### Common Validation Messages
* "This field is required"
* "Please enter a valid phone number"
* "Minimum 1 photo required"
* "Must select at least 2 options"
* "Value must be between X and Y"
## Tips for Using Subpage
### Best Practices
1. **Fill required fields first**: Complete all mandatory fields to avoid validation errors
2. **Use default values**: Take advantage of pre-filled values when available
3. **Review before saving**: Check all entries for accuracy before saving the task
4. **Delete unused entries**: Remove incomplete or incorrect entries instead of leaving them empty
### Working Efficiently
* **Duplicate similar entries**: Some implementations allow copying an entry to save time
* **Check completion status**: Use the field counter to track what's left to fill (e.g., "3/5 fields completed")
### Common Scenarios
#### Scenario 1: Multi-Stop Delivery
**Subpage**: "Delivery Recipients"
For each delivery stop:
1. Add new entry for each recipient
2. Fill recipient name and phone
3. Capture delivery photo
4. Get signature
5. Repeat for all stops
#### Scenario 2: Equipment Inspection
**Subpage**: "Equipment Checklist"
For each equipment item:
1. Add entry with equipment ID
2. Select condition (Good/Fair/Poor)
3. Record measurement or reading
4. Take inspection photos
5. Add notes if needed
#### Scenario 3: Quality Control
**Subpage**: "QC Checkpoints"
For each checkpoint:
1. Review checkpoint criteria (view field)
2. Select Pass/Fail
3. Enter measurement value
4. Attach evidence photo
5. Add remarks
## Troubleshooting
### "Cannot save task" Error
* **Check required entries**: Ensure required subpage has at least one entry
* **Fill required fields**: Complete all mandatory fields in each entry
* **Validate inputs**: Fix any field-specific validation errors
### Photos Not Uploading
* **Check connection**: Ensure stable internet connection
* **File size**: Images may be too large (typically max 5-10MB)
* **Format**: Use supported formats (JPG, PNG)
* **Permissions**: Grant camera/storage access on mobile
### Entry Not Saving
* **Required fields**: Complete all required fields first
* **Field validation**: Fix any error messages shown
* **Connection**: Ensure you're online when saving the task
## Frequently Asked Questions
**Q: Can I add unlimited entries to a Subpage?**
A: Generally yes, but performance may vary with very large numbers (100+ entries). Check with your organization for any specific limits.
**Q: Can I edit entries after saving the task?**
A: Yes, you can edit Subpage entries when editing the task. The entries are part of the task data.
**Q: What happens to photos when I delete an entry?**
A: Photos uploaded in the deleted entry are removed from the task. They cannot be recovered.
**Q: Do I need to fill all entries at once?**
A: No, you can save the task with partial entries and complete them later during task editing or completion.
## Related
* [Subpage Component in Flow Builder](/pages/flow/flow-builder/component-subpage)
* [Creating a Task](/pages/task/creating-task/manual-task-input/manual-task-input)
* [Flow Components Overview](/pages/flow/flow-builder/introduction)