Understanding Subpage in Tasks
Subpage appears as a collapsible card in the task form that allows you to:- Add multiple entries with the same structure
- Fill in different data for each entry
- View completion status per entry
- Edit or delete entries as needed
- Recording multiple delivery recipients
- Documenting inspections of multiple items
- Collecting signatures from multiple parties
- Capturing data at multiple service checkpoints
Adding Subpage Entries
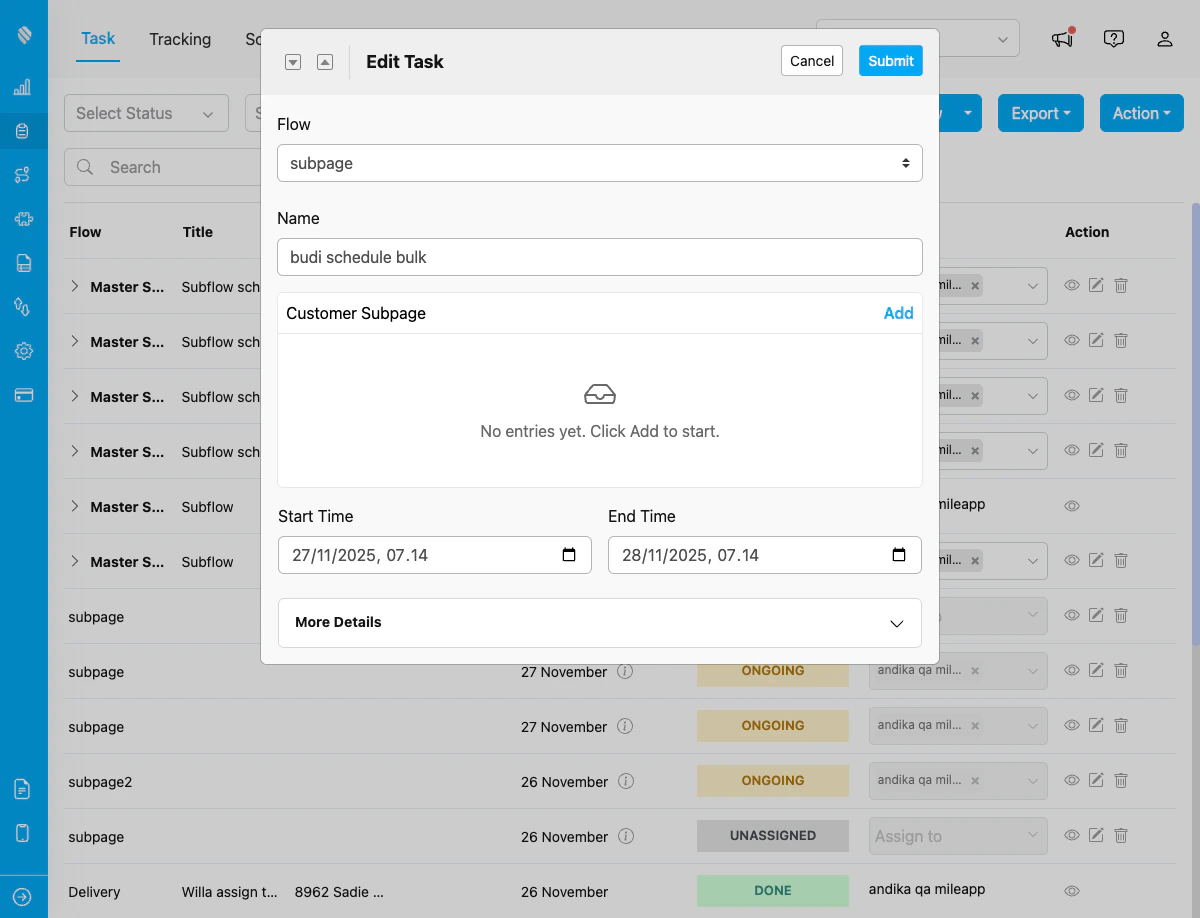
Empty Subpage component showing “No entries yet. Click Add to start” message
Step 1: Locate the Subpage Component
When creating a task, scroll to find the Subpage component (e.g., “Customer Subpage”, “Delivery Recipients”, etc.). It displays as a card with:- Component title at the top
- Current entry count and completion status
- ”+ Add” button to create new entries
Step 2: Add a New Entry
Click the ”+ Add” button or tap on the empty subpage card to create your first entry.Step 3: Fill in the Fields
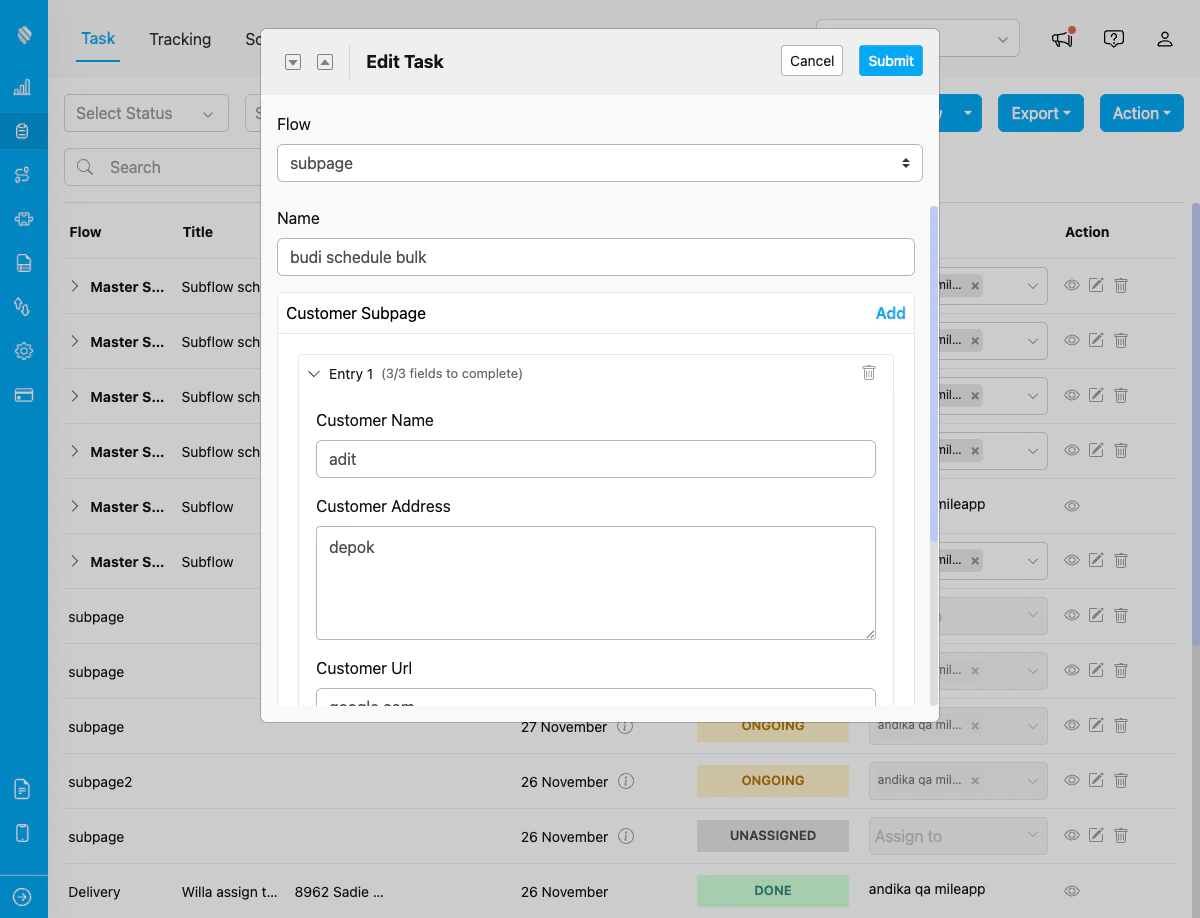
Subpage entry expanded showing three fields: Customer Name, Customer Address, and Customer Url with completion status
- Field labels with input types
- Validation messages for errors
- Completion progress (e.g., “3/5 fields completed”)
Step 4: Save the Entry
After filling required fields, the entry is automatically saved. You can:- Return to the entry list to add more entries
- Continue filling optional fields
- Edit the entry later if needed
Managing Entries
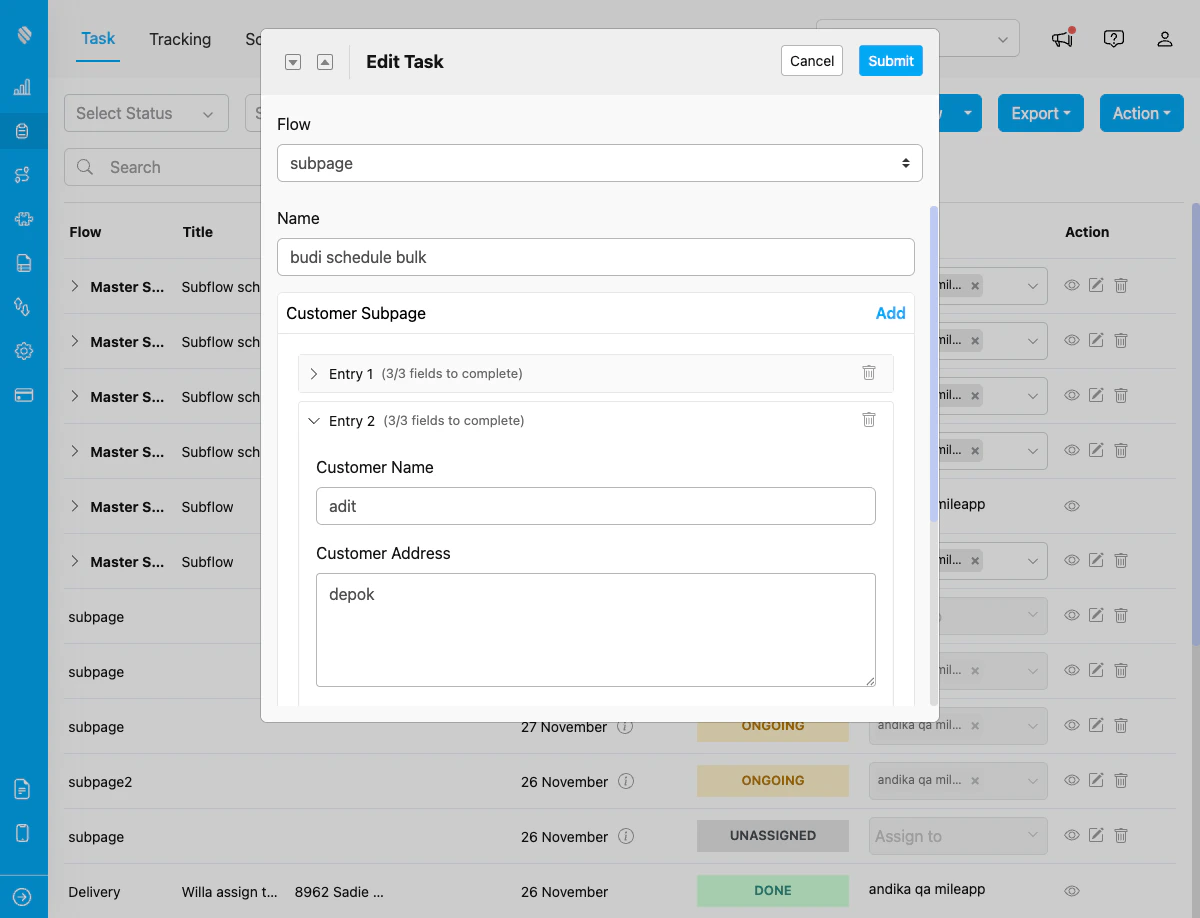
Multiple entries in Subpage: Entry 1 collapsed, Entry 2 expanded, both showing completion status and delete option
Viewing Entries
The Subpage card shows all entries in a list view with:- Entry number or identifier
- Completion status per entry
- Quick summary of key fields
- Actions (edit, delete)
Editing an Entry
- Click on the entry card to open it
- Modify any fields as needed
- Changes are saved automatically
- Return to the list view when done
Deleting an Entry
- Find the entry you want to remove
- Click the delete icon (trash button)
- Confirm the deletion
- The entry is removed permanently
Viewing Subpage Data in Task Detail
After creating a task with subpage entries, you can view the subpage data in the task detail dialog.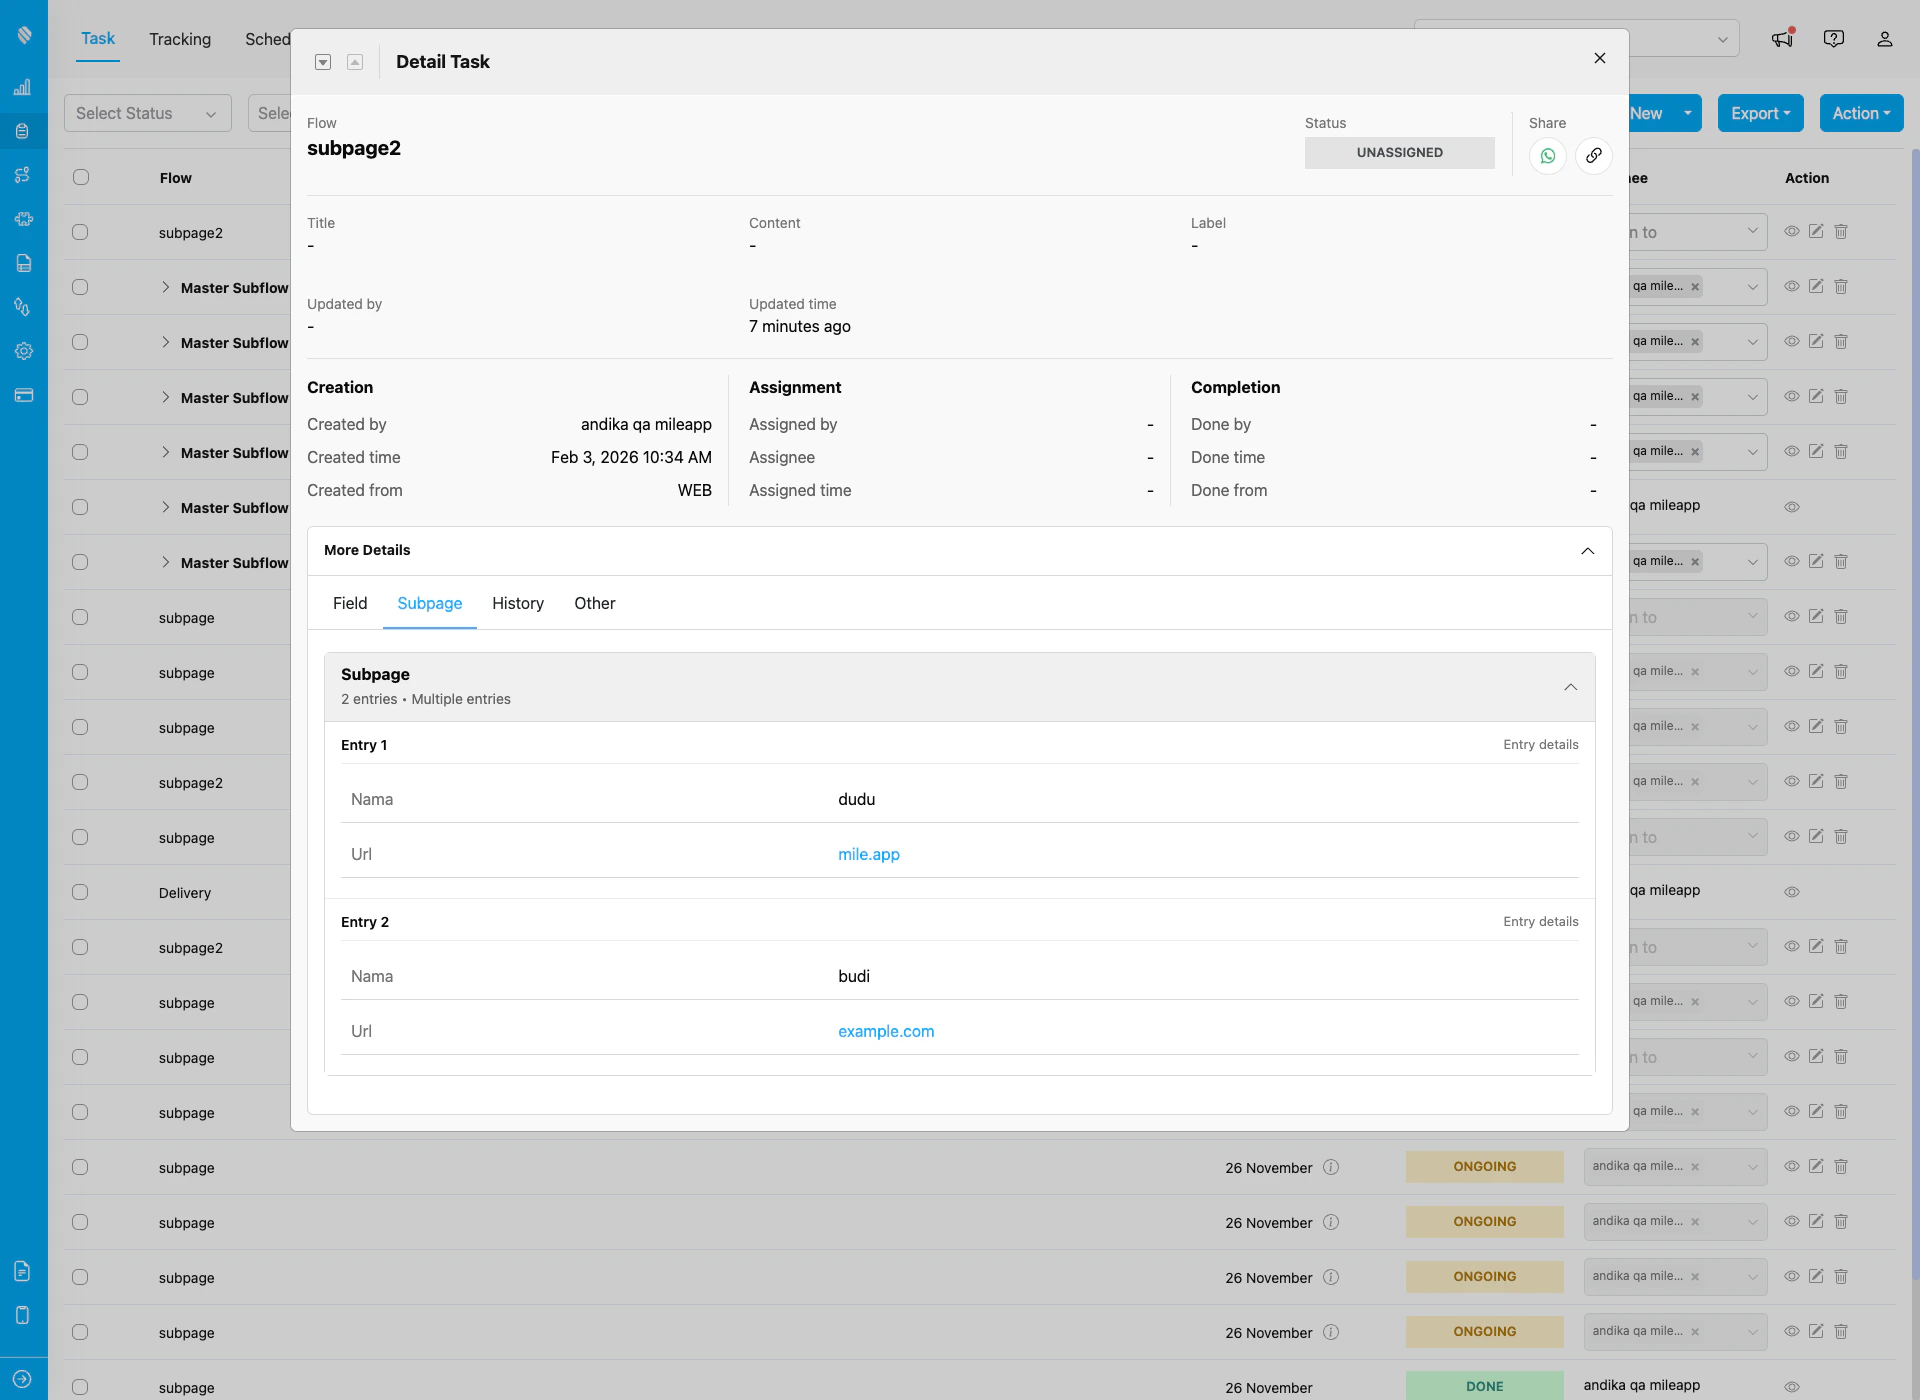
Task detail dialog showing Subpage tab with multiple entries (Entry 1 and Entry 2) displaying field data
How to View Subpage Data
- Open task detail: Click the eye icon on any task in the task list
- Expand More Details: Click the “More Details” button to expand the details section
- Click Subpage tab: The Subpage tab appears alongside Field, History, and Other tabs
- View entries: The Subpage tab shows:
- Entry count and summary (e.g., “2 entries • Multiple entries”)
- Expandable list of all subpage entries
- Each entry displays all field data with labels and values
Validation and Requirements
Entry-Level Validation
- Required Subpage: Must add at least one entry before saving task
- Optional Subpage: Can save task with zero entries
Field-Level Validation
- Required fields: Must be filled for each entry
- Input validation: Type-specific rules (email format, number range, etc.)
- Photo limits: Min/max photo count per entry
- Selection constraints: Min/max options for multi-select
Common Validation Messages
- “This field is required”
- “Please enter a valid phone number”
- “Minimum 1 photo required”
- “Must select at least 2 options”
- “Value must be between X and Y”
Tips for Using Subpage
Best Practices
- Fill required fields first: Complete all mandatory fields to avoid validation errors
- Use default values: Take advantage of pre-filled values when available
- Review before saving: Check all entries for accuracy before saving the task
- Delete unused entries: Remove incomplete or incorrect entries instead of leaving them empty
Working Efficiently
- Duplicate similar entries: Some implementations allow copying an entry to save time
- Check completion status: Use the field counter to track what’s left to fill (e.g., “3/5 fields completed”)
Common Scenarios
Scenario 1: Multi-Stop Delivery
Subpage: “Delivery Recipients” For each delivery stop:- Add new entry for each recipient
- Fill recipient name and phone
- Capture delivery photo
- Get signature
- Repeat for all stops
Scenario 2: Equipment Inspection
Subpage: “Equipment Checklist” For each equipment item:- Add entry with equipment ID
- Select condition (Good/Fair/Poor)
- Record measurement or reading
- Take inspection photos
- Add notes if needed
Scenario 3: Quality Control
Subpage: “QC Checkpoints” For each checkpoint:- Review checkpoint criteria (view field)
- Select Pass/Fail
- Enter measurement value
- Attach evidence photo
- Add remarks
Troubleshooting
”Cannot save task” Error
- Check required entries: Ensure required subpage has at least one entry
- Fill required fields: Complete all mandatory fields in each entry
- Validate inputs: Fix any field-specific validation errors
Photos Not Uploading
- Check connection: Ensure stable internet connection
- File size: Images may be too large (typically max 5-10MB)
- Format: Use supported formats (JPG, PNG)
- Permissions: Grant camera/storage access on mobile
Entry Not Saving
- Required fields: Complete all required fields first
- Field validation: Fix any error messages shown
- Connection: Ensure you’re online when saving the task