The Setup Wizard checks for 16 platform permissions across Data Type, Data Source, Task, Flow, Automation, Team, and User categories. Make sure your role has these before starting.
Starting the Setup Wizard
When you open Transport Vendor Management for the first time, the Setup Wizard appears automatically. You can also re-run it later by clicking the gear icon (⚙) on the Order Management page and selecting Setup Wizard.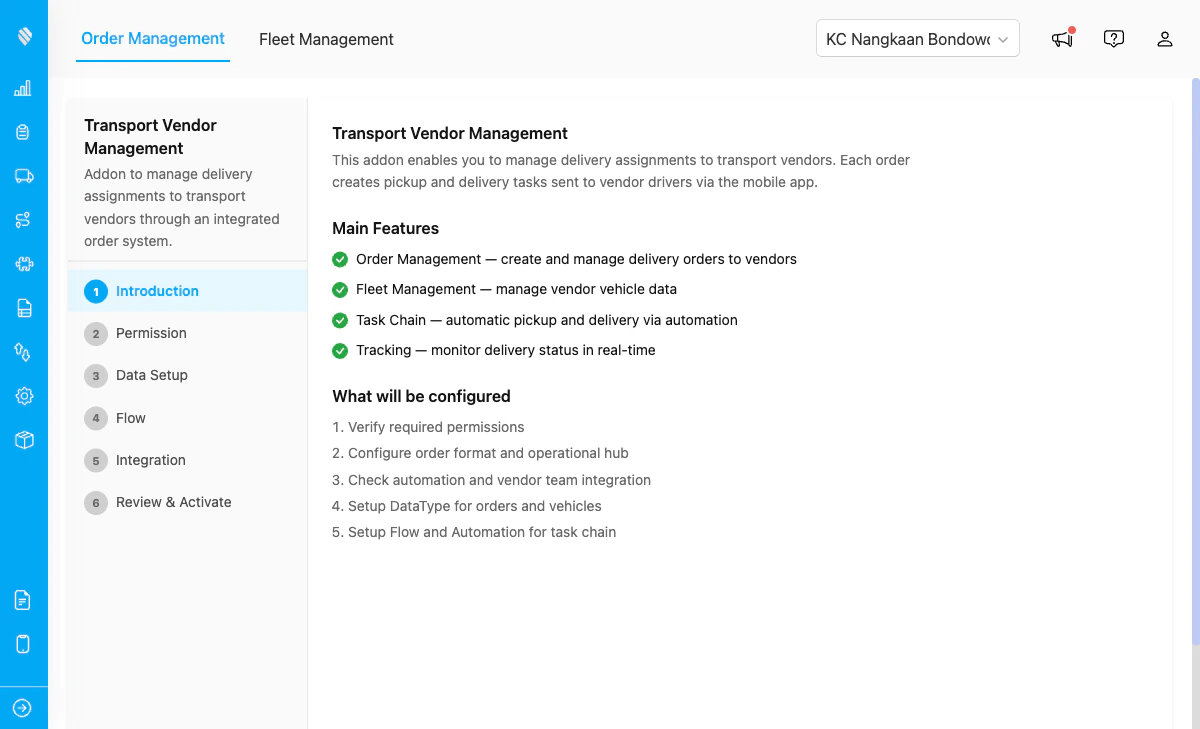
The Setup Wizard opens automatically on first access, showing 6 steps: Introduction, Permission, Data Setup, Flow, Integration, and Review & Activate.
Step 1: Welcome
The welcome screen explains the main features of Transport Vendor Management:- Order Management — create and manage delivery orders to vendors
- Fleet Management — manage vendor vehicle data
- Task Chain — automatic pickup and delivery via automation
- Tracking — monitor delivery status in real-time
- Verify required permissions
- Configure order format and operational hub
- Setup DataType for orders and vehicles
- Setup Flow and Automation for task chain
- Review and activate the add-on
Step 2: Verify Permissions
The wizard checks that your account has the required platform permissions.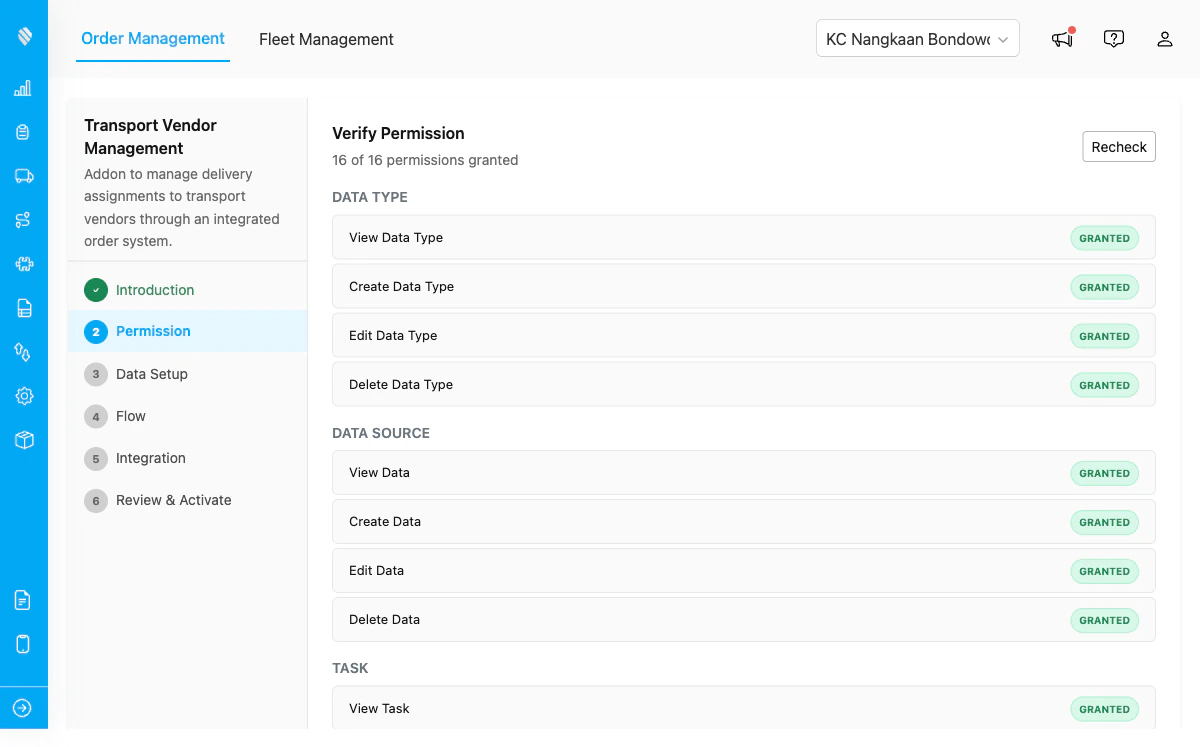
The Permissions step shows a checklist grouped by category. All required items must be granted before you can continue.
| Category | Permission |
|---|---|
| Data Type | View, Create, Edit, Delete |
| Data Source | View, Create, Edit, Delete |
| Task | View, Create |
| Flow | View, Create |
| Automation | View, Create |
| Team & User | View Team, View User |
Step 3: Data Setup
The wizard creates two data types to store order and vehicle information.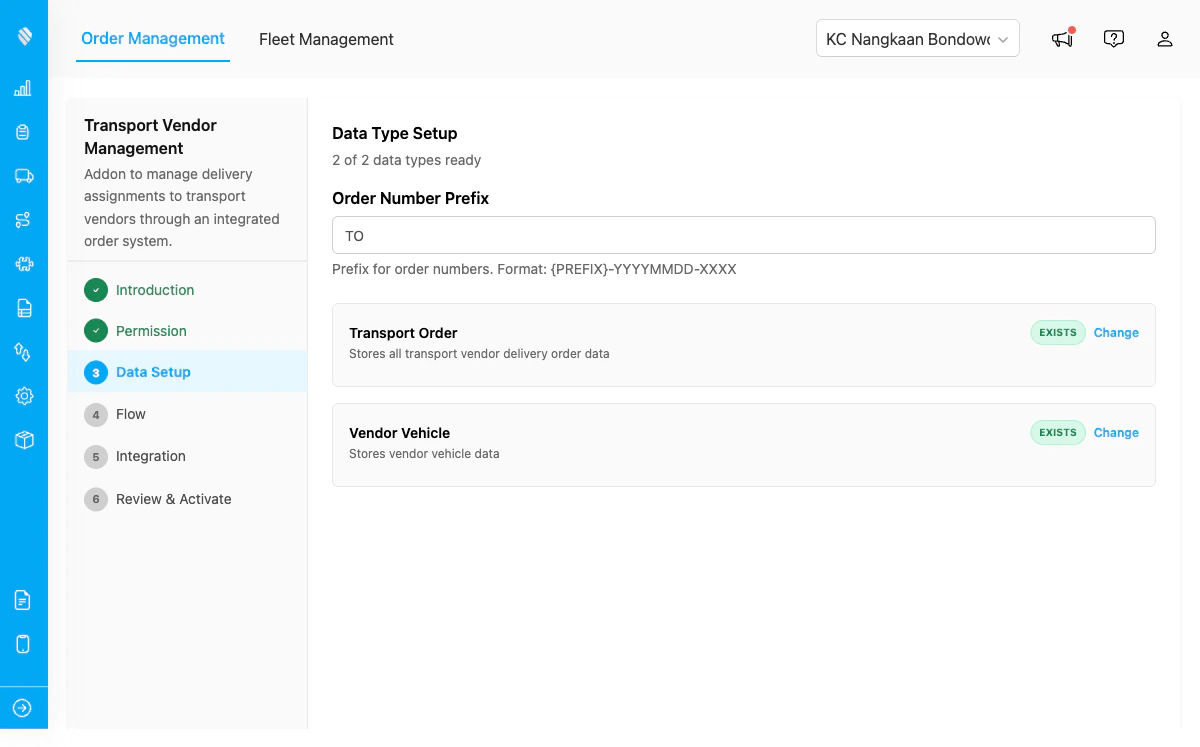
The Data Setup step showing Transport Order (24 fields) and Vendor Vehicle (10 fields) data types ready to be created.
You can configure the Order Number Prefix before creating the data types. The default prefix isTO, which generates order numbers in the format TO-YYYYMMDD-XXXX.
| Data Type | Description | Fields |
|---|---|---|
| Transport Order | Stores all delivery order data | 24 fields including order number, status, priority, vendor, pickup/delivery details, driver, vehicle, and items |
| Vendor Vehicle | Stores vendor vehicle data | 10 fields including vehicle code, plate number, type, capacity, drivers, and status |
Step 4: Flow Setup
The wizard creates two task flows for the delivery workflow.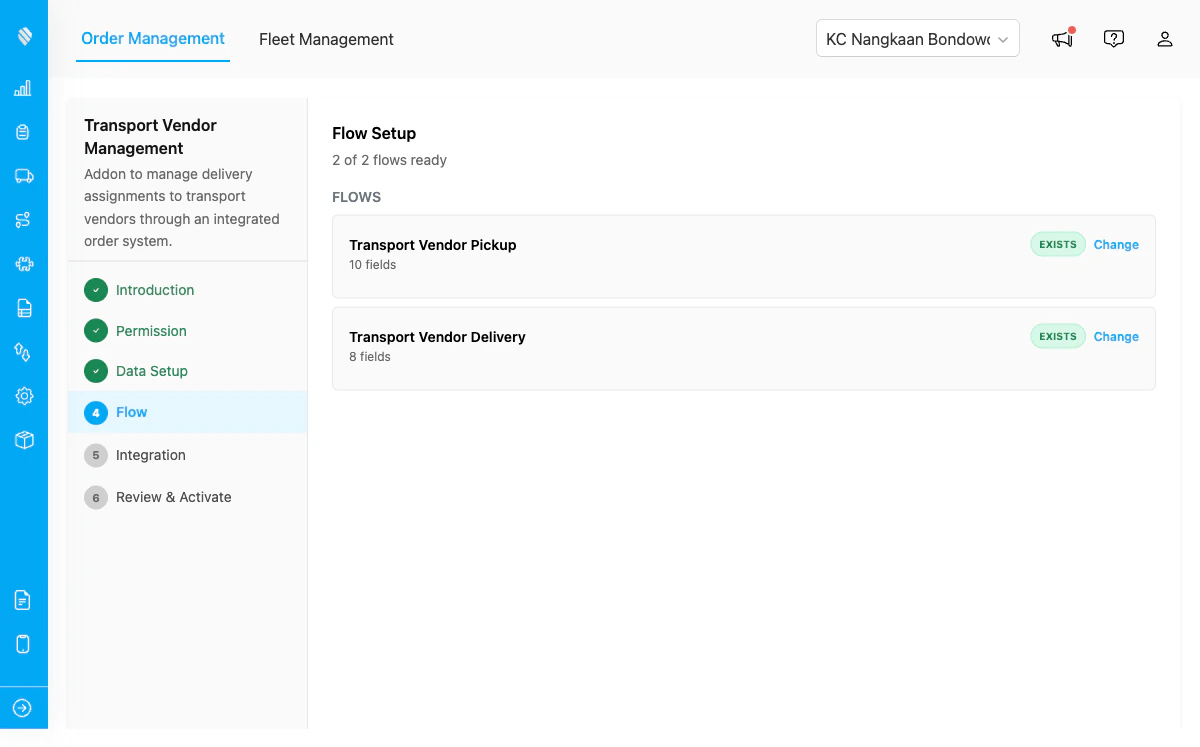
The Flow step showing the two task flows that will be created for pickup and delivery.
| Flow | Purpose |
|---|---|
| Transport Vendor Pickup | Flow for pickup tasks. Includes pickup address, contact details, order number, items, and delivery information |
| Transport Vendor Delivery | Flow for delivery tasks. Includes delivery address, contact details, order number, items, and a link to the transport order data source |
Step 5: Integration
The wizard creates two automations that enable the automatic task chain.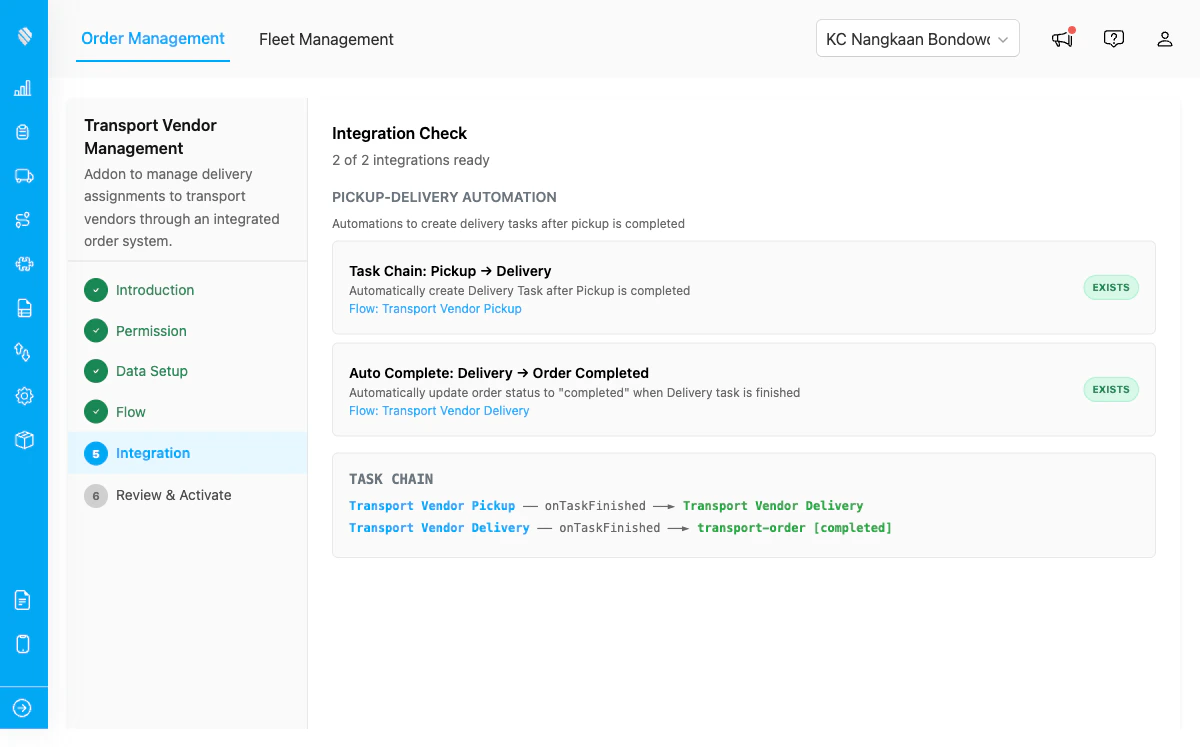
The Integration step showing the two automations that power the pickup-to-delivery chain.
| Automation | Trigger | Action |
|---|---|---|
| Pickup to Delivery | Pickup task completed | Creates a delivery task and assigns it to the same driver |
| Delivery Complete | Delivery task completed | Updates the transport order status to “completed” |
Do not modify or delete these automations manually. Doing so will break the automatic task chain and orders will not progress correctly.
Step 6: Review and Activate
The Review step shows a summary of all created resources. Verify everything looks correct.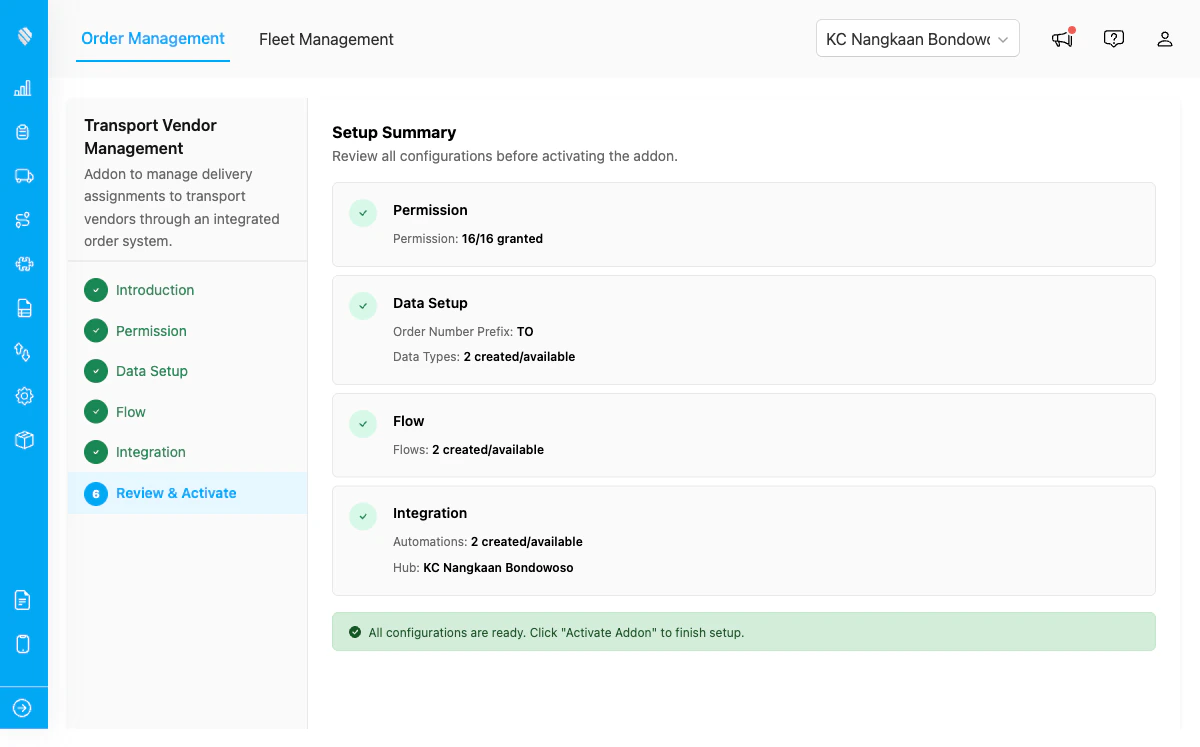
The Review step confirms all resources are created and the add-on is ready to activate.
Click Activate Addon to finish setup. The Order Management page loads immediately.