What is the Capture Component?
The Capture component renders as a button on the mobile app, labeled with the component title. When the worker taps the button, the current device date and time are saved to the task as an ISO 8601 datetime string with the device timezone. The worker controls the moment the timestamp is taken — no value is recorded until they trigger it. Use Cases:- Arrival time logging — Record the exact moment the worker reaches the customer location
- Departure time logging — Capture when the worker finishes and leaves the site
- Check-in / check-out — Stamp the start and end of a shift or task step
- Event time tracking — Log a specific event (machine started, sample taken, package opened) with audit-quality timestamps
- Task start / end time — Combine two Capture components on different pages to measure how long a task took
Capture Component Properties
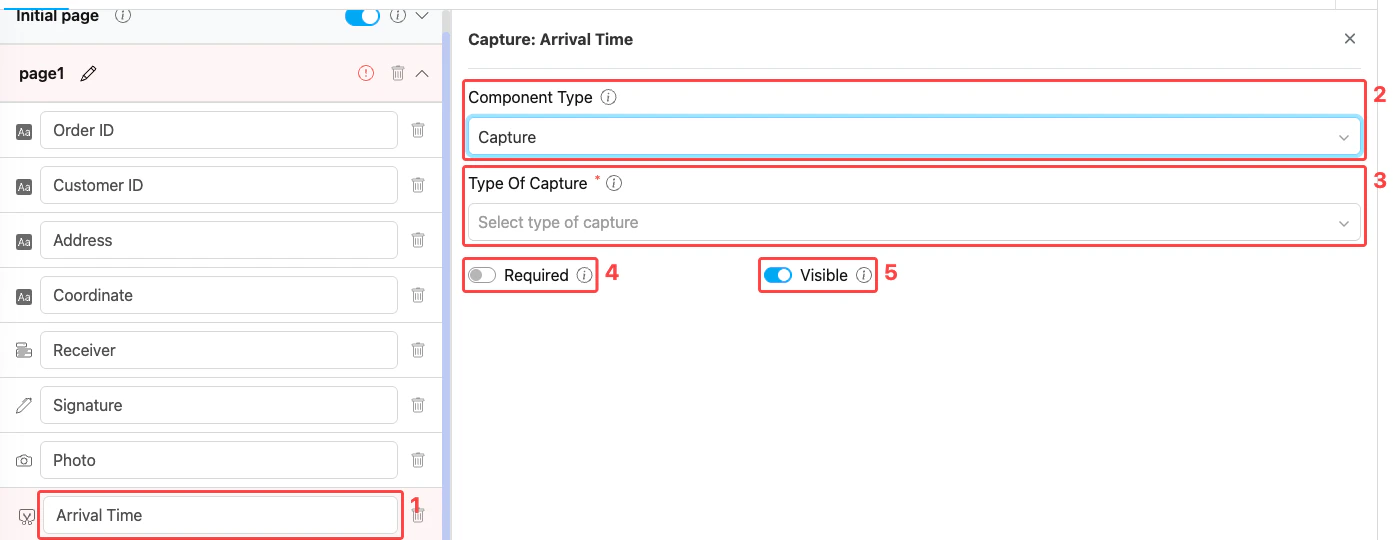
Capture component settings panel
- Title — Component label shown above the capture button on the mobile app (e.g., “Arrival Time”, “Departure Time”, “Check-in”)
- Component Type — Set to Capture
- Type of Capture — Must be Date Time. This is the only supported type — the captured value is always saved as an ISO 8601 datetime string with timezone.
- Required — When on, the worker must capture the timestamp before the task can be saved
- Visible — Controls display on Create Task (web and mobile) and View Task (mobile). Hidden components still export their data.
How to Configure the Capture Component
Step 1: Add the Component on a Mobile App Page
In the Flow Builder, open a Mobile App Page (e.g., Page 1). Click Add Component, then set Component Type to Capture. The Capture option is not available on the Initial Page.Step 2: Set the Title
Enter a descriptive Title (e.g., “Arrival Time”, “Departure Time”, “Service Start”). This label is shown above the capture button on the mobile app so the worker knows what the timestamp represents.Step 3: Select Type of Capture
Open the Type of Capture dropdown and select Date Time. This is currently the only supported type, but the selection is mandatory before the component can be saved.Step 4: Toggle Required and Visible
- Turn on Required when the timestamp is mandatory (e.g., arrival time must always be captured). Leave it off if the field is optional.
- Leave Visible on for normal use. Turn it off only when the component should be hidden from both the web admin form and the mobile app but still exported on completed tasks.
Step 5: Save
Click Save in the Flow Builder. The capture button is now live in any task created from this flow.How the Capture Works in Tasks
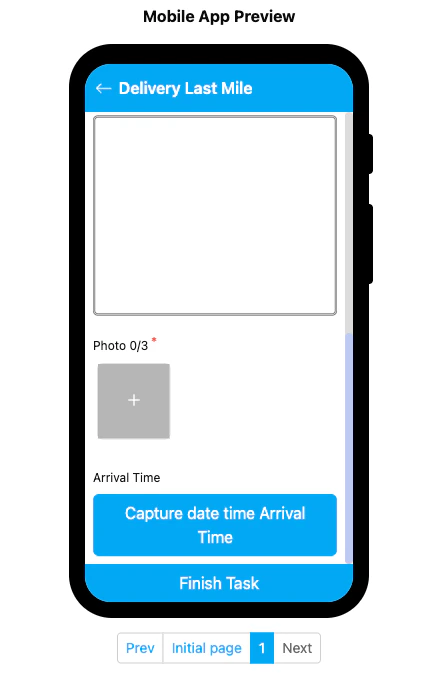
Capture component rendered on the mobile preview
- The Capture section shows the title and a blue button labeled
Capture date time <Title>(e.g.,Capture date time Arrival Time). - The worker taps the button when the moment they want to log occurs (arriving at the location, starting the activity, etc.).
- The current device date and time are saved to the task in ISO 8601 format including the device timezone.
- If Required is on, the worker cannot save the task until the timestamp has been captured.
Related
- Component: Timer — Measures elapsed time as a stopwatch (start/pause/reset) instead of stamping a single moment
- Component: Input (Date Time) — Manual date-time picker when the worker should choose the time rather than capture the current one
- Mobile App Page — Where Capture components must live
- Flow Builder Overview — Reference for every part of the Flow Builder