What is the Subflow Component?
A Subflow lets one Flow connect to another Flow as a reference. The two Flows stay independent — editing the referenced Flow does not change the Flow that points to it. When a task is created from the main Flow, MileApp automatically creates a separate task for the referenced Flow as well. The first task acts as the parent, and the new task created from the referenced Flow becomes its subtask. The Task list marks them accordingly so dispatchers can see which tasks belong together. Use Cases:- Approval / verification chains — Hand off part of a task to a different team through the subtask
- Quality control — Run multi-stage inspections as separate, trackable subtasks
- Data-collection hierarchies — Keep related but distinct datasets in their own tasks
Subflow Component Properties
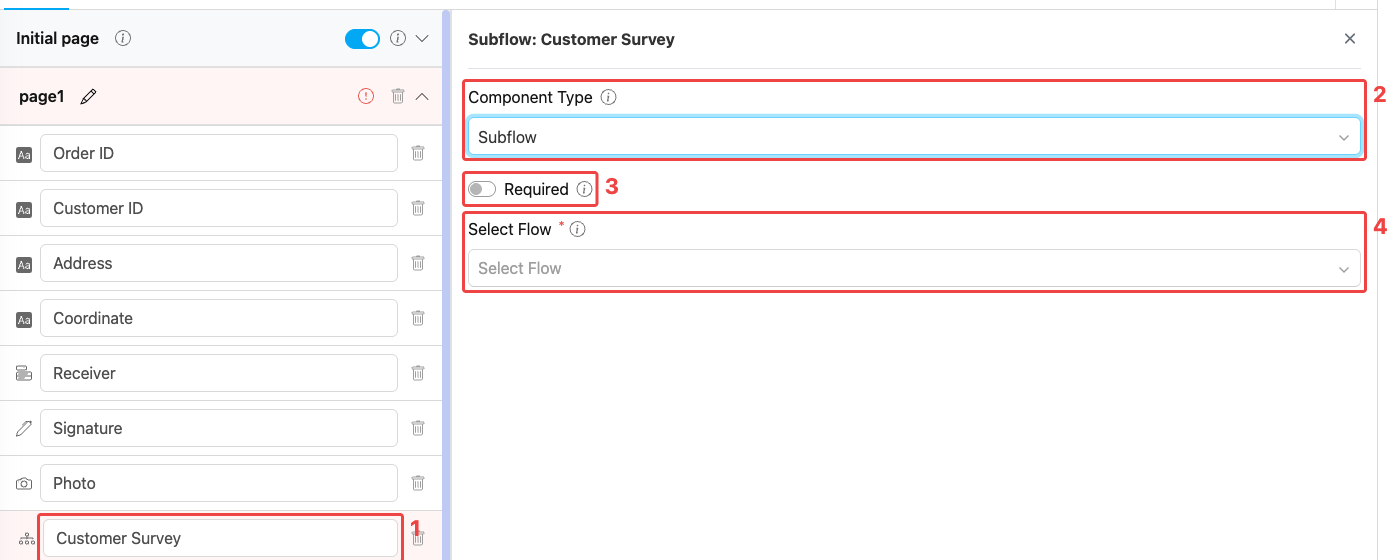
Subflow component settings panel
- Title — Component label shown on the Subflow card on the mobile app (e.g., “Customer Survey”, “Quality Inspection”)
- Component Type — Set to Subflow
- Required — When on, the main task cannot be marked Done until the linked subtask reaches status Done
- Select Flow — Dropdown listing every Flow in your organization. Pick the Flow that will run as the subtask. After a Flow is picked, the Field Mappings section appears.
Visible toggle is not exposed on Subflow. The Subflow card is always shown on the page it is placed on; if you do not want a Subflow to render, remove the component.
Selecting a Child Flow
When you click Select Flow, a dropdown lists every Flow in your organization.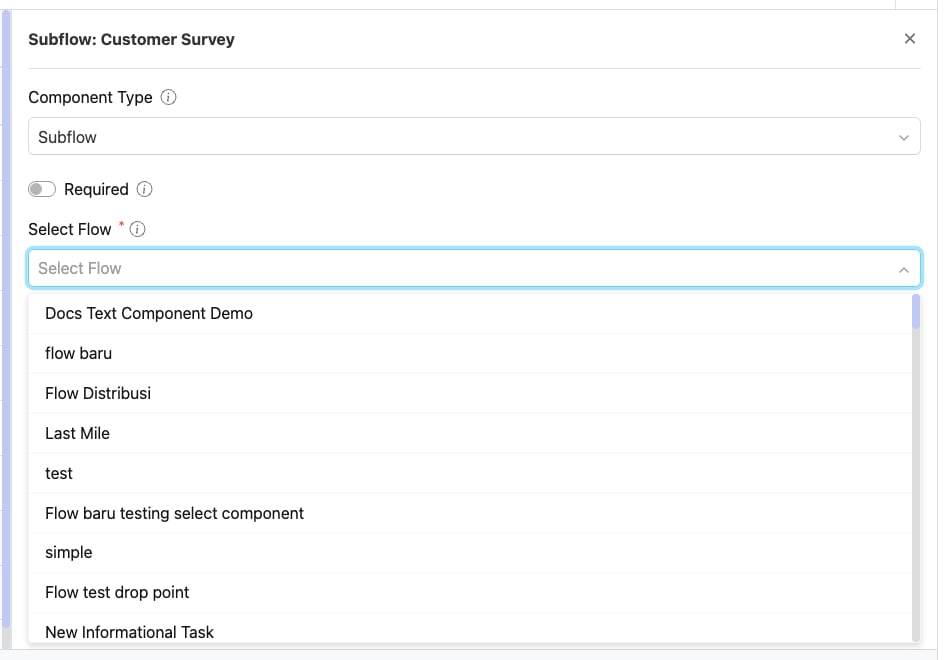
The Select Flow dropdown lists Flows you can reference
- Current Flow — The Flow you are currently editing is disabled (a Flow cannot reference itself — circular reference).
- Flow with nested Subflow — Any Flow that already contains a Subflow component is disabled (nested Subflows are not supported).
Field Mappings
After you pick a child Flow, a Field Mappings section appears. It lists every mappable component from the child Flow’s Initial Page (page0).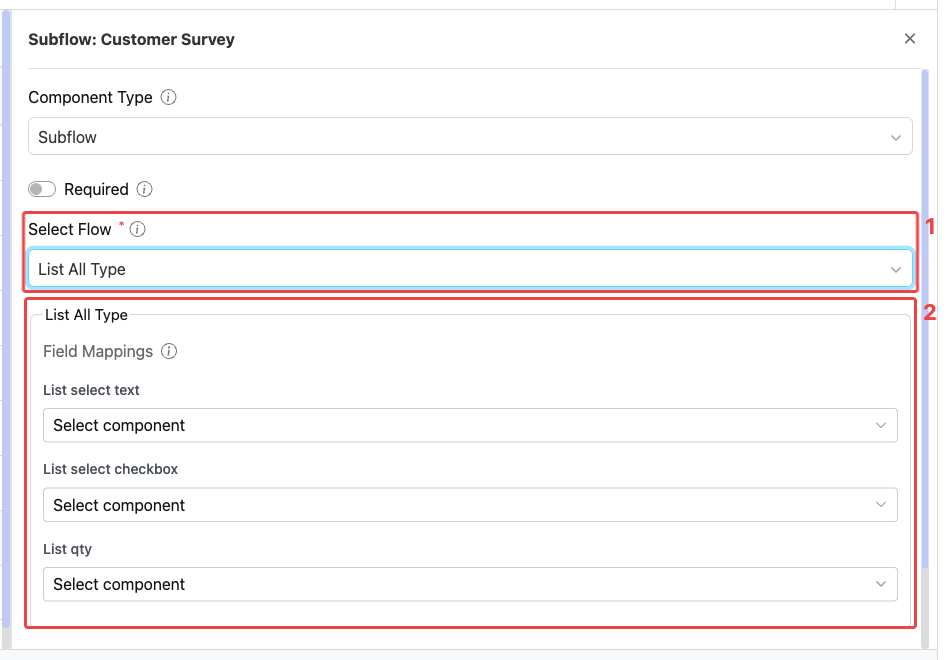
After picking a Flow, the Field Mappings section appears (1: selected Flow, 2: mapping rows)
- View components are not listed in field mapping — they only display information and have no data to map.
- Field mapping uses fields from the parent Flow’s Initial Page only. Once an Initial Page field is referenced by any mapping, the Flow Builder automatically marks it as Required on the parent.
- Every child field shown in the list must be assigned a parent field before the Flow can be saved.
Field Type Compatibility
The Select component dropdown for each child field only lists parent fields whose type is compatible:| Child Flow Field (Subflow) | Compatible Parent Flow Fields |
|---|---|
| Input – String | Input (String, Date, Datetime, Time, Address, Geolocation, PhoneNumber, URL, Currency), Select |
| Input – Numeric | Input (Numeric) |
| Input – Date | Input (Date) |
| Input – Datetime | Input (Date, Datetime) |
| Input – Time | Input (Time) |
| Input – PhoneNumber | Input (PhoneNumber) |
| Input – Geolocation | Input (Geolocation) |
| Input – URL | Input (URL) |
| Input – Currency | Input (Currency) |
| Input – Address | Input (String, Address) |
| Select | Select |
| Photo | Photo, Signature |
| Signature | Photo, Signature |
| Bill | Bill |
| List | List |
| Timer | Timer |
| Voice Note | Voice Note |
| Capture | Capture |
How to Configure the Subflow Component
Step 1: Add the Component on a Mobile App Page
In the Flow Builder, open a Mobile App Page (e.g., Page 1). Click Add Component, then set Component Type to Subflow. The Subflow option is not available on the Initial Page.Step 2: Set the Title
Enter a descriptive Title (e.g., “Customer Survey”, “Delivery Inspection”). The title appears on the Subflow card the field worker taps on the mobile app.Step 3: Pick a Flow
Open the Select Flow dropdown and pick the Flow you want to run as a subtask. Disabled rows show why a Flow cannot be selected.Step 4: Map Each Field
The Field Mappings section appears with one row per mappable child field. For each row, pick a parent field from Select component. The dropdown is filtered to compatible types only.Step 5: Toggle Required (Optional)
Turn Required on if the main task should not be completable until the subtask is finished.Step 6: Save
Click Save in the Flow Builder. Every task created from this Flow will now automatically spawn the configured subtask.How the Subflow Works in Tasks
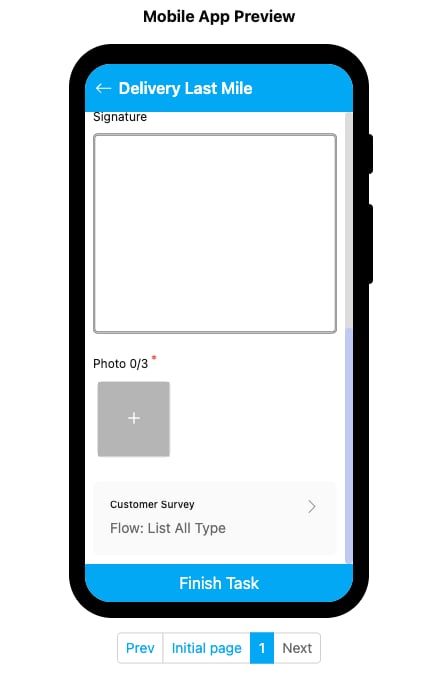
The Subflow component rendered as a card with the child Flow’s title
- Sees a card on the page showing the Subflow’s title and the referenced Flow name.
- Taps the card to open the subtask (a real, separate task linked to the parent).
- Sees the mapped fields pre-populated from the main task’s values.
- Completes the subtask and returns to the main task.
- If the Subflow is Required, the main task cannot be marked Done until the subtask reaches status Done.
Validation
The Flow Builder and backend run these checks:- Page restriction — Subflow components cannot be added to or moved to the Initial Page.
- Nested-subflow block — Flows that contain a Subflow component cannot themselves be selected as a Subflow target.
- Circular reference block — A Flow cannot reference itself.
- Required mappings — Every child field listed in the mapping section must have a parent field assigned before the Flow can be saved.
- Type compatibility — Each mapping is filtered to compatible parent field types only.
- Required completion — If
requiredis true, the main task cannot transition to Done until the subtask is Done.
Related
- Subflow in Task — How Subflow tasks appear and behave in the Task list
- Mobile App Page — Where Subflow components must live
- Component: Subpage — Inline repeating entries (without spawning a subtask)
- Flow Builder Overview — Reference for every part of the Flow Builder