Required permission:
- View flows
- View automation
- Create automation
- Edit automation
Opening the Setup Wizard
Navigate to the Discord Notification add-on from the sidebar. If no configuration exists, the setup wizard opens automatically.Step 1: Introduction
The first step shows an overview of what the add-on does and checks your organization’s resource availability.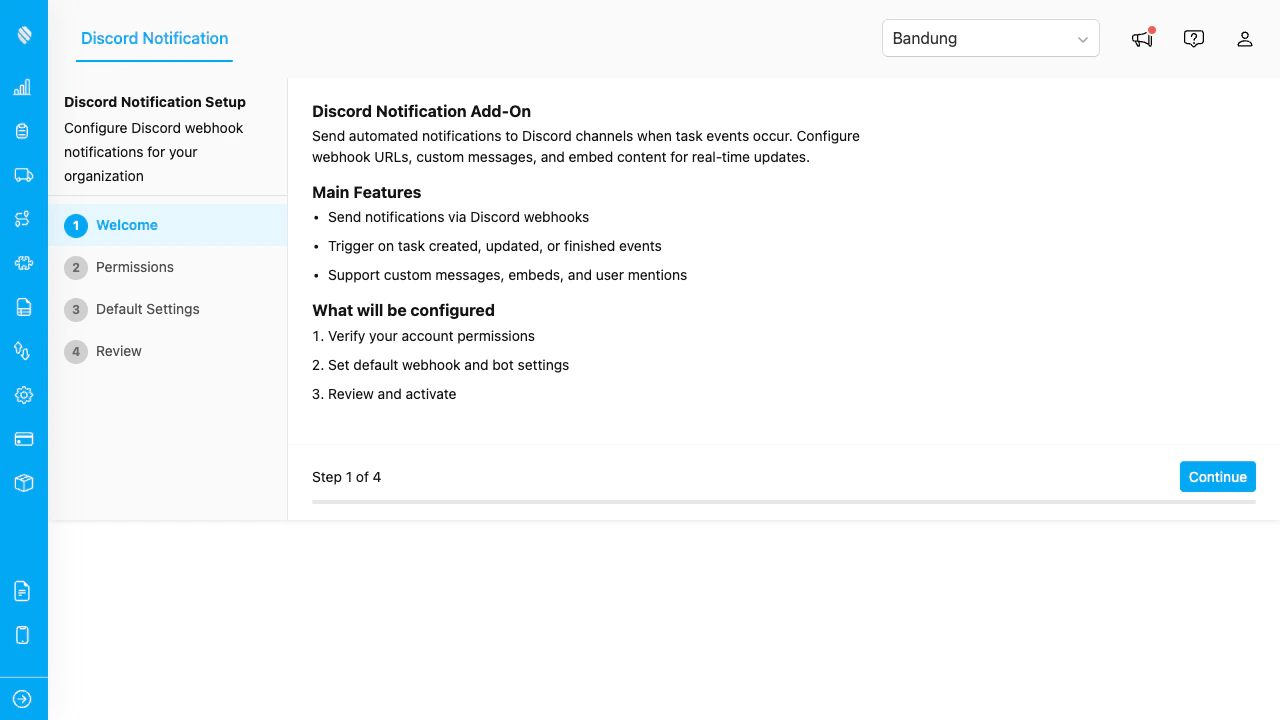
The introduction step lists the main features and verifies that your organization has available quota for automations.
The resource check confirms you have available:- Data Types quota
- Automations quota
- Personal Access Tokens quota
Step 2: Permissions
The wizard verifies that your account has the required permissions.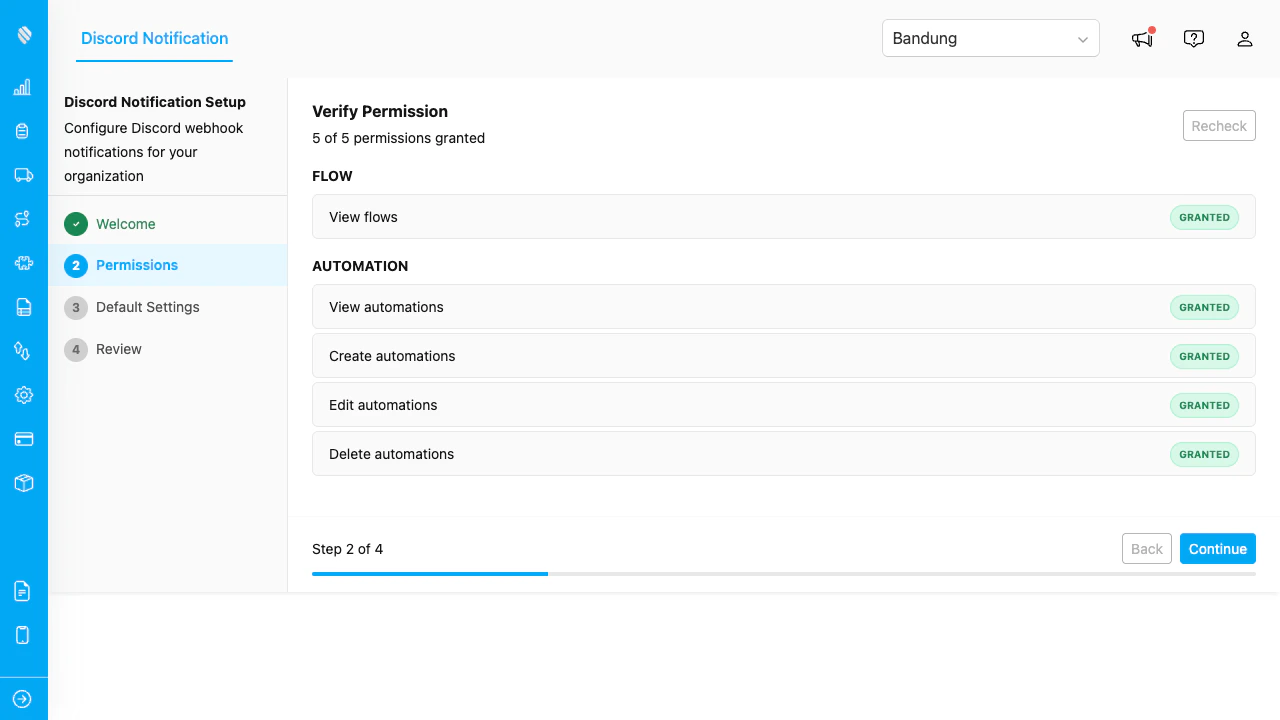
Each permission is shown with a Granted or Denied badge. All required permissions must be granted before continuing.
Permissions checked:| Permission | Category |
|---|---|
| View flows | Flow |
| View automation | Automation |
| Create automation | Automation |
| Edit automation | Automation |
| Delete automation | Automation |
Step 3: Default Settings
Configure the webhooks and mentions that your automations will use.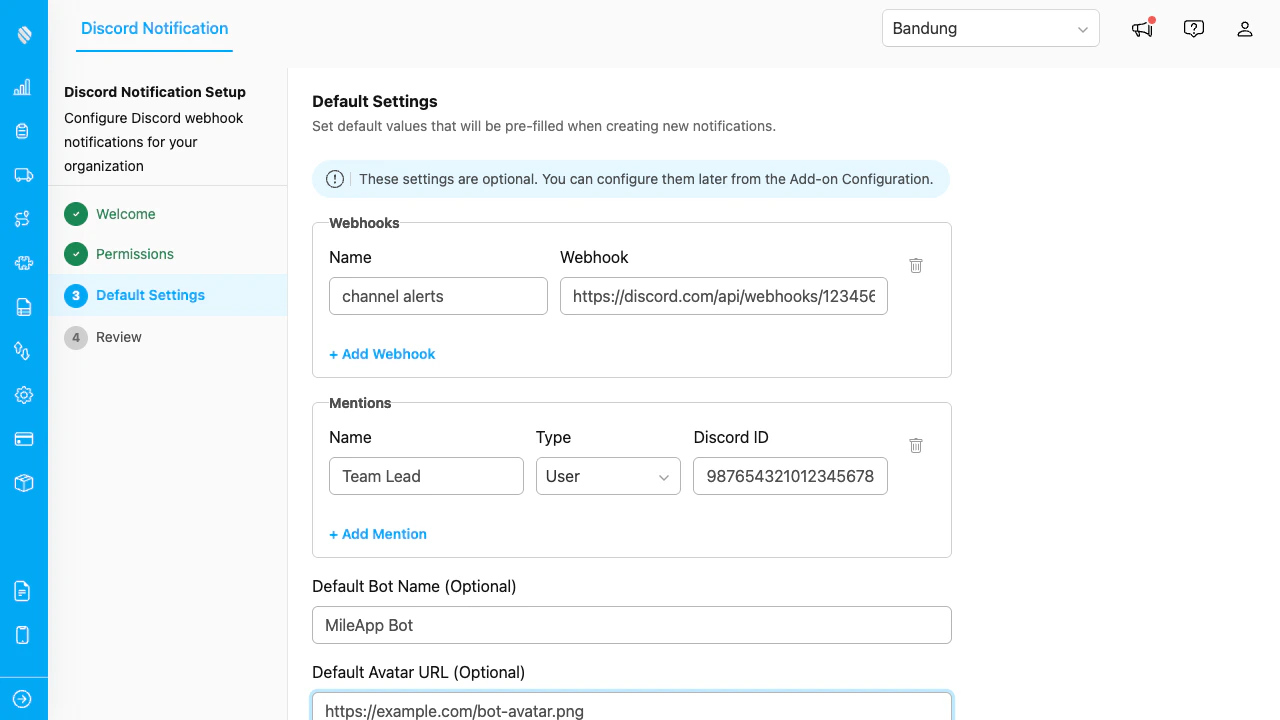
Add one or more Discord webhooks and optionally configure mentions and a default bot identity.
Adding a Webhook
- Click Add Webhook.
- Enter a Name (e.g., “General Channel”, “Alerts”).
- Paste the Discord Webhook URL.
Adding a Mention
Mentions let you tag Discord users or roles inside messages.- Click Add Mention.
- Enter a Name (a friendly label, e.g., “Team Lead”).
- Select Type: User or Role.
- Enter the Discord ID.
Default Bot Settings
- Default Bot Name: The display name shown on Discord messages. If left empty, Discord uses the webhook’s default name.
- Default Avatar URL: An image URL for the bot avatar. If left empty, Discord uses the webhook’s default avatar.
Step 4: Review
The final step shows a summary of everything you configured.
Review all settings before activating the add-on.
Verify that:- All permissions are granted
- At least one webhook is configured
- Mentions and defaults look correct