Required permission:
- View Sales Target - Manager
Exporting Targets
To download your current targets as an Excel file:- Go to the Sales Target Manager page.
- Apply any filters if you want to export a specific subset of targets.
- Click the Export button in the filter bar.
- The file will be downloaded automatically in
.xlsxformat.
Importing Targets
Importing allows you to create multiple targets at once from an Excel file. Follow these steps:1. Download the Template
- Click the Import button in the filter bar.
- In the upload dialog, click Download Template to get the Excel template.
- Save the template file to your computer.
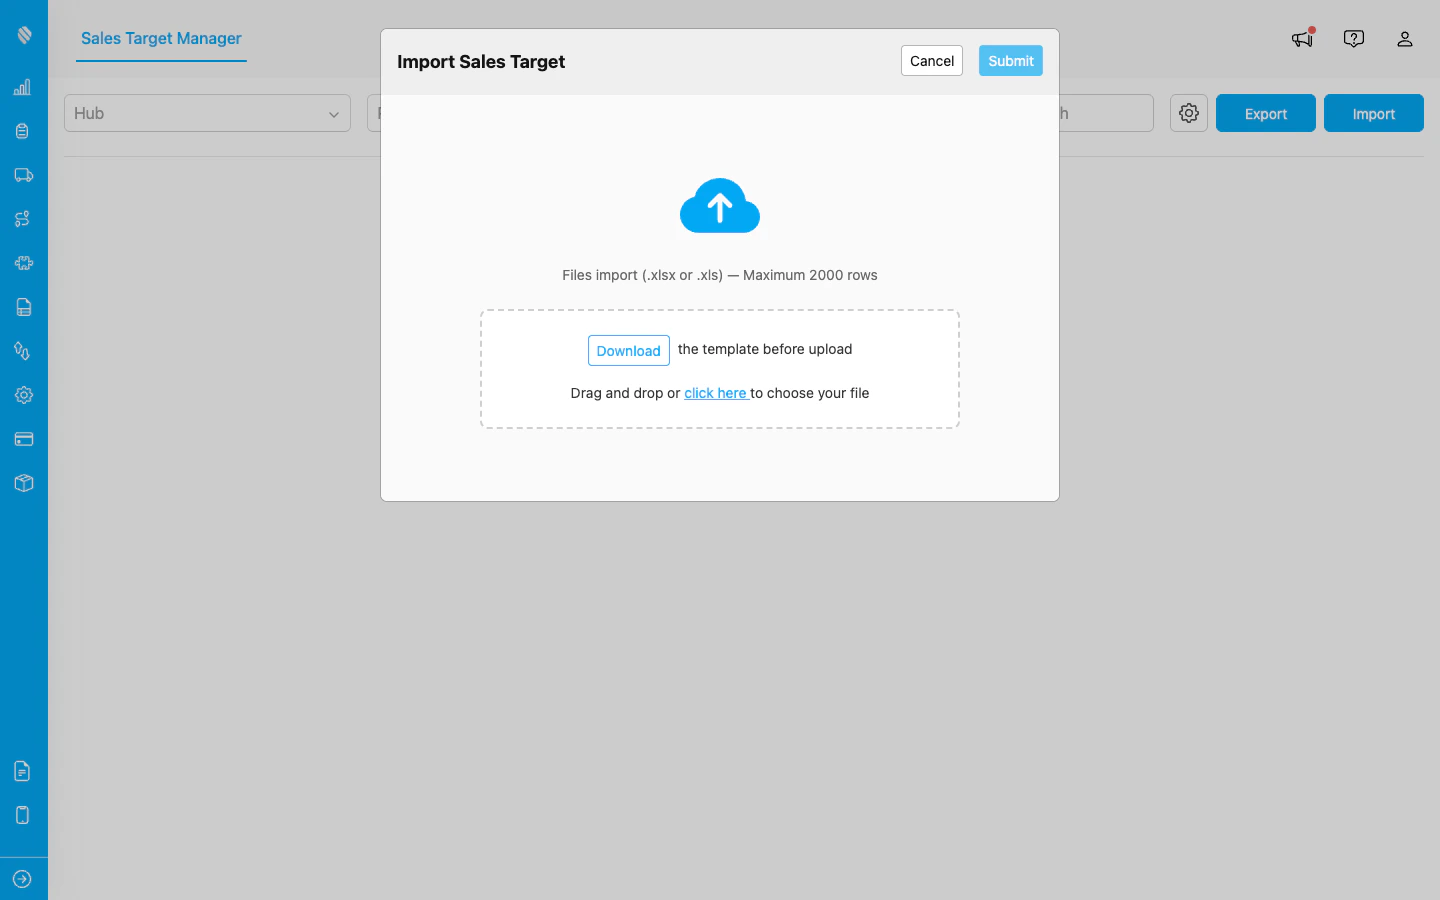
The Import dialog shows the file upload area and a Download button to get the Excel template.
2. Fill In the Template
Open the template in Excel or any spreadsheet application and fill in your target data. The template includes the following columns:| Column | Required | Description |
|---|---|---|
| City/Hub | Yes | The location name |
| Store | Yes | The store or outlet name |
| Yes | The representative’s email address | |
| Active Days | Yes | Number of working days (1–31) |
| Total Target | Yes | The monthly sales goal |
| Category columns | No | One column per category (e.g., Food, Beverages) |
The category columns in the template match the categories you configured during setup. If you add new categories later, download a fresh template to get the updated columns.
3. Upload the File
- Drag and drop your filled Excel file into the upload area, or click to browse and select the file.
- Wait for the file to be processed. A progress indicator will show the upload status.
4. Preview and Review
After the file is processed, a preview table shows all the parsed data:- Select the target month and year using the dropdowns at the top of the preview.
- Review each row in the preview table.
- To edit a cell, hover over it and click the pencil icon that appears. Modify the value and click outside the cell to save.
- To remove a row, click the trash icon on that row.
- Rows with validation errors are highlighted in red. The error details appear below the affected row.
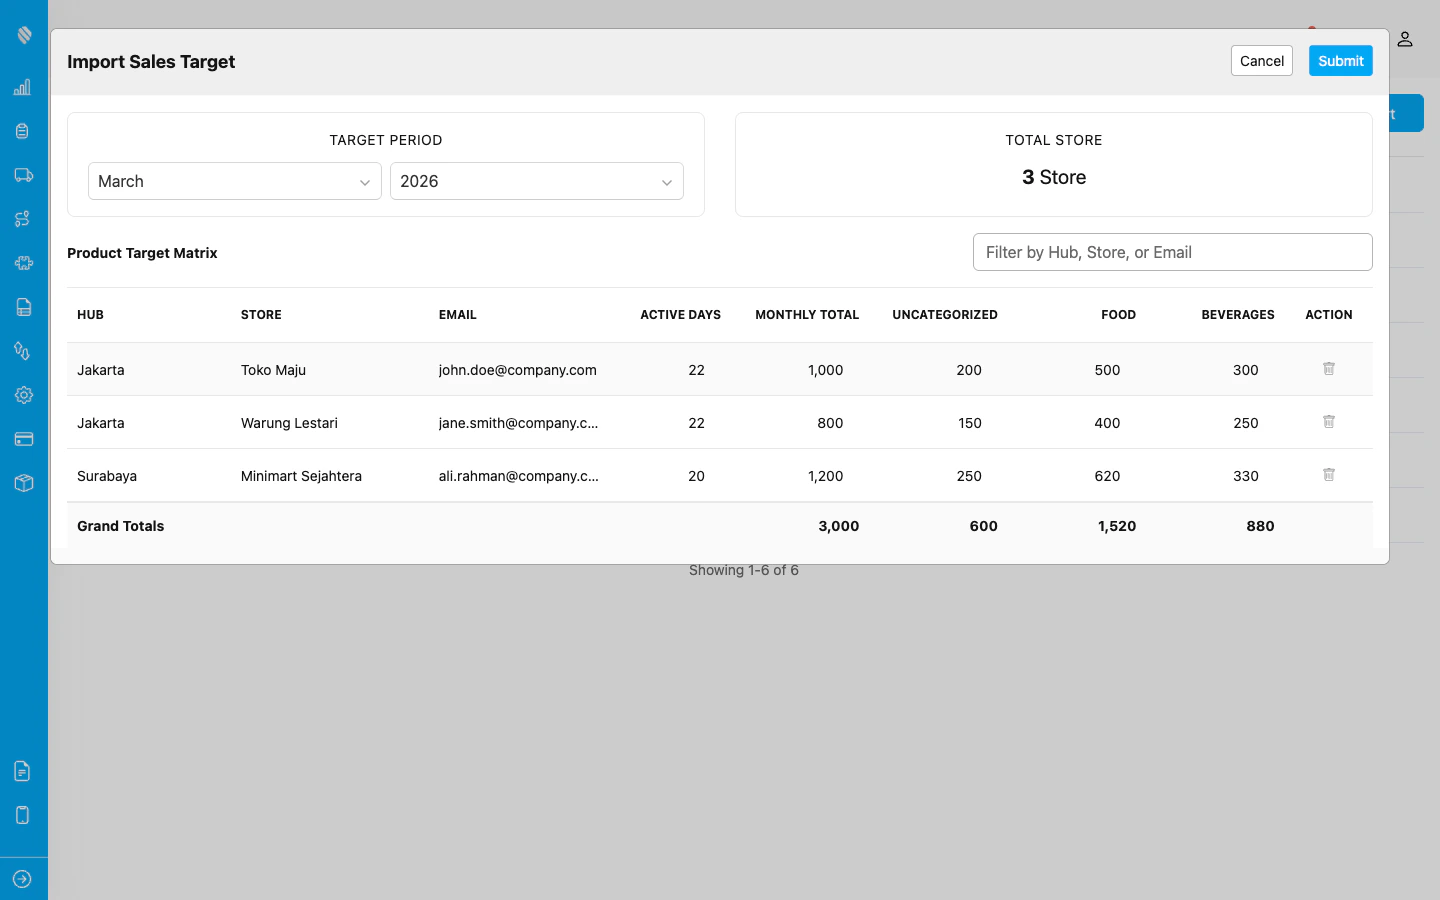
The preview table shows parsed data with the target period selector, total store count, and per-row actions.
5. Submit
Once you are satisfied with the data, click Submit to create all the targets. A success message will appear when the import is complete.Validation Rules
The following rules are checked during import:- City and Store are required fields and cannot be empty.
- Email must be a valid email address.
- Active Days must be a whole number between 1 and 31.
- Total Target must be a number greater than or equal to zero.
- Category targets cannot be negative.
- The sum of category targets should match the total target.
- Duplicate entries (same city, store, and email combination) will be flagged.
Import Limits
- Supported formats:
.xlsxand.xls - You cannot import targets for past periods (months that have already ended).