- View Sales Target - Manager
Starting the Setup Wizard
When you open Sales Target for the first time, the Setup Wizard appears automatically. The wizard guides you through all the required configuration in six steps.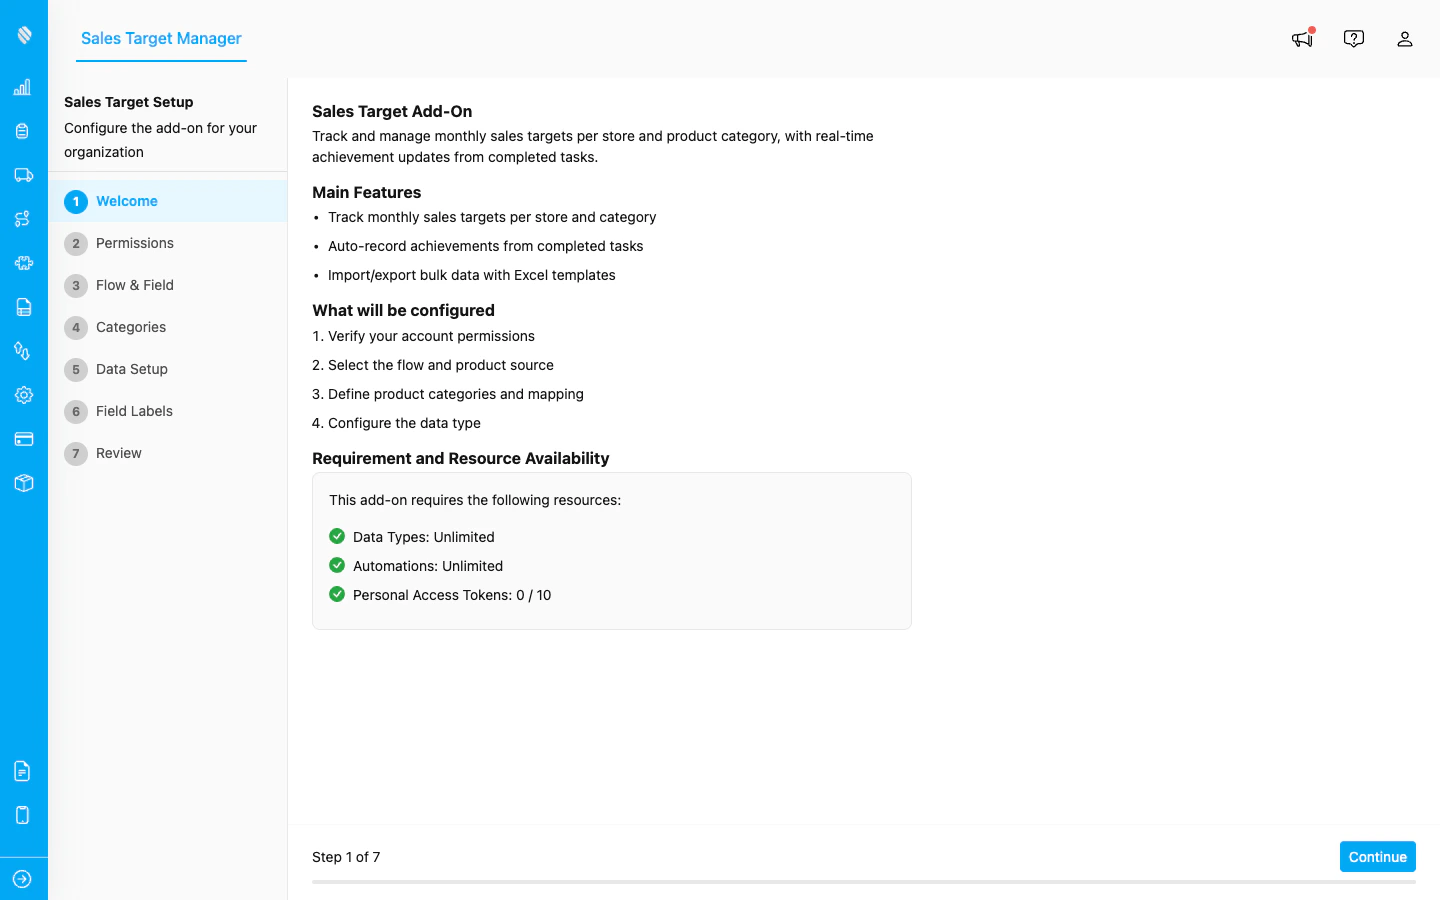
The Setup Wizard opens automatically on first access, showing all 7 steps in the left sidebar.
Step 1: Welcome and Permissions
The wizard first checks that your account has the platform permissions needed for the add-on to run. The following permissions are required:| Category | Permission |
|---|---|
| Flow | View flows |
| Data Type | View data types |
| Data Type | Create data types |
| Data Type | Edit data types |
| Data Source | View data records |
| Data Source | Create data records |
| Data Source | Edit data records |
| Data Source | Delete data records |
| Automation | View automations |
| Automation | Create automations |
| Automation | Edit automations |
| Other | View hubs |
| Other | Create access tokens |
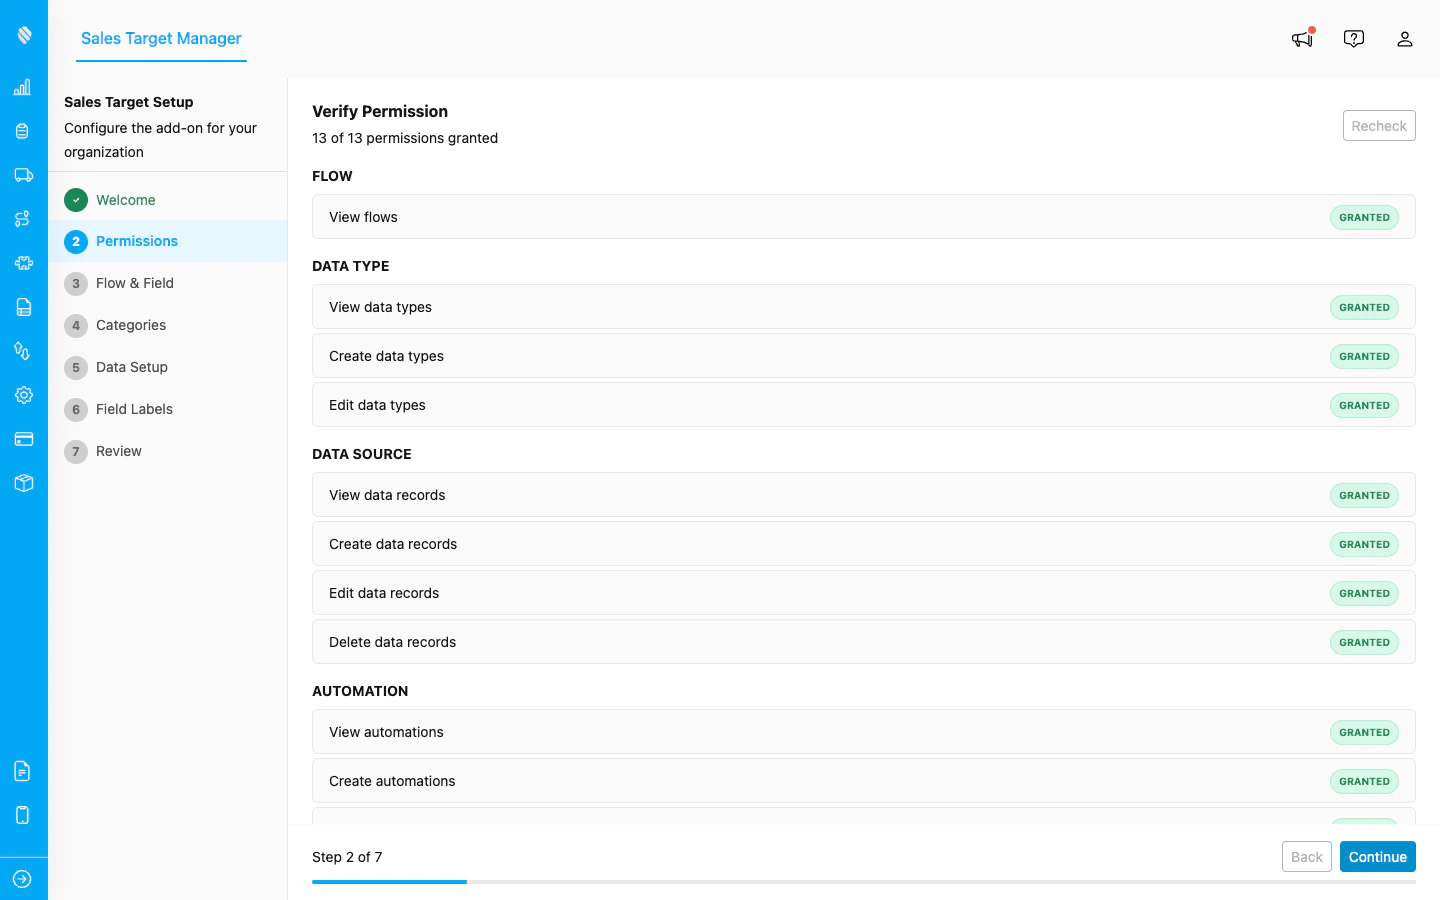
The Permissions step shows a checklist of required permissions. All items must be granted before you can continue.
Click Next to continue.Step 2: Select Your Flow and Sales Field
In this step, you connect Sales Target to the flow your sales reps use in the field.- Select a Flow: Choose the flow that captures your sales data. This is typically the flow your reps fill out when visiting a store.
- Select the Sales Field: Pick the component in your flow that records product sales. This can be a Bill component (an inline product list) or an Input component connected to a data source.
- Select the Store Field (optional): If your flow has a field for the store name, select it here. This allows Sales Target to track targets per store location.
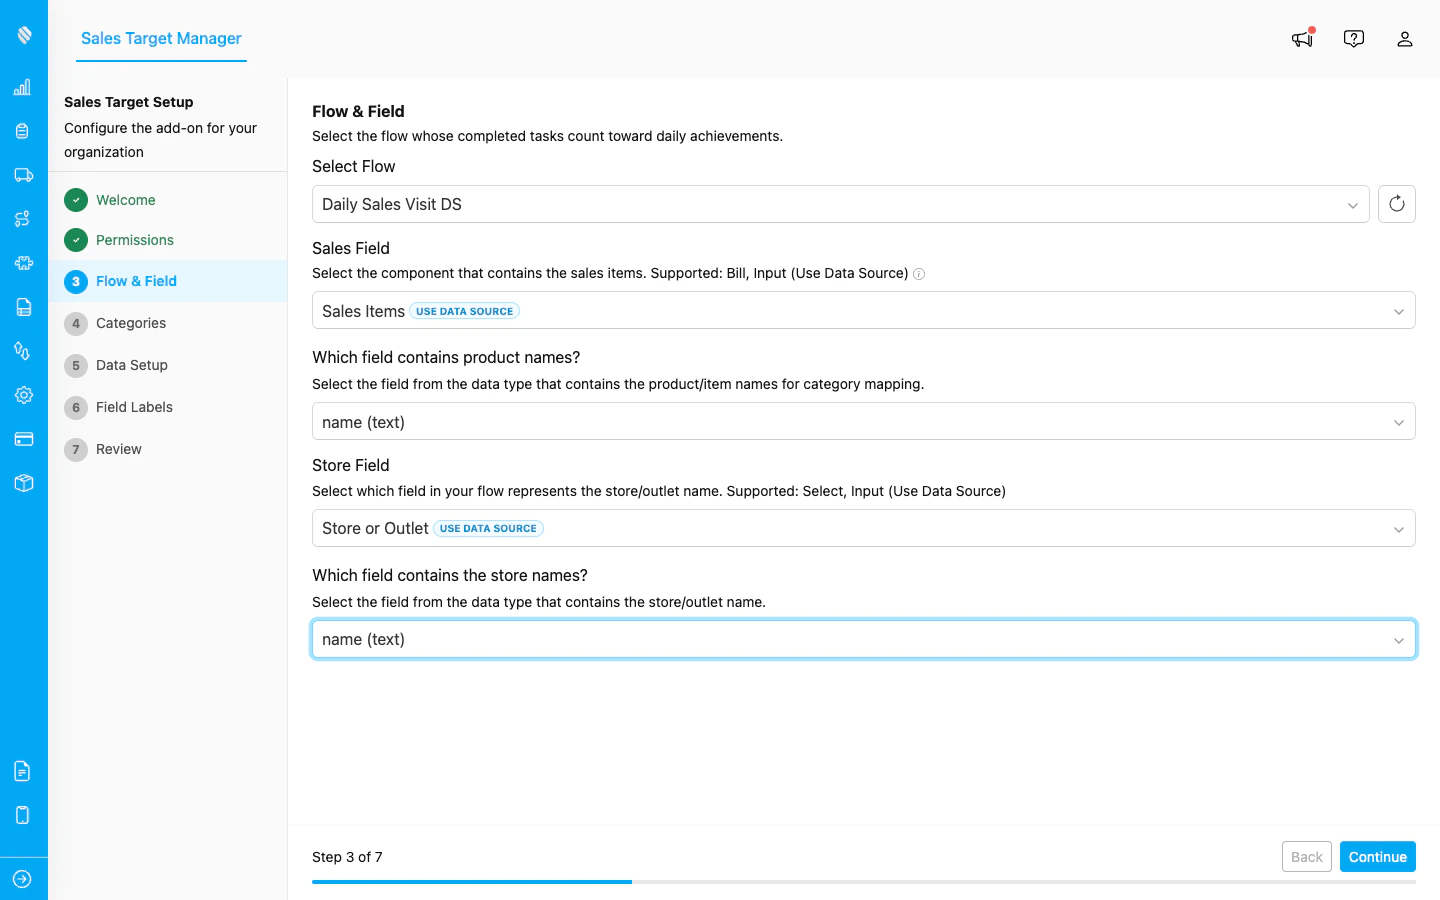
Select the flow, sales field, and store field that Sales Target will use to track achievements.
Step 3: Define Categories
Categories let you break down your sales targets by product group (e.g., Food, Beverages, Personal Care).- Type a category name in the input field and click Add.
- Repeat for each product category you want to track.
- Categories appear as badges. Click the X on a badge to remove it.
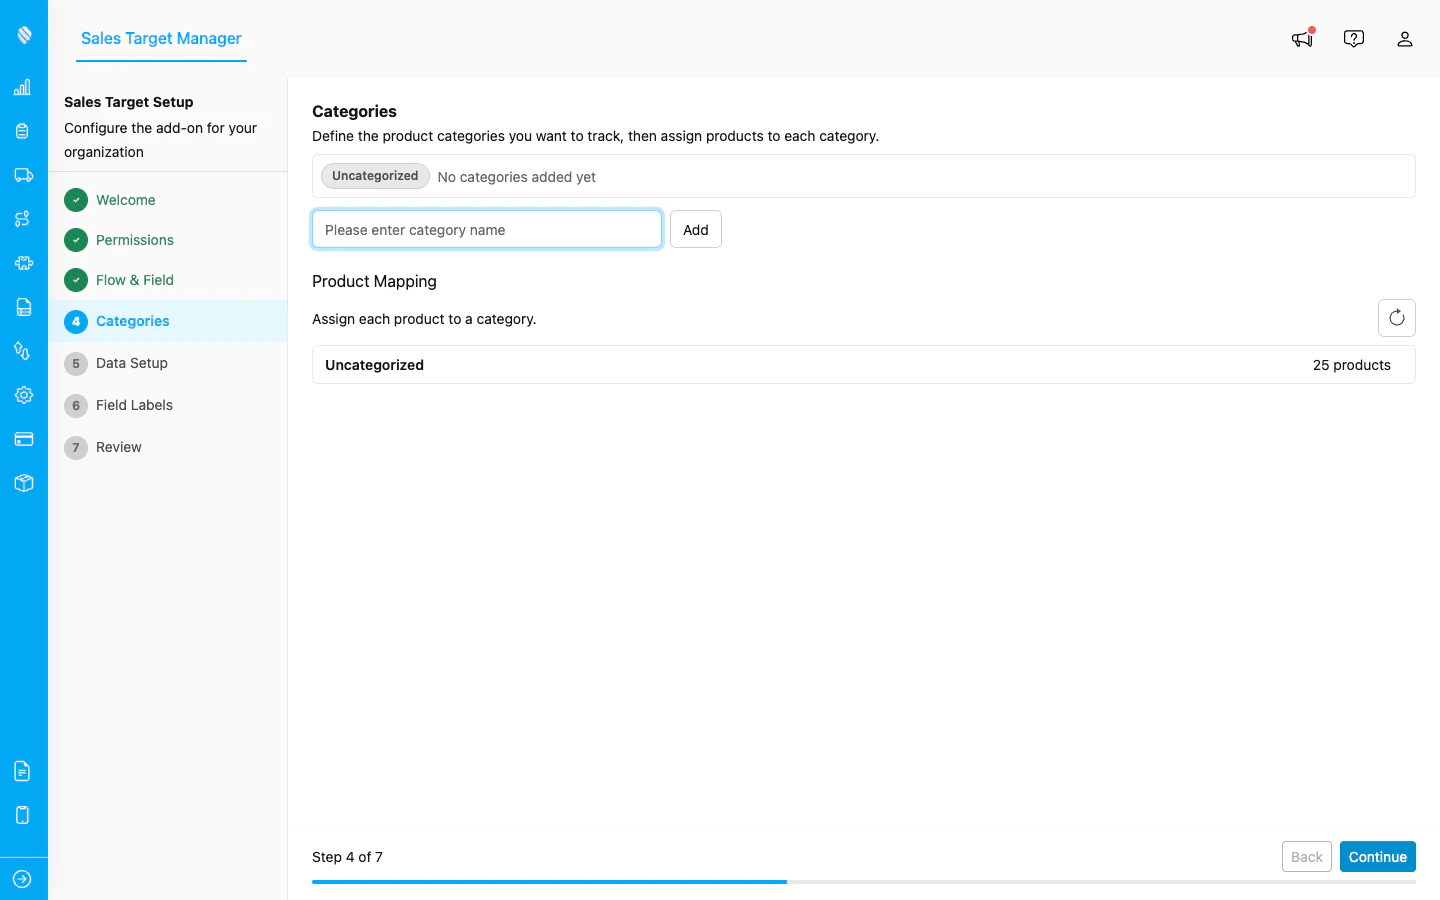
Add categories and use the Product Mapping section to assign products to each category.
After adding categories, the wizard will show a product mapping section. Here you assign each product from your flow to a category. Any products not assigned to a category will fall under Uncategorized.Step 4: Configure Data Source
Choose how Sales Target stores its data:- Auto-Create (recommended): The wizard automatically creates a data type called Addon-SalesTarget with all the required fields. This is the easiest option.
- Select Existing: Choose an existing data type that already has the necessary fields. Use this if you want to store target data alongside other information.
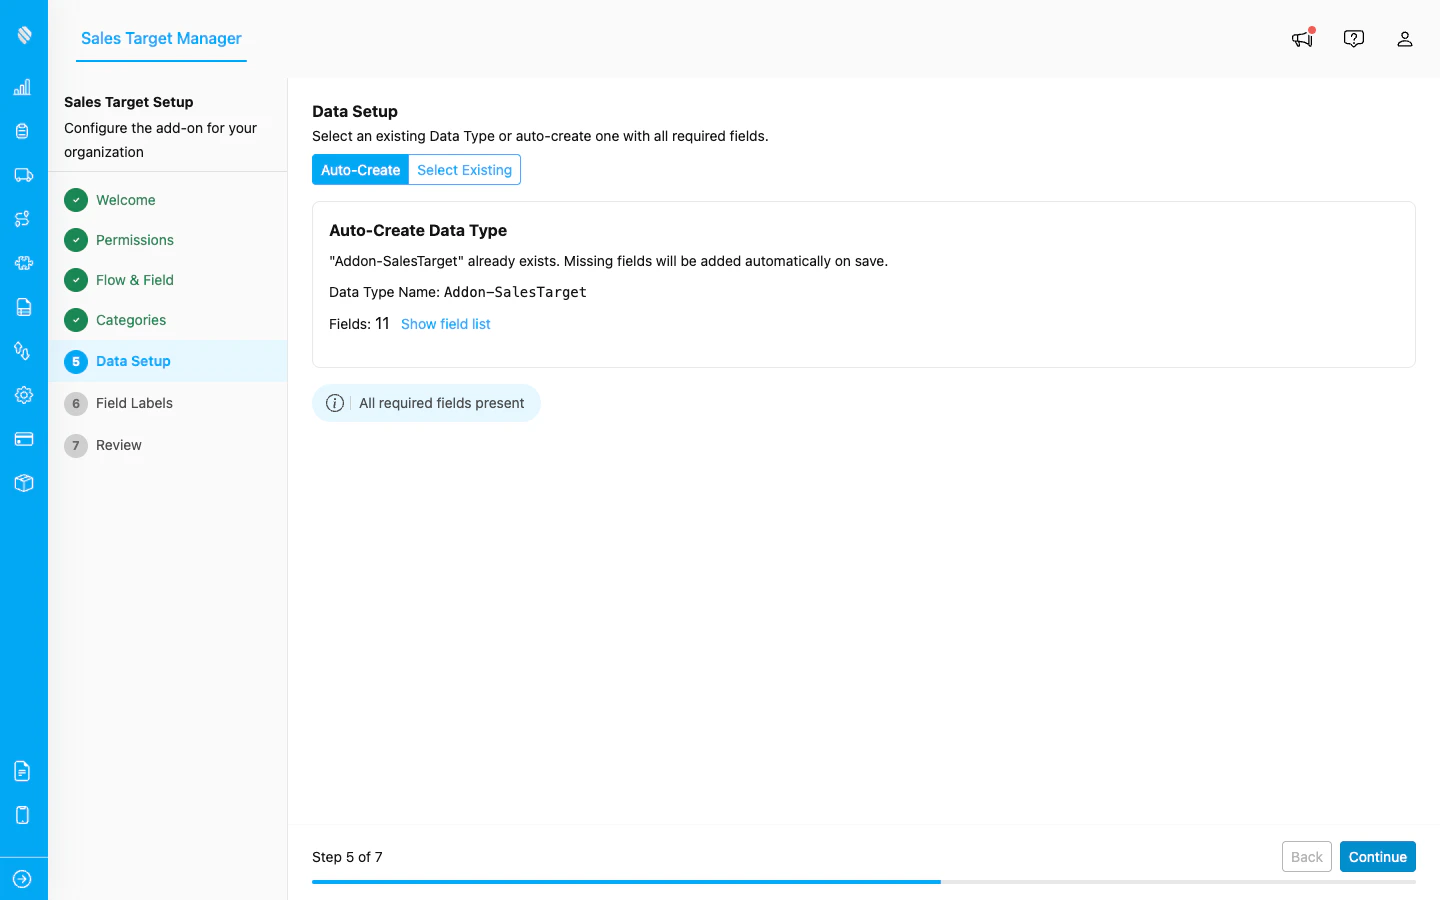
Choose Auto-Create to let the wizard set up the data type automatically, or select an existing one.
Step 5: Customize Field Labels
Customize the display names used throughout the add-on to match your organization’s terminology:- City Label: Default: “Hub”. Change this if your organization uses a different term (e.g., “City”, “Region”, “Area”).
- Store Label: Default: “Store”. Change this if needed (e.g., “Outlet”, “Branch”, “Location”).
- Representative Label: Default: “Representative”. Change this if needed (e.g., “Sales Rep”, “Agent”, “Driver”).
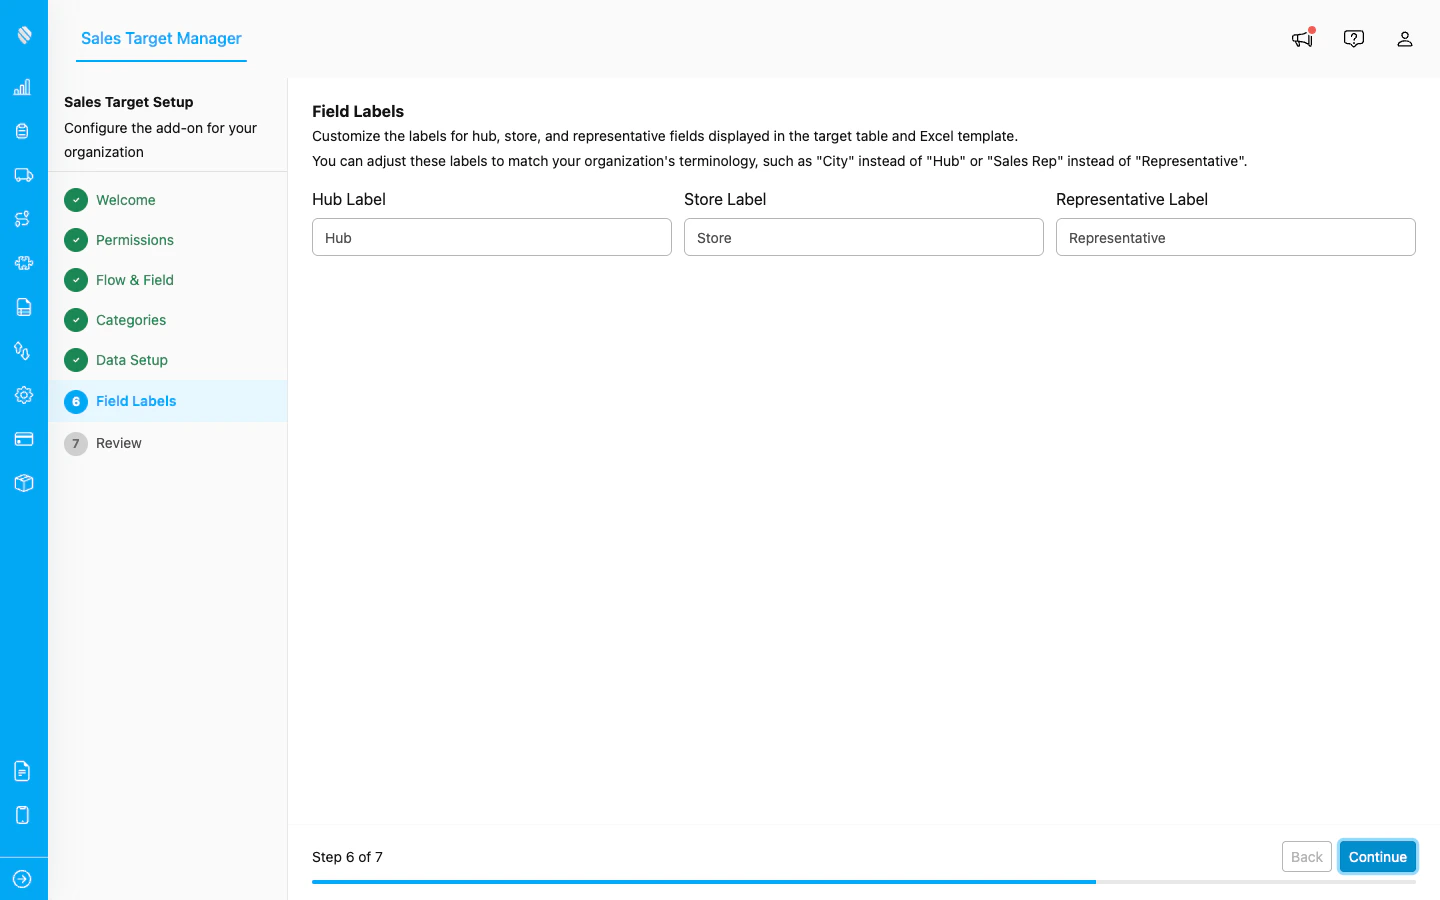
Customize Hub, Store, and Representative labels to match your organization’s terminology.
Step 6: Review and Save
Review all your configuration choices on the summary page. If everything looks correct, click Save to complete the setup.
The Review step shows a summary of all your settings. Click Activate Addon to complete setup.
After saving, the Setup Wizard closes and you are taken to the Manager page where you can start creating targets.Modifying Settings After Setup
You can update your configuration at any time after the initial setup:- Go to the Sales Target Manager page.
- Click the gear icon in the top-right corner of the filter bar.
- The Settings dialog opens, allowing you to modify categories, field labels, and data source settings.
- Click Save to apply your changes.
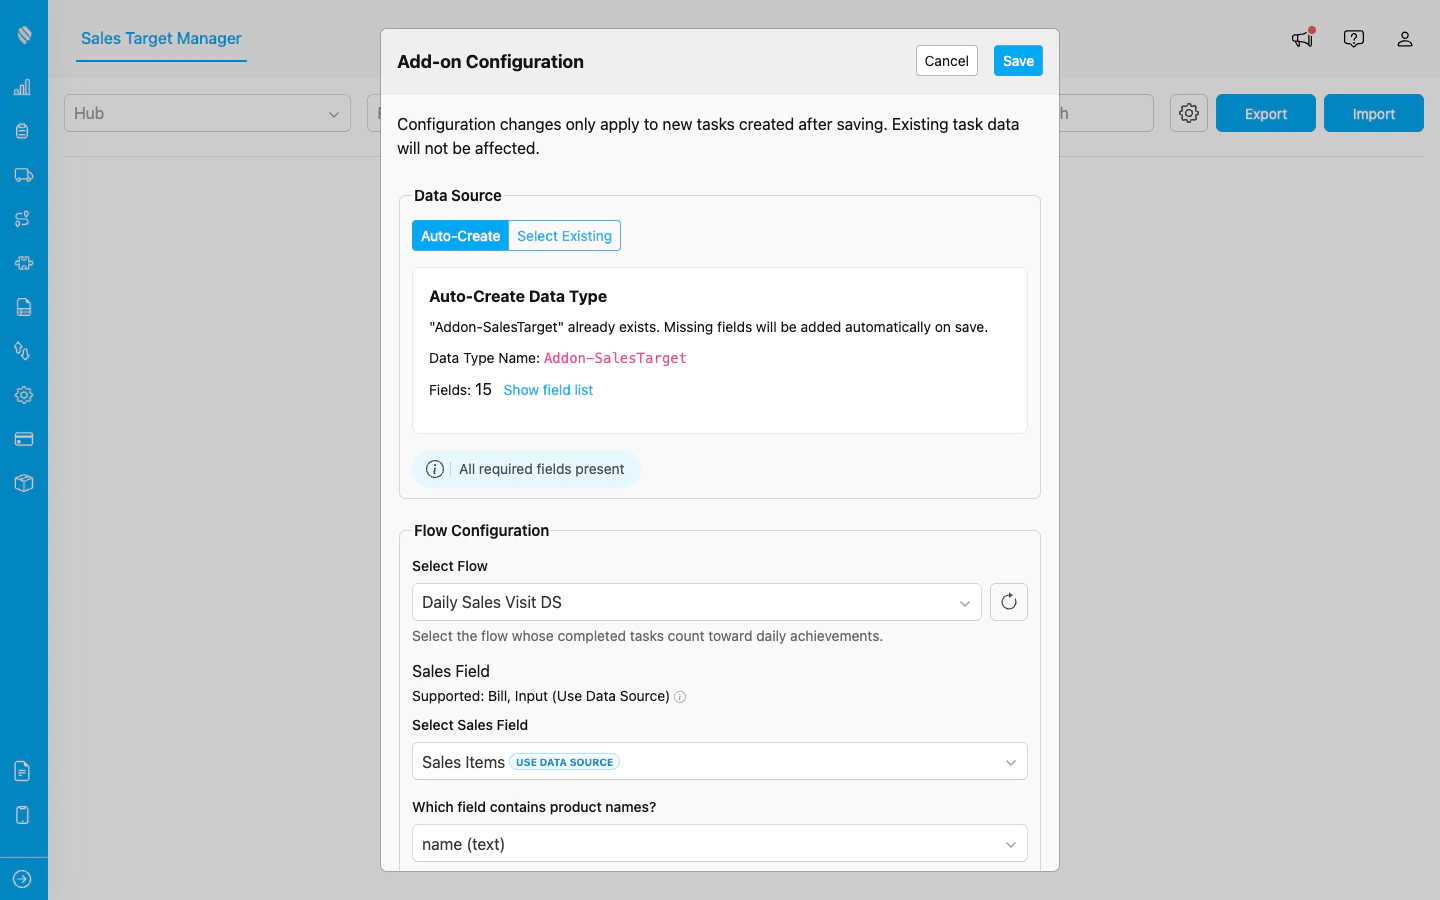
The Settings dialog lets you update your flow, categories, and field labels at any time.