Overview
The Webhook automation type sends HTTP POST requests to external URLs when automation events are triggered. This enables real-time integration with external systems, allowing you to extend MileApp’s functionality and connect with third-party applications, custom dashboards, or enterprise systems. Webhooks are the most versatile automation type, available for all automation events, making them ideal for system integrations and custom workflows.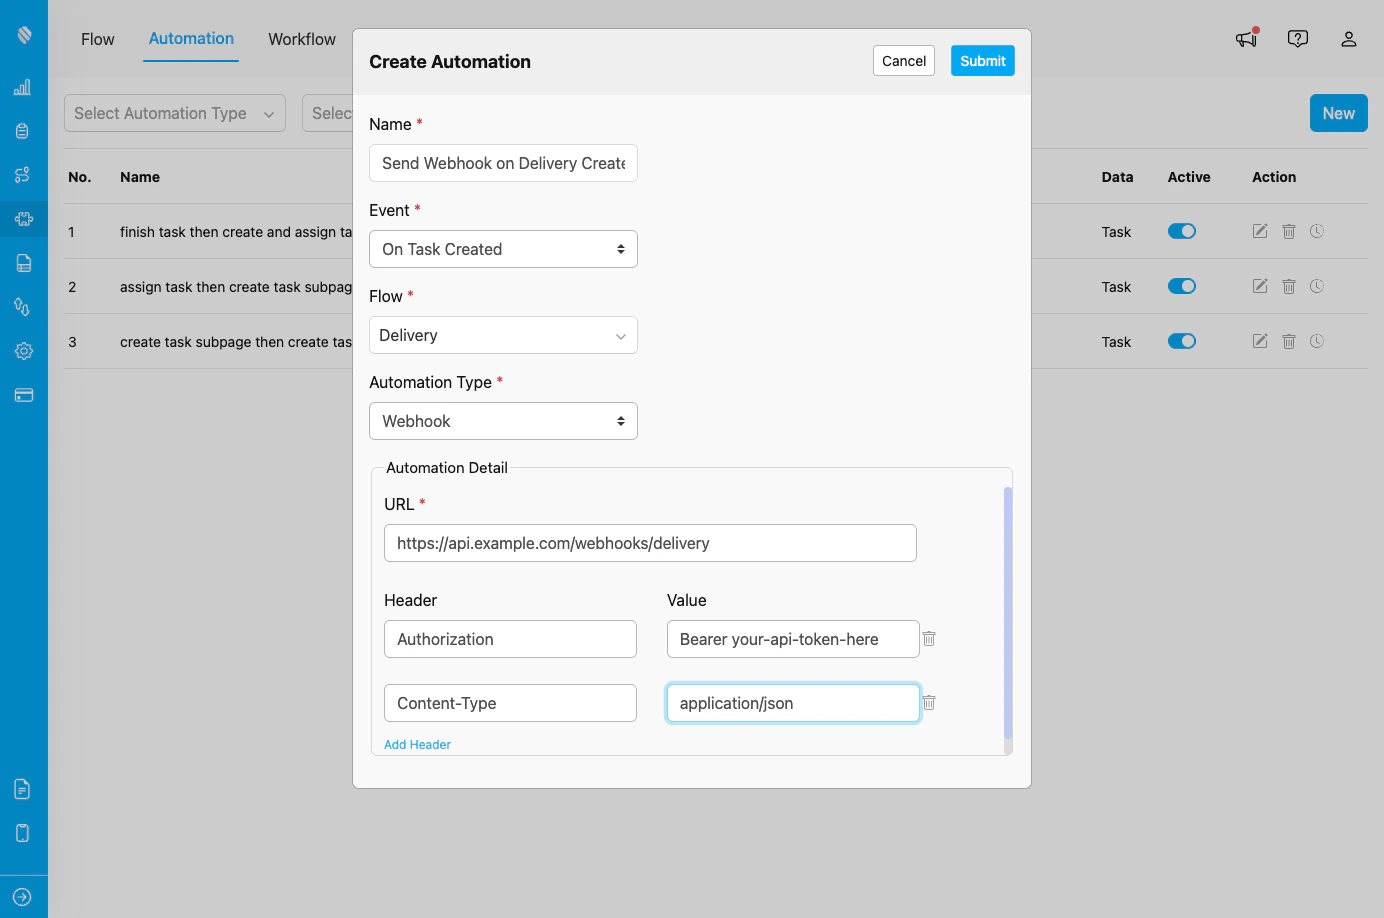
Webhook automation configuration showing URL and custom headers
When to Use Webhook
Use this automation type when you need to:- Integrate MileApp with external systems (ERP, CRM, custom applications)
- Send real-time notifications to external dashboards or monitoring systems
- Trigger custom workflows in third-party platforms
- Synchronize data with external databases or services
- Build custom automation logic that extends beyond MileApp’s built-in capabilities
Event Availability
Webhook automation type is available for ALL events:- On Task Created - Send webhook when a task is created
- On Task Assigned - Send webhook when a task is assigned
- On Task Finished - Send webhook when a task is completed
- On Data Source Created - Send webhook when new data is added to Data Source
- On Routing Finished - Send webhook when route optimization completes
- On Routing Dispatched - Send webhook when routes are dispatched
- On Start Trip - Send webhook when a trip starts
- On Finish Trip - Send webhook when a trip finishes
Configuration Fields
When you select Webhook as the automation type, you need to configure the following:1. URL *
The destination endpoint URL where the webhook POST request will be sent. Requirements:- Must be a valid HTTPS URL (recommended for security)
- Should be a publicly accessible endpoint
- Must be able to receive HTTP POST requests
2. Header and Value (Optional)
Custom HTTP headers to include in the webhook request. You can add multiple headers as needed. Common Use Cases:- Authorization: Authentication tokens or API keys
- Content-Type: Specify request content type (usually
application/json) - Custom Headers: Any custom headers required by your endpoint
| Header | Value | Purpose |
|---|---|---|
| Authorization | Bearer your-api-token-here | API authentication |
| Content-Type | application/json | Specify JSON payload |
| X-Custom-Header | custom-value | Custom application headers |
| X-API-Key | your-api-key | Alternative authentication method |
- Enter header name in the “Header” field
- Enter header value in the “Value” field
- Click “Add Header” to add additional headers
- Click the trash icon to remove headers
Webhook Payload
When the webhook is triggered, MileApp sends a POST request with a JSON payload containing event data.Payload Structure
The webhook payload contains complete information about the triggered event: For Task Events (On Task Created, On Task Assigned, On Task Finished):Use Cases
1. External System Integration
Scenario: Send task completion data to your ERP system. Configuration:- Event: On Task Finished
- Flow: Delivery
- Automation Type: Webhook
- URL:
https://erp.yourcompany.com/api/deliveries/complete - Headers:
- Authorization:
Bearer your-erp-api-token - Content-Type:
application/json
- Authorization:
2. Slack Notifications
Scenario: Send notifications to Slack channel when high-priority tasks are created. Configuration:- Event: On Task Created
- Flow: Urgent Delivery
- Automation Type: Webhook
- URL:
https://hooks.slack.com/services/YOUR/WEBHOOK/URL - Rules: priority = “High”
3. Custom Dashboard Updates
Scenario: Update real-time dashboard when routes are dispatched. Configuration:- Event: On Routing Dispatched
- Automation Type: Webhook
- URL:
https://dashboard.yourcompany.com/api/routes/update - Headers:
- X-API-Key:
your-dashboard-api-key
- X-API-Key:
4. CRM Integration
Scenario: Create customer records in CRM when new data is added. Configuration:- Event: On Data Source Created
- Flow: Customer Database
- Automation Type: Webhook
- URL:
https://api.crm.com/contacts/create - Headers:
- Authorization:
Bearer crm-api-token
- Authorization:
5. Billing System Integration
Scenario: Send billing data when tasks are completed. Configuration:- Event: On Task Finished
- Flow: Delivery
- Automation Type: Webhook
- URL:
https://billing.yourcompany.com/api/invoices - Headers:
- X-Billing-Key:
your-billing-api-key
- X-Billing-Key:
How It Works
- Event Occurs: The specified automation event is triggered
- Rules Evaluated: If Rules are configured, they are checked
- Webhook Prepared: MileApp prepares the HTTP POST request with event data as JSON payload
- Headers Added: Custom headers (if configured) are added to the request
- Request Sent: POST request is sent to the configured URL
- Response Logged: The response from the endpoint is logged for monitoring
Security Best Practices
1. Use HTTPS URLs
Always use HTTPS endpoints to ensure data is encrypted in transit. Good:2. Implement Authentication
Use authentication headers to secure your webhook endpoints:- Bearer tokens
- API keys
- Custom authentication schemes
3. Validate Webhook Requests
On your receiving endpoint, implement validation to ensure requests are from MileApp:- Verify request source
- Validate payload structure
- Check authentication headers
4. Handle Secrets Securely
- Never hardcode sensitive tokens in documentation
- Rotate API keys regularly
- Use environment-specific credentials
5. IP Whitelisting
If possible, whitelist MileApp’s IP addresses on your firewall for additional security.Best Practices
- Test Endpoint First: Verify your webhook endpoint works before activating automation.
- Use Rules for Filtering: Combine with Rules to send webhooks only for specific conditions.
- Implement Error Handling: Ensure your endpoint handles errors gracefully and returns appropriate status codes.
- Log Webhook Activity: Monitor automation logs in MileApp to track webhook success/failure.
- Set Up Monitoring: Implement monitoring on your endpoint to track webhook delivery and processing.
- Document Integration: Maintain clear documentation of webhook integrations for your team.
- Use Descriptive Names: Name automations clearly to indicate their purpose (e.g., “Send Task Data to ERP System”).
- Implement Retry Logic: On your endpoint, implement retry logic for downstream operations that might fail.
Troubleshooting
Issue: Webhook is not being sent Possible Causes:- Automation is not set to Active
- Event does not match automation configuration
- Rules exclude the triggering event
- URL is invalid or inaccessible
- Verify automation toggle is ON
- Check Event and Flow settings
- Review Rules configuration
- Test URL accessibility from external network
- Invalid payload structure expected by endpoint
- Authentication failure
- Endpoint processing error
- Review automation logs for response details
- Verify authentication headers are correct
- Check endpoint logs for error details
- Validate payload structure matches endpoint expectations
- Endpoint takes too long to respond
- Network connectivity issues
- Endpoint is down or unreachable
- Optimize endpoint response time (respond within 10 seconds)
- Implement asynchronous processing on endpoint
- Check endpoint availability and network connectivity
- Multiple automation rules for same event
- Webhook retry logic triggered by slow response
- Endpoint not implementing idempotency
- Review all active automations for the same event
- Improve endpoint response time
- Implement idempotency checks on endpoint using event ID
Related Documentation
- Automation Events - On Task Created
- Automation Events - On Task Finished
- Automation Events - On Routing Finished
- Automation Introduction
- Automation Rules