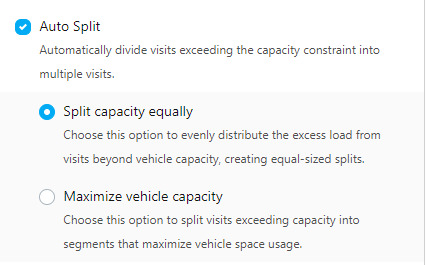
Activate the Auto Split
To activate Auto Split, follow these steps:- Go to the Routing/Configuration menu.
- Check the “Auto Split” checkbox.
- Select one of two split types available:
- Split capacity equally
- Maximize vehicle capacity
Understanding the Split Types
1. Split Capacity Equally This type divides the visit’s total capacity evenly across multiple vehicles. Each resulting segment will have approximately the same capacity value. When to use:- When you want balanced load distribution across vehicles
- When multiple vehicles with similar capacity are available
- When you want to minimize the number of vehicles used
- When you have vehicles with varying capacity limits
- First segment: 3000 kg (maximized)
- Second segment: 500 kg (remaining)
Only the first defined capacity will be considered in the routing optimization process.
Auto Split Configuration
Route Optimization
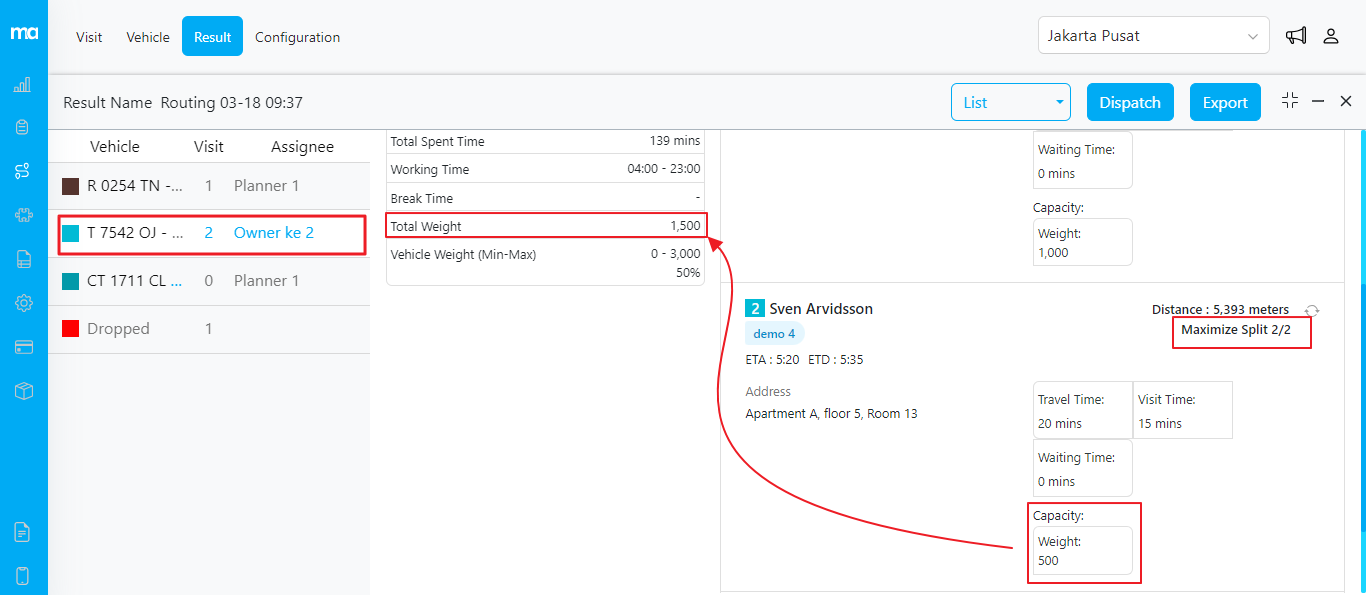
Example using “Split capacity equally” type:
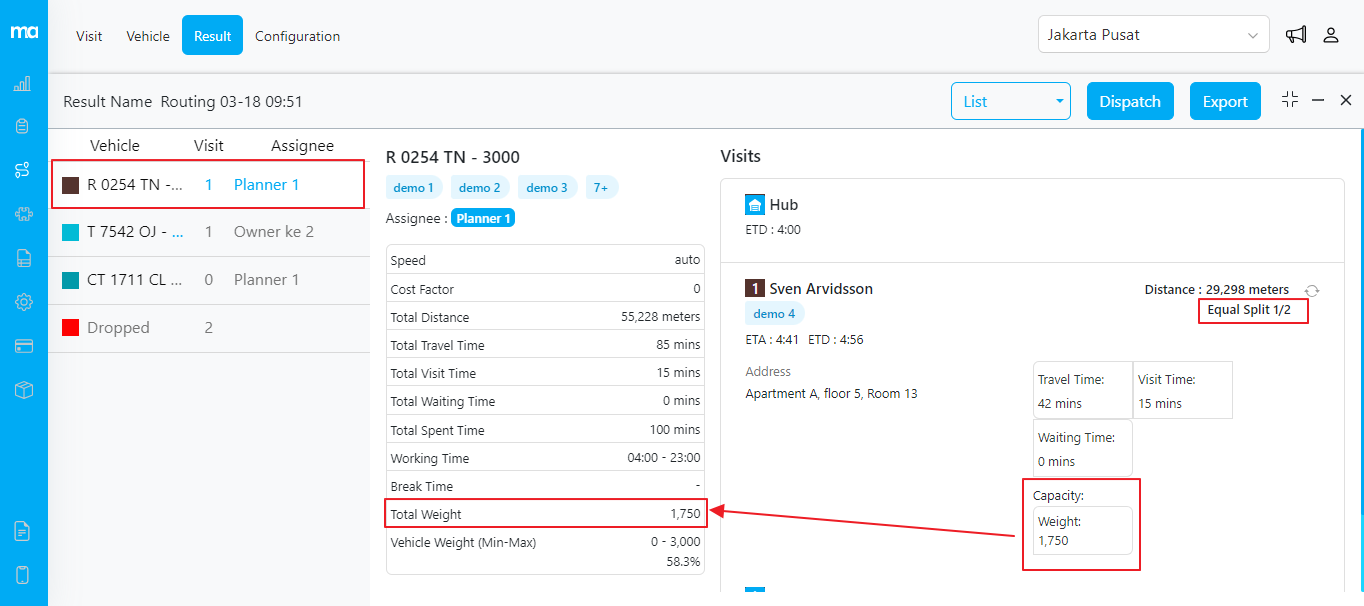
The first segment of the visit “Sven Arvidsson” in vehicle 1
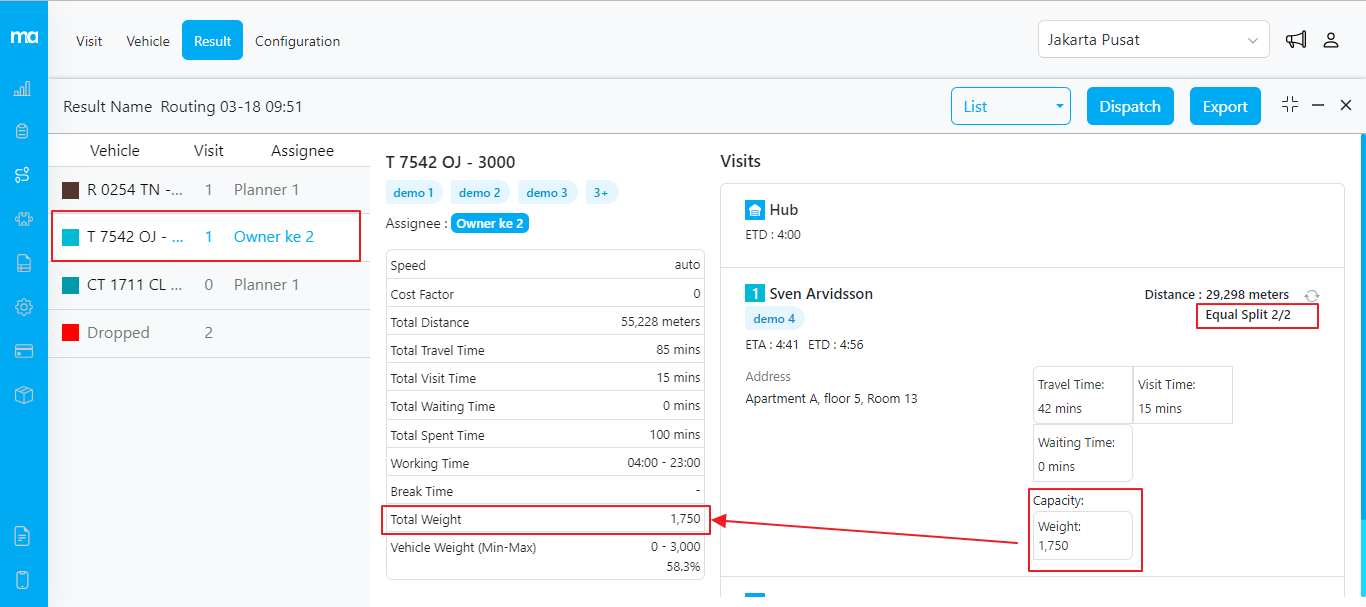
The second segment of the visit “Sven Arvidsson” in vehicle 2
Example using “Maximize vehicle capacity” type:
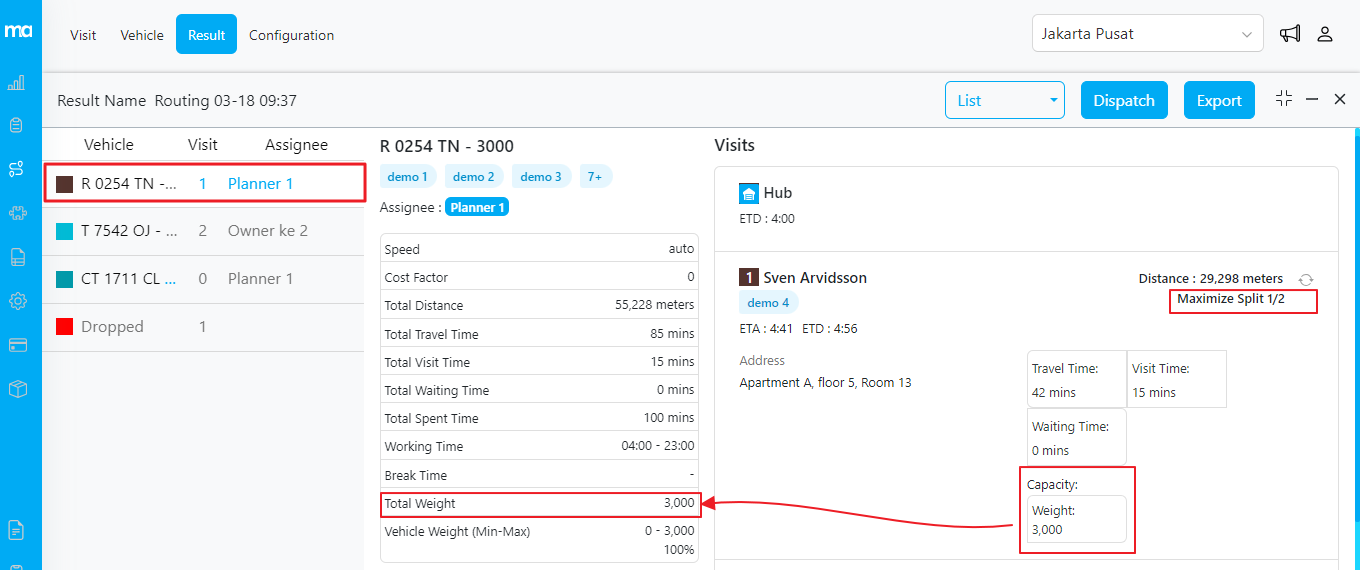
The first segment of the visit “Sven Arvidsson” in vehicle 1
The second segment of the visit “Sven Arvidsson” in vehicle 2
Exporting Data
When exporting data, the “Other” sheet will include information about the Auto Split type.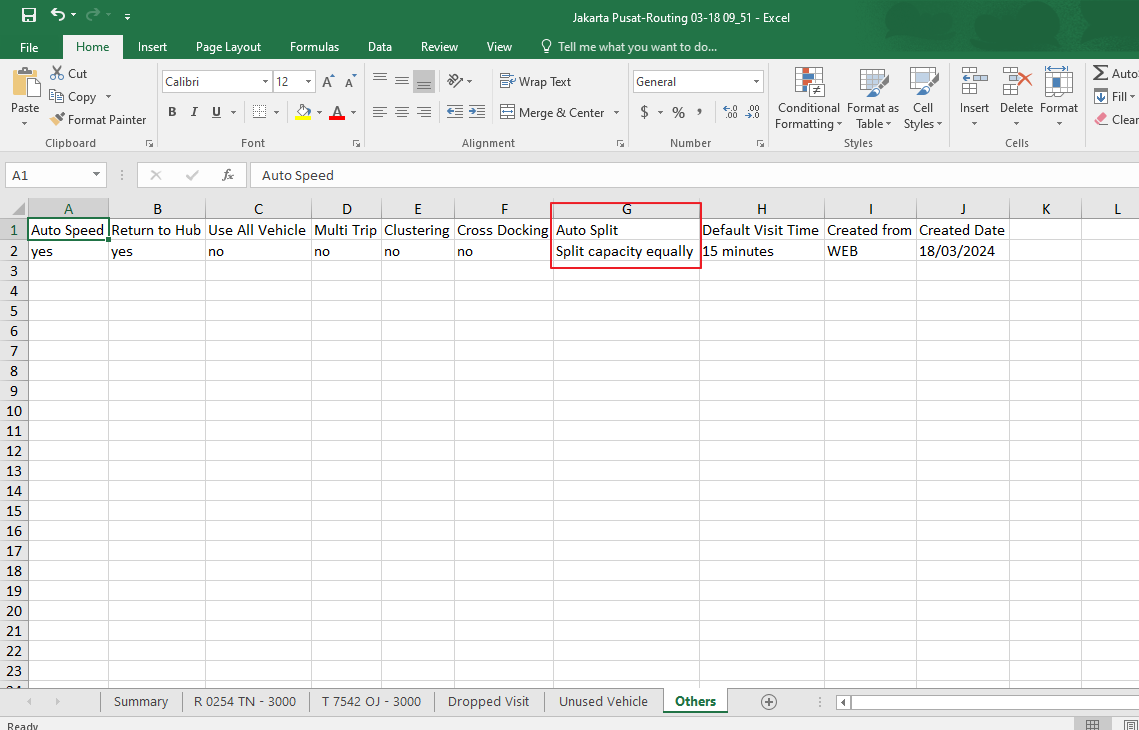
Dispatching Visits
Upon clicking “Dispatch,” the system initiates background processing to assign tasks based on routing results. If a visit is split into multiple segments, a new task is generated for each segment, maintaining data integrity and ensuring accurate capacity allocation. The original task’s capacity is updated accordingly to reflect the split.Important Notes:
- It is recommended to configure the capacity constraint field with the component in the task from the Flow menu. Failure to do so may result in an empty capacity constraint in the Routing/Visit menu, which can be manually inputted later.
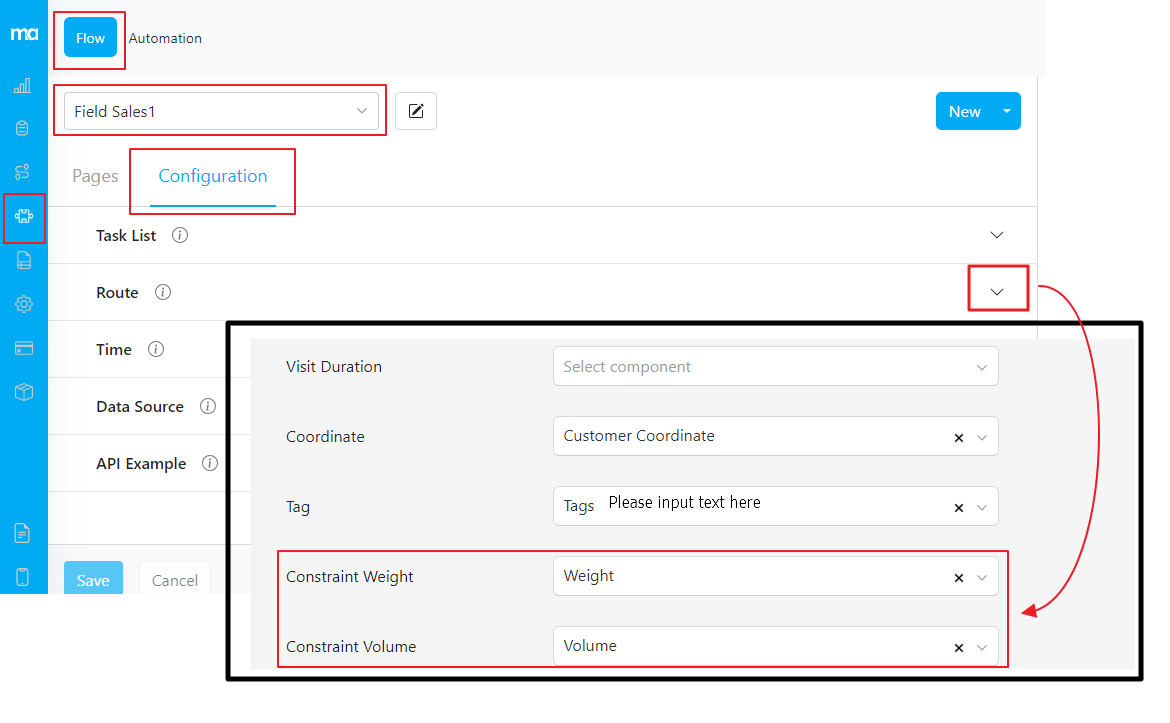
Route Configuration in Flow/Configuration menu
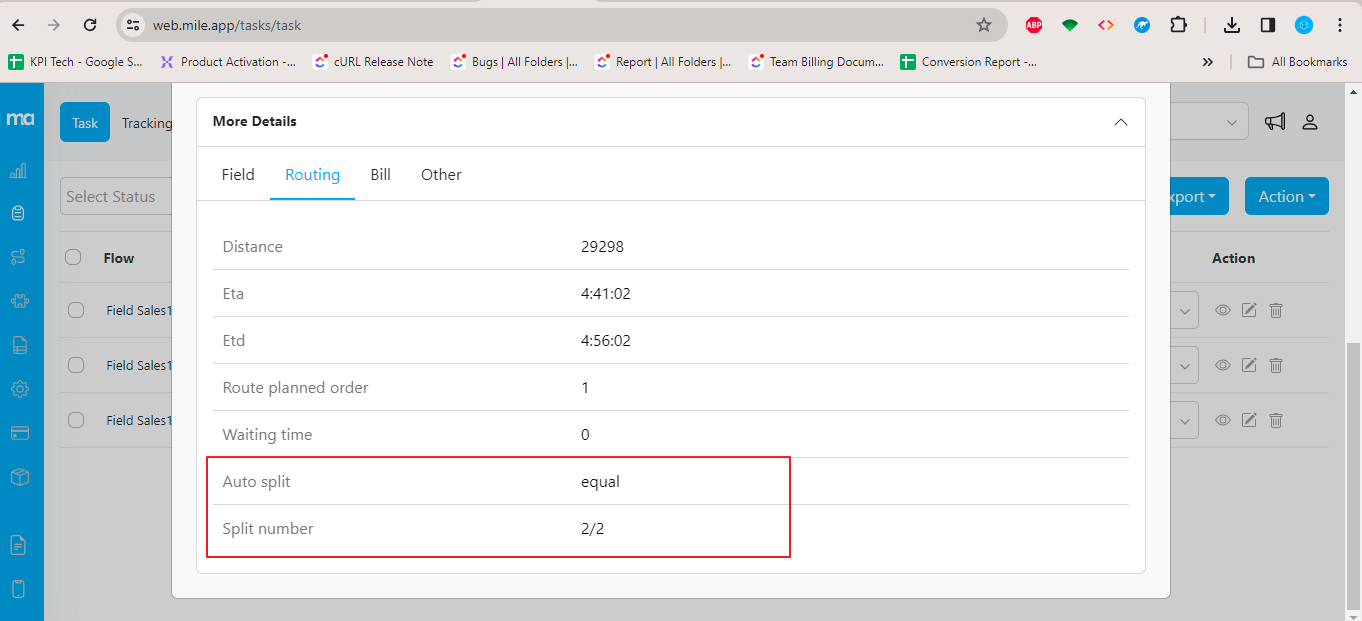
- Upon dispatching, the detailed task will display information regarding the split type and split number. However, if the split visit is on the dropped list, it will retain the original task and remain “Unassigned.”
- If you exceed your task quota, failed dispatches may occur, as a new task is generated based on the split number during dispatching.
- When Auto Split is used in conjunction with the Auto Merge feature, identical coordinate visits will not be split across different vehicles.